Tips for Summertime Sidewalk Chalk Art & Street Painting
Chalk Art that sings
We are in the heart of summertime and I remember the days when the kids would wake up feeling deflated as if everything had already been done. All of the activities in their mind had been exhausted, swimming…check, playing outside…check, went to the zoo…check. Well here’s a little summertime outdoor activity that will get them off the couch, and with the tips I give you, they’ll want to do this over and over again (you will too)!
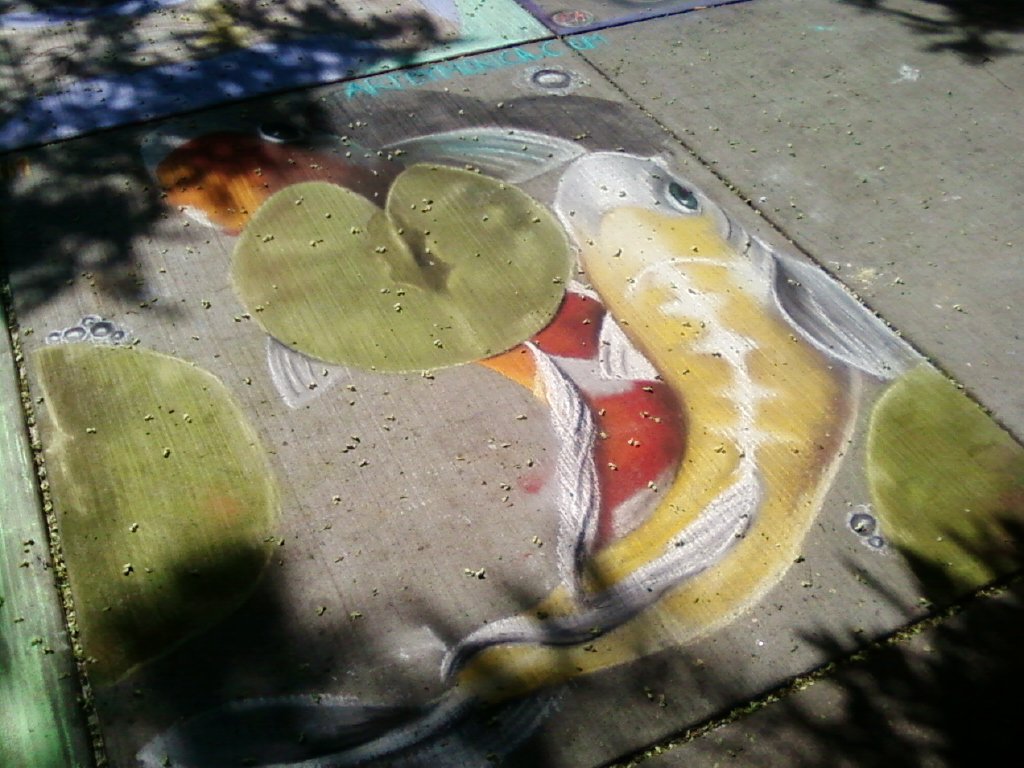
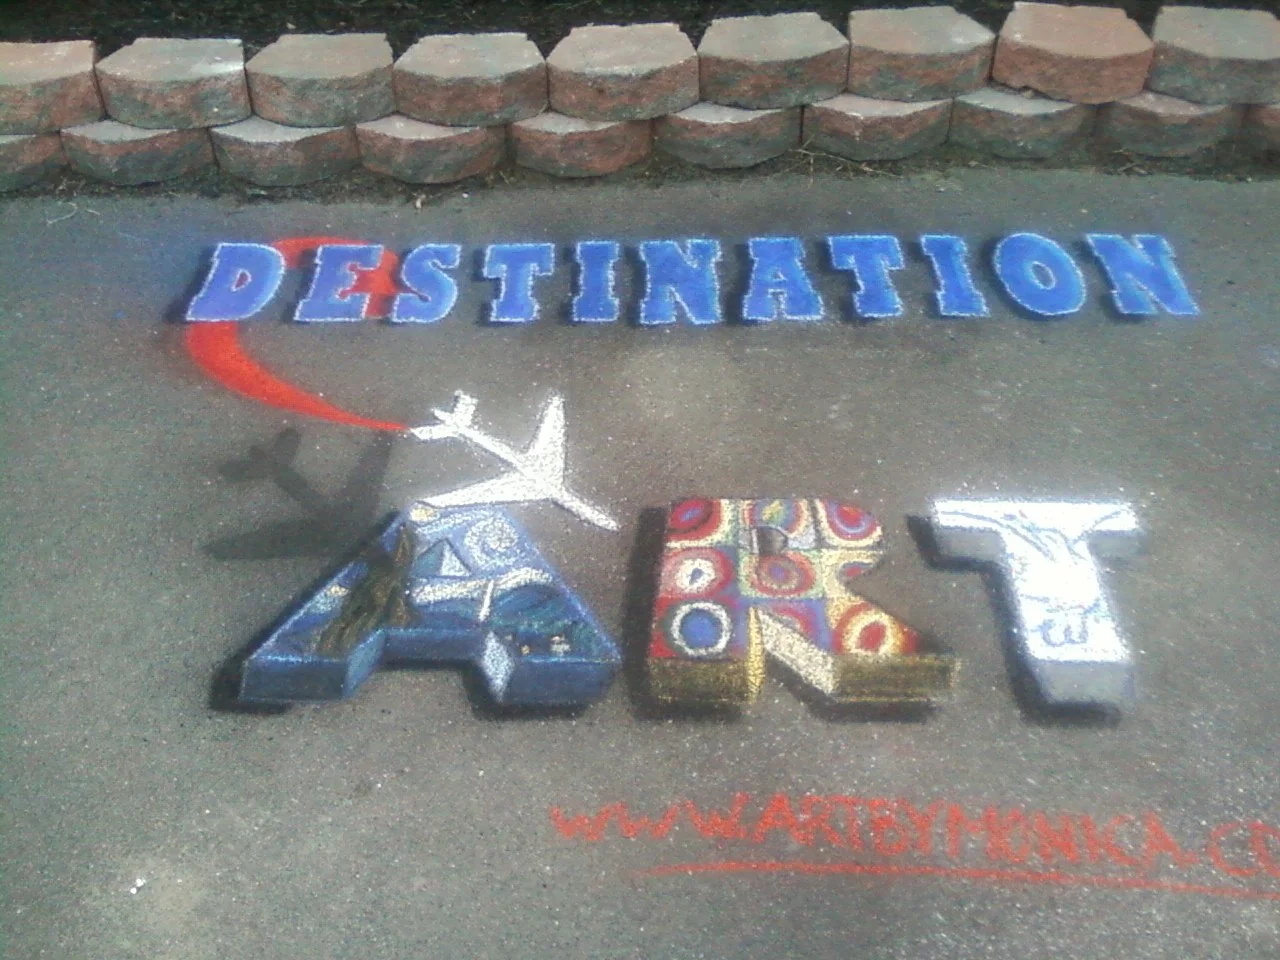
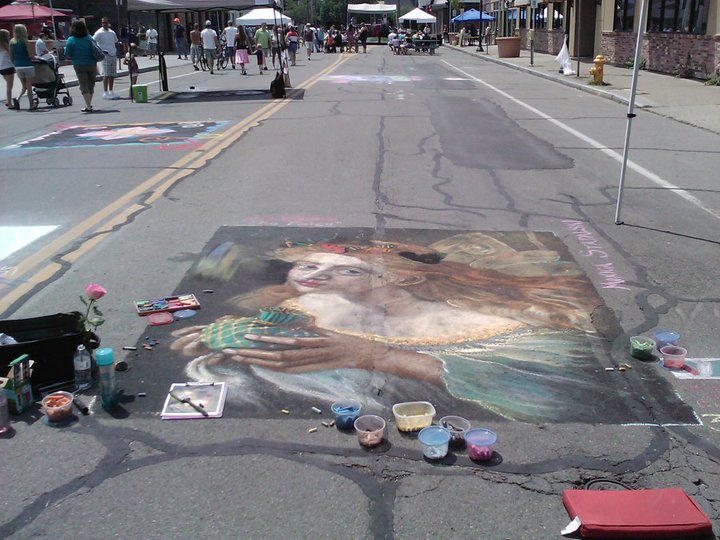
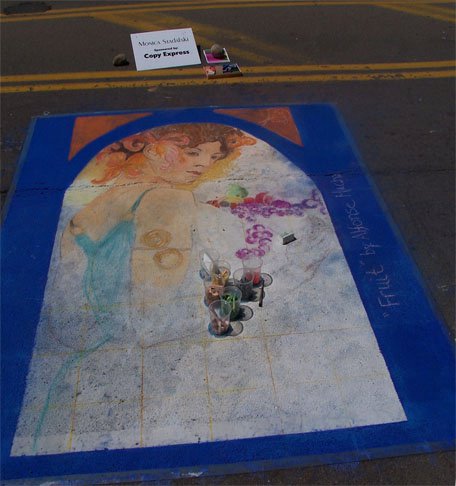
Koi Fish street painting I created for New Times Street Painting festival, Syracuse, NY
I was inspired to write this post because my niece had texted me and said that my nephew was curious to see some of the chalk art that I had done in past years at various festivals. (As a side note, most artists refer to chalk art as street painting, but the terms can be used interchangeably.) So I sent him a few pictures so he could see what it was all about.
As a kid who loved coloring books (I still do), I wanted the brightest markers, crayons or paint that had the most vivid, saturated color! I think we all did and as a grown-up artist, I still feel the same way. Which, when I look at what is sold and marketed as “sidewalk chalk” leaves me scratching my head. The chalk that is sold for kids is washed out, pale and the colors are so limited, no wonder kids use it once and are done. I’ve spent countless hours crawling around on asphalt in 90 degree weather, and I want something beautiful to look at when it’s finished, something colorful, bright and saturated, a big payout at the end… who wouldn’t? The whole process becomes so much more fun when the colors sing and the process is made fool proof which is what I’ll be showing you.
What type of supplies?
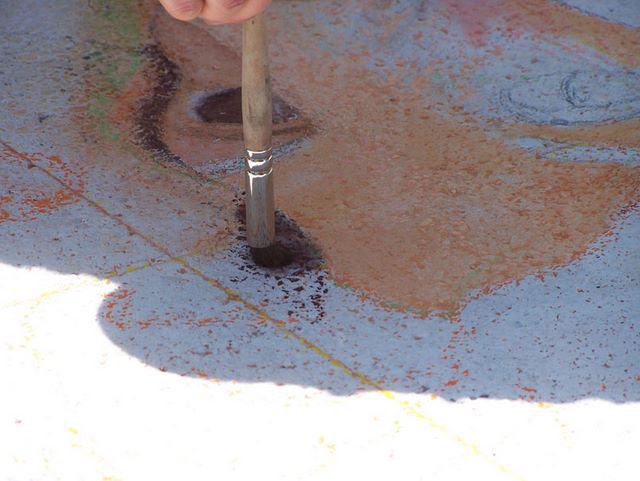
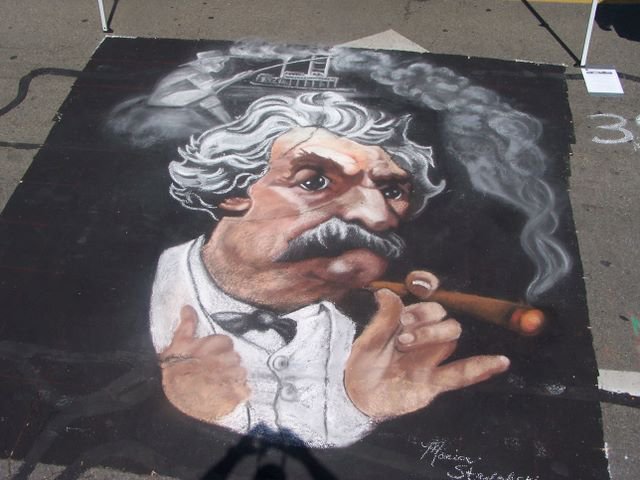
Hard at work, thankfully in the shade
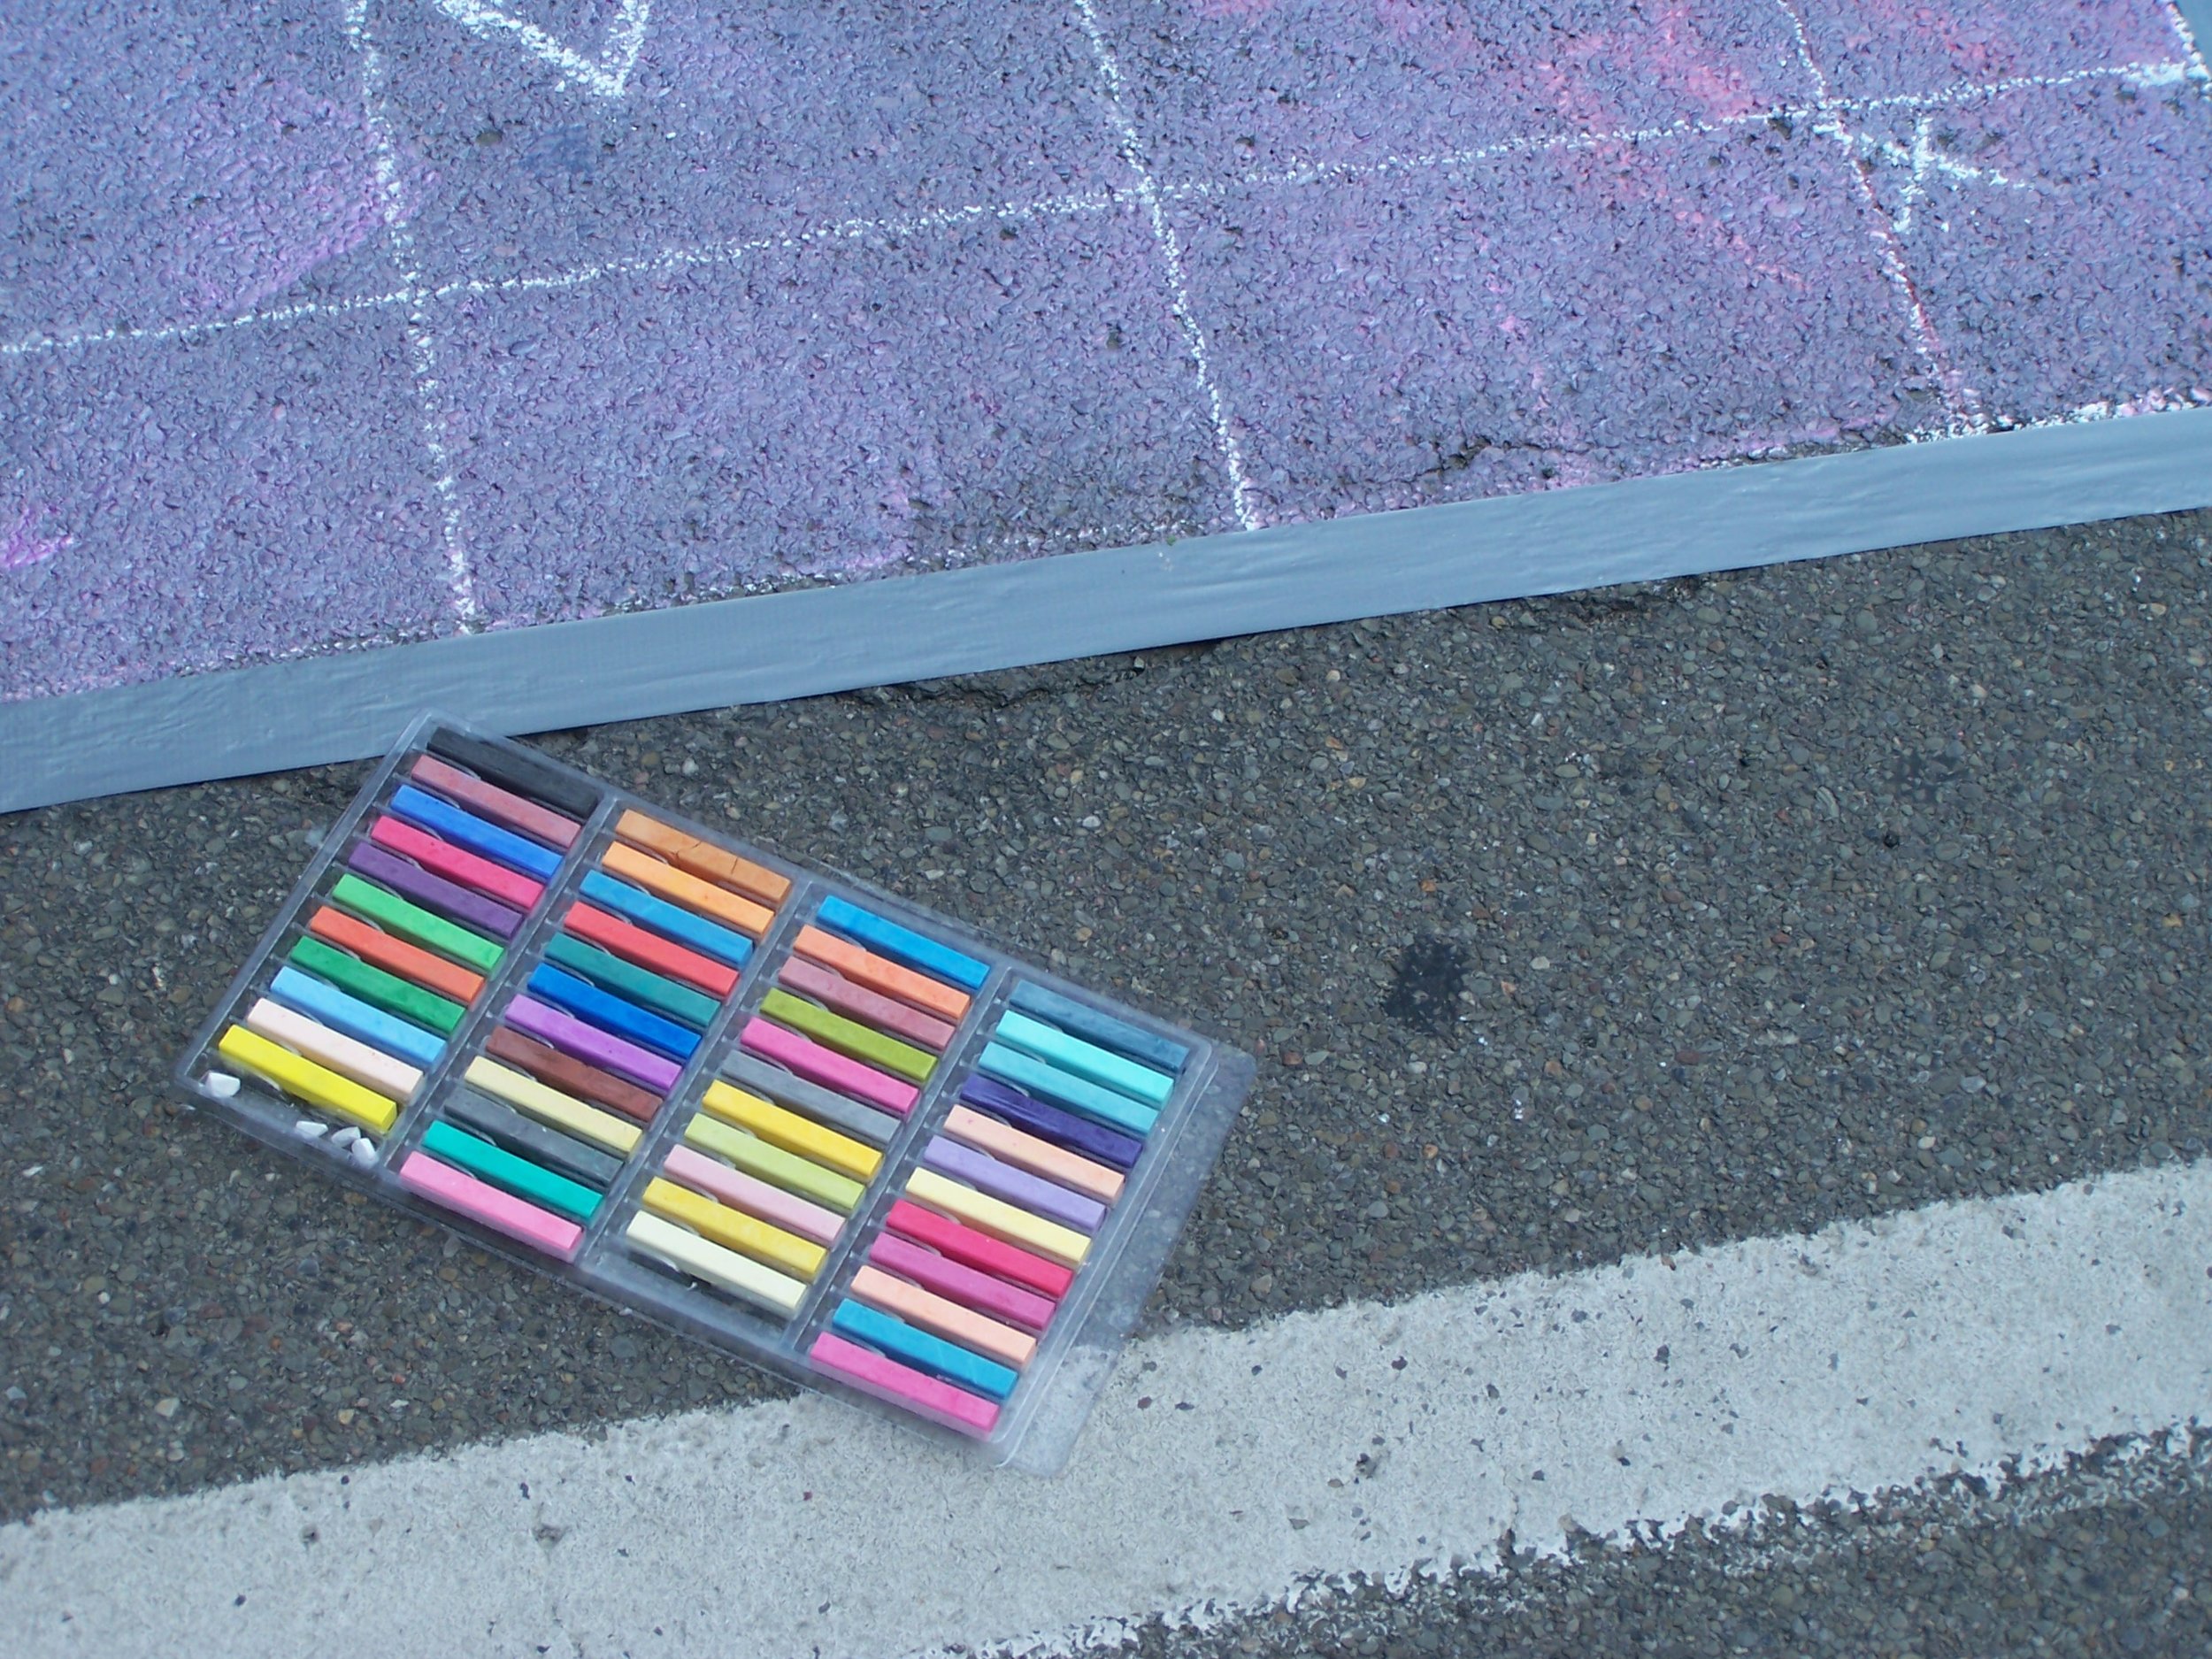
Ok, so if you’re not going to buy chalk then what else is there? When you get to the craft store, skip the kids section and head over to the art aisle and look for student grade soft pastels. I did a little comparison shopping and you can buy sidewalk walk chalk for around $5 for a set of 48 and you can get a set of 36 Artist Loft soft pastels for $6, not much difference. The pastels are smaller in size and probably won’t last as long, but it’s so much more satisfying to look at and a lot easier to blend. Please make sure you’re buying SOFT pastels, NOT oil, those will not wash off the pavement.
If you or your kids are really into this and want to create beautiful blends, save your fingers and find some foam! I usually used some of the packing foam around the pastels, but try out different types, they work amazing! They take a beating when they’re scrubbed on the pavement or sidewalk, but they last through it and you won’t end up with skinless fingers.
If you’re interested in creating multiple layers of color on top of each other it’s always a good idea to make sure the layer underneath is “fixed”. We do that by spraying on a fixative, which will allow you to build color on top of subsequent layers. Now, I know you’re probably thinking, what do my kids want with that?? Well, maybe you want to “fix” their artwork on the sidewalk to show grandma when she comes over, it’ll help it last a little longer. Don’t worry, you don’t need to buy anything special a can of super cheap hairspray works brilliantly….think Aqua Net, Rave or White Rain.
While you’re at the store picking up your supplies, grab some baby wipes while you’re there, and have them outside for quick hand clean-ups.
Now if you find you love this or your kids are super into it, you can always create a colored background before they start applying pastels, with tempera paint. Tempera or poster paint is a water soluble paint that is opaque and creates a nice colored block to paint on. Never use acrylic or an enamel paint, unless you want permanent art.
What’s the Process?
The fun begins..
So you’ve purchased all of the supplies and you’re ready to hit the pavement, now what? Well, you could just let everyone have fun and go freestyle, but if the kids are ready to take it up a notch, this is the process I’ve used and it’s fool proof.
Find a photo reference or a picture of whatever it is you want to create on the sidewalk. It can be clipart, a photo, something you’ve drawn yourself.
Before printing it, add a grid to the top of the photo. You can do this by using a program like this, or there are apps you can use too. (If you use an app you can just look at your phone, but I find a bigger image printed out lets you see all of the details, and works better for kids too.) If you don’t want to fuss with any of this, you can grid right on top with a pen or pencil, or use a piece of acetate to create a grid and lay it over your reference. This is a great easy way to do it and you can use the acetate over and over.
Decide how large you want to make your art on the pavement, 2 x 2 feet? Or maybe 4 x 4’? The images you see throughout this post are all painted in a 10 x 10’ block except for the fish, which was a 4 x 4’. From this you’ll determine how big you want to make the grid blocks over your photo. If it’s a small area like a 2 x 2’, then you may want to use 1/2” grid block=6” on the pavement. When I painted in 10 x 10 squares, I used 1” grid block = 1 foot on the pavement. The idea behind gridding out your artwork is that you get the proportions correct on the ground, if you’re working big it’s more important, smaller work not so much.
Once you have your artwork with the grid overlay, print it out and get ready to make your grid on the pavement. For small artwork a yardstick will work great. If you’re gridding out larger areas a chalk line tool is what you’ll need, they run about $6 at Walmart. It’s basically string that sits in an enclosed container of colored chalk, when you pull the string out you line it up on your measurements on the pavement, hold it super taut (this takes two people), and right on the ground, then give it a good SNAP and it will pop the color down on the pavement, creating your grid line.
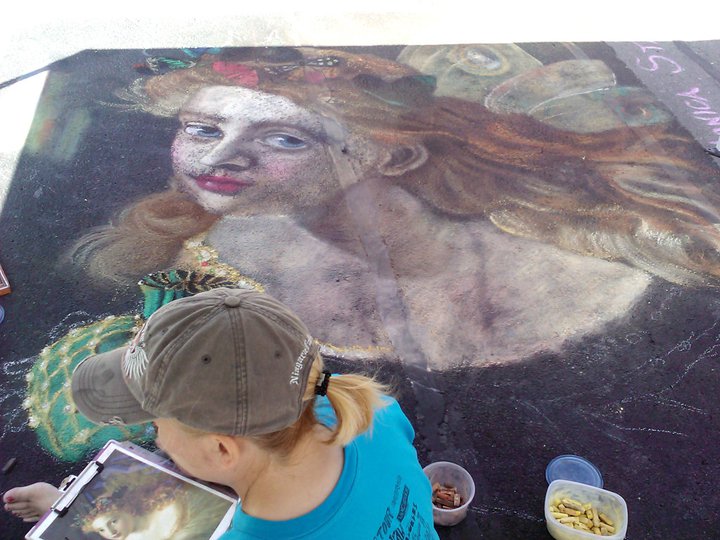
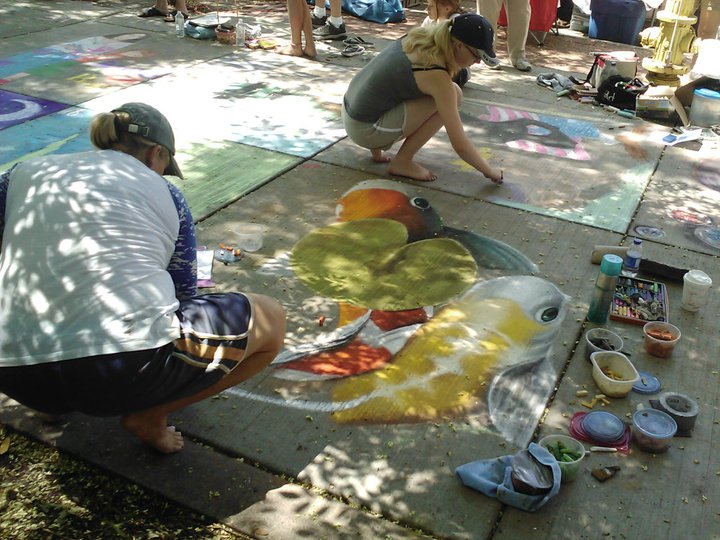
Once the grid is down, just follow along on your reference photo and draw what you see in the square, on the corresponding square on the pavement. In the photo below, I’ve already drawn the image with an outline and now I’m going back with color and shading.

Here I am, laying out the initial sketch. Thompson Park, Watertown NY.
Once you do this a couple of times, it’s a breeze and the kids will be amazed at what they’ve created! This is also a great way to practice drawing in a sketchbook, grid out your reference photo and lightly sketch a grid on your paper and follow the same process. It inspires a lot of confidence once a child sees what they’re capable of creating. Below are a list of supplies and quick tips to get you on your way. Happy Painting!
cool 3-D stuff you see on the internet
Just a little side note, and I’ll save most of this for a future post, but the cool 3-d street paintings you see on the internet are called anamorphic paintings/art. They are created in such a way that when viewed through a camera lens at a specific vantage point, they appear to be 3-d. Yes, the paintings only make sense through a camera lens, if you saw them in person, they would make no sense at all. I found some really great photos of the process that’s used here and she has some really great pictures of how distorted the image on the street really is, versus through a camera lens.

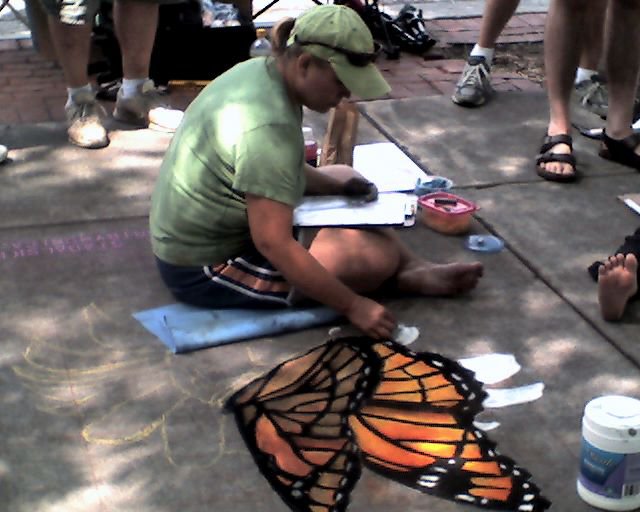
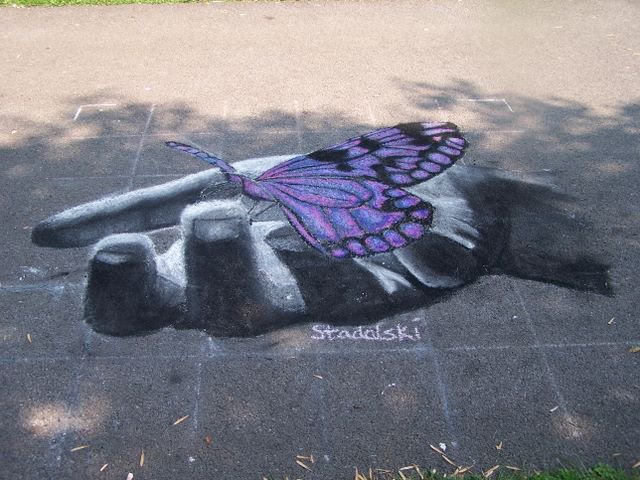
3-D Butterfly and Daisy Street Art I created for the New Times Street Painting Festival, Syracuse, NY.
If you really want to make something look as though it’s 3-d, add a drop shadow to it. Think about the items normally found on a street like leaves, garbage, bugs, etc. and add a shadow. Here is a street painting that I did that was a very simple subject, but by adding a drop shadow, it came alive! (You can use a photo editing tool to add a drop shadow, before adding your grid lines.)
A Quick Breakdown
Supplies:
Yardstick/ruler or Chalk line tool
*Tempera or poster paint (make sure it’s water based)
Student grade soft pastels
*Hairspray
Photo reference
*Acetate if making a grid by hand
Foam for blending (or paint brushes, some sponges work too)
Baby Wipes
Process:
Round up your supplies
Pick your photo reference
Grid it out
Grid the pavement
Draw what you see on in one square on your paper on the corresponding block on the pavement
Seal with hairspray
A more detailed look at the process can be found here.
I hope you enjoyed this and that you and your littles have a great time creating together!
Below you’ll find some photos of me creating street paintings, enjoy!