
Inside: Everything you need to know about Brazilian embroidery!
Embroidery is a common creative outlet of many cultures around the world. Though it may be called different names, generally there is believed to easily be hundreds and hundreds of varying types and styles.
For someone just starting their own embroidery journey, this can seem a bit overwhelming.
This is totally understandable. But i’m here to help.
You should never bite off more than you can chew, so i’m going to discuss one type of embroidery today in an easy way… Let’s dive into Brazilian Embroidery!
What is Brazilian Embroidery?
Brazilian embroidery is a style of embroidery that is very textured and basically 3 Dimensional. This beautiful style of thread art get’s it’s name because it uses high-sheen rayon thread in place of the traditional cotton or wool. This rayon thread was first created and popularized in brazil, hence the name! You will find that this kind of embroidery commonly is used to depict flowers, this is achieved through a combined cast-on and knotted stitches.
No clue what I’m talking about? Don’t worry about it! I’m going to cover it all in this article. I’ll show you how to achieve the Brazilian embroidery style as well as include some simple patterns to get you started strong!
Let’s get into it!
Brazilian Embroidery Supplies
For this project you’ll need quite a few things handy. So heres a list!
- Rayon Thread
- Firmly woven fabric such as trigger cloth
- Bullion Needle Set- 5″ to 7″
- Embroidery Hoop
- Transfer Marker
- Scissors
How to Do Brazilian Embroidery
First, choose a design. If you need some inspiration, I’ve compiled a list of examples down below to get those creative juices flowing! So take a peak.
Once you’ve decided on a design, go ahead and sketch it out onto your fabric using the transfer pen. These pens are great because they easily come off with a damp cloth when you no longer need your template!
Next you’re going to want to secure your fabric to your embroidery hoop. Make it tight, the tighter it is the easier this will go!
Once all of this is completed, sit down with your supplies in hand and your scissors near by and we can get this started!
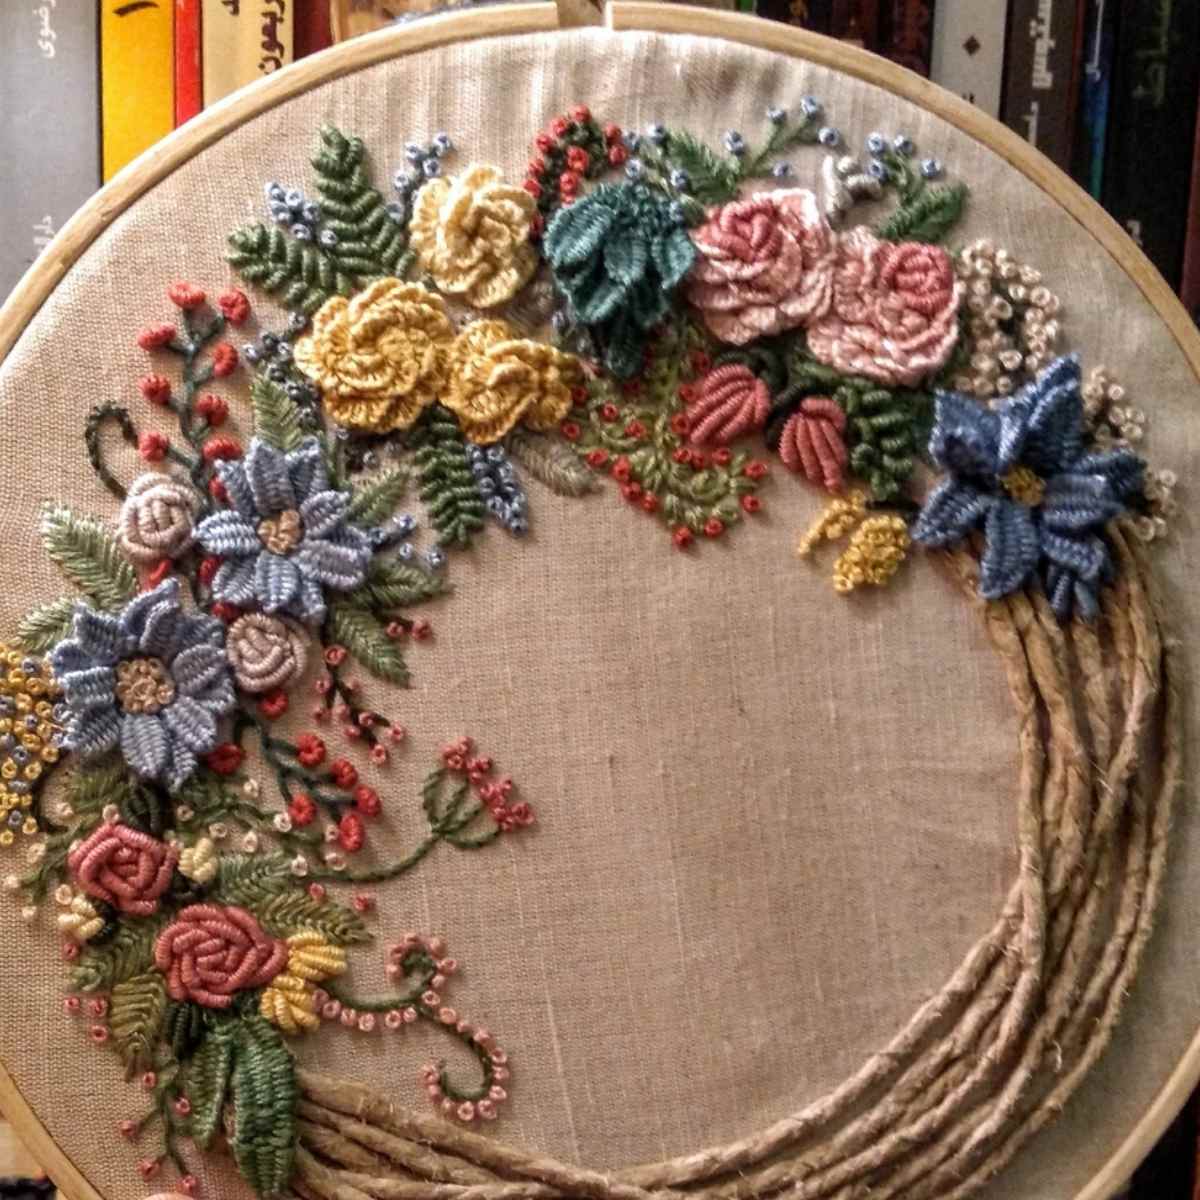
To help you choose a pattern, I’ve compiled a list of some of the coolest Brazilian embroidery images and patterns to help you get a good feel of this style and perhaps give you some inspiration for your own design!
Take a look below.
Brazilian Embroidery Images
4.Irises
6. Strawberries
Brazilian Embroidery Patterns
13. Floral Heart
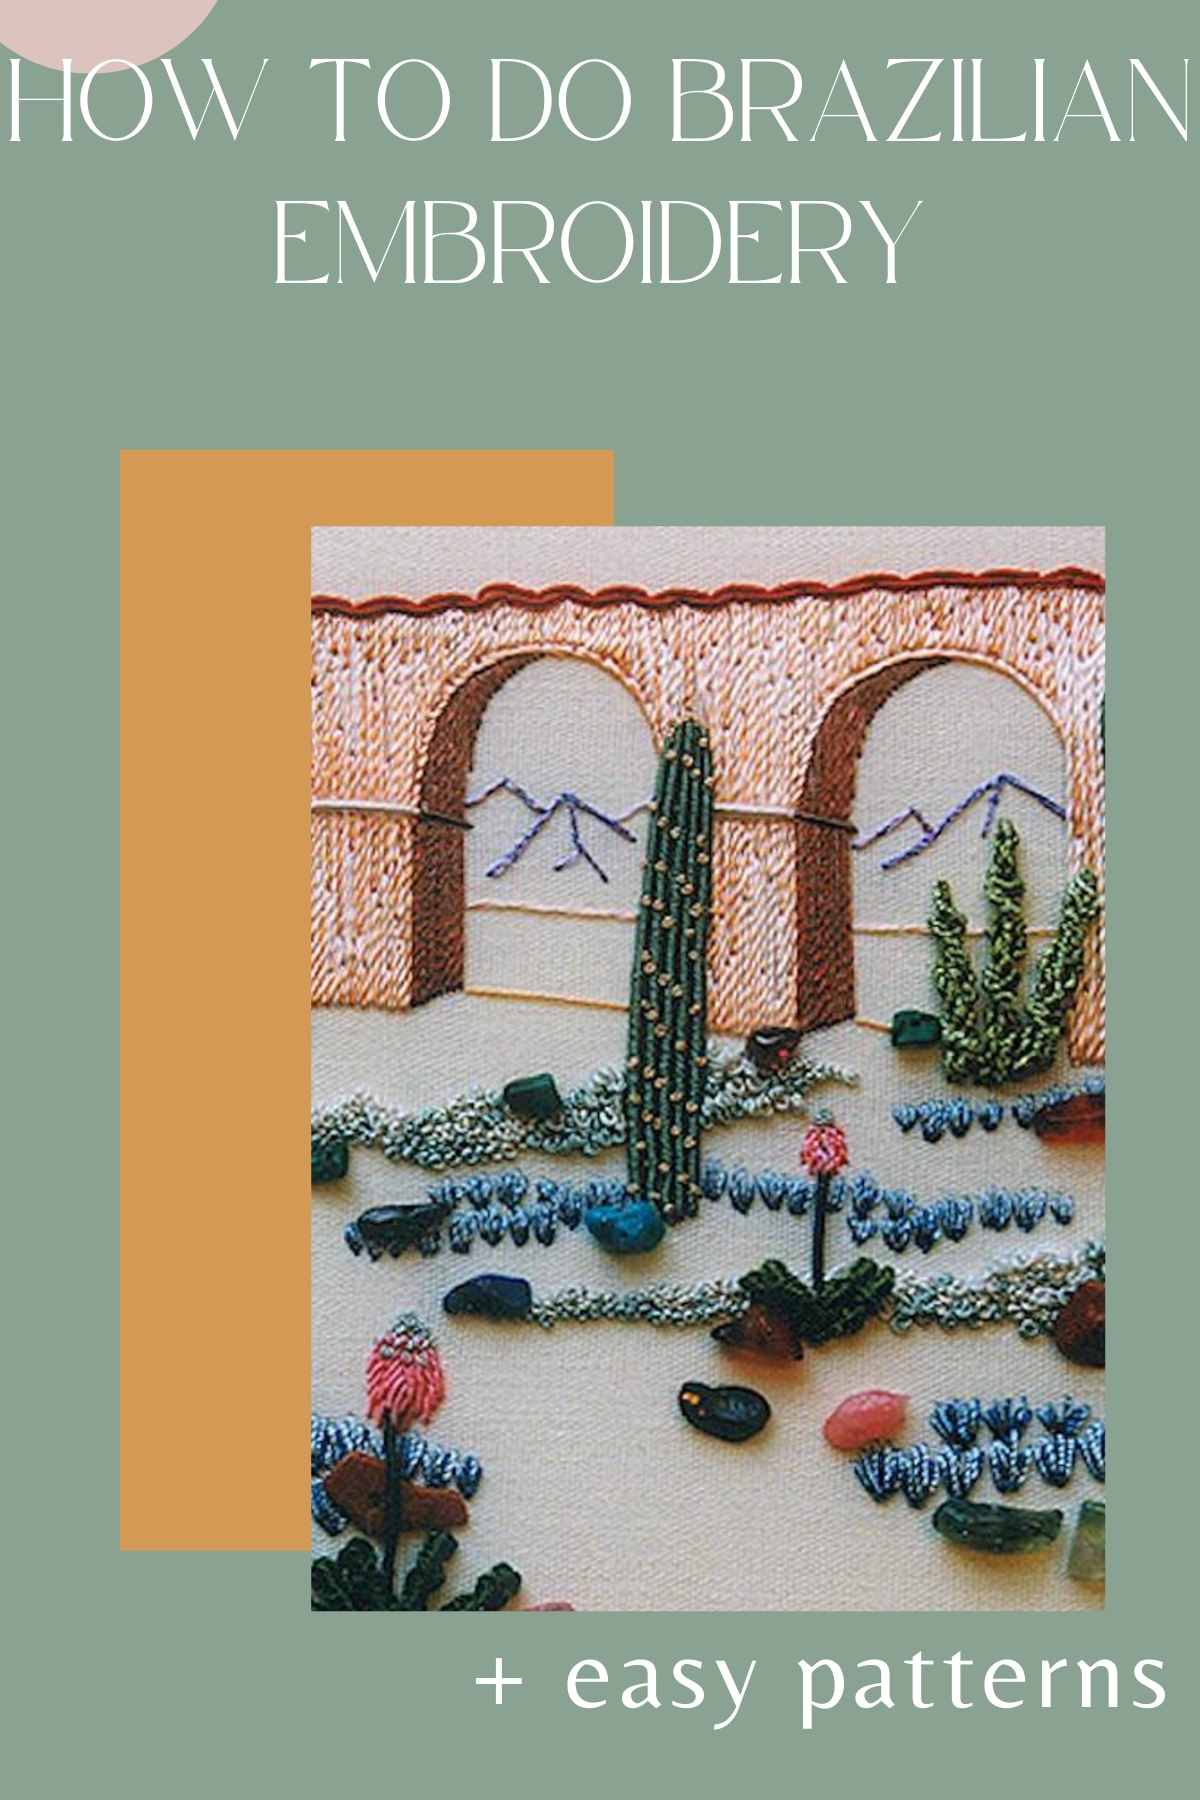
16. Succulent Garden
Now, once you have a design we can get started on the stitches! Hoorah!
Brazilian Embroidery Stitches
There are many stitches used in Brazilian Embroidery, most of which are dimensional, which as mentioned before is stitch style that come out off of the fabric a bit, like its 3D!
There are too many different stitches to be able to cover it in the one article, so today we’ll be focussing on 2 very important ones you can use while you start out.
Before starting outright on your project, go ahead and practice these different knots so you can choose where they’ll best fit in your design.
The first stitch we’re going to learn is the Bullion Knot! I’ve sorted it into steps below.
Bullion Knot
1. Take 3 strands of the Rayon thread and tie them to your needle. Bring the need through the fabric from the backside to the front(otherwise known as the face).
2. You then take your needle about one centimeter away from where the thread is protruding on the surface and insert it. The tip of the needle should come back out right next to the original piece of thread. Do not pull the needle all the way through, it should be flat on the surface of the fabric with the middle of the needle on the backside, but the tip and end both on the front lying flat.
3. Next take the thread and wind it around the tip of the needle several times, estimate how any coils it will take to fill the area between the tip and the end that is under the fabric. Since you are using Rayon thread you must wrap the thread around it clockwise to avoid the thread unraveling.
4. Gently pull the needle through the coils.
5. Use your finger to guild the coils over the 1 cm space left between the holes.
6. Then bring the needle through the end of the coils to secure them.
That’s it! You’ve successfully made your first Bullion Knot!
Cast On Stitch
Next is the Cast On Stitch! It’s similar to the knot above so it should be a breeze. Once you get used to it you’ll be able to make these stitches with no second thought!
1. Tie your thread onto a needle. Then come up through the back of your fabric.
2. Slide your needle through the face of the fabric, (Much like in step 2 of the bullion knot how-to).
3. Make a single loop with your thread.
4. Insert the needle through that loop. Pull this stitch to the back of the needle and repeat. Make as many loop coils as needed to bridge the 1 cm gap between holes.
5. Next gently pull needle out of loops and guide the section to where you need it to be with your finger.
6. Then bring the needle through the end of the coils to secure them.
There you go! Thats how you make a cast on stitch!
Okay, now that you’ve got a handle on the basics, you can get started on your own Brazilian embroidery project! Happy embroidering!
More Embroidery Ideas You’ll Love!
-
How To Start Embroidery With The Easiest Stitches To Learn – Embroidery is not as difficult as you may think. While it can be a little tricky at first, do not be intimidated! Once you get the hang of it, you’ll be producing adorable projects in no time. It is also an inexpensive activity. Simply run to your local craft store or hop on Amazon for the basic products and then research a beginner pattern to embark on your embroidery journey.
-
27 Sunflower Embroidery Patterns – These beautiful sunflower designs can act as a great addition to any room in your home! Their yellow hue will add light and warmth no matter where you place the final product. Not to mention that they symbolize happiness. Not to mention that they would make a lovely gift for anyone in your life.
- 3D Puff Embroidery Ideas – If you’re looking for a way to step your embroidery game up, consider buying an embroidery machine. There are so many different projects that you can do with one, including 3D puff embroidery! 3D puff embroidery is a style of stitching that you’ve likely already seen on athletic wear like baseball hats. Don’t stop at sportswear! You can use this technique on ski hats, backpacks, and even t-shirts. Pro-tip: before you invest in a new machine, if you have a sewing machine, check to see if it has embroidery capabilities.