Hello you guys and welcome back to my blog. I wish you all a happy New Year. I hope, you started with a lot of new energy into 2023. In today’s post I want to show you how I sewed my 1900s s-bend corset. It was a challenging one and I am not 100% happy with the outcome, I did a bit of a sloppy sewing job for some parts. And the eyelits… Well, it is underneath my clothes and just needs to be functional. At least that’s what I’m telling myself.
I sewed this corset at my current work place. I am working in a program, where I can slowly increase my workload in a safe environment. And they have a sewing area so I decided to work there. We don’t have many assignments so they said I could bring my own projects with me. I emptied my whole UFO box 😀 And this corset was among my UFOs, I had cut it out sometime, I don’t even remember. But I decided to finish it.
This was by far the most complicated corset I have ever sewn. Especially because I had to figure out myself where to place the boning channels. It was tricky, but it’s doable, you can do it too 😀 Let’s start:
As a pattern I used Ralph Pink’s hip curve corset pattern in the size 8. It only comes in this size unfortunately and as of now, it doesen’t fit me. But I’m on keto at the moment and losing weight so I will fit it eventually. Back to the pattern. The pattern is free and it’s a PDF with A4 sheets you can print and stick together.
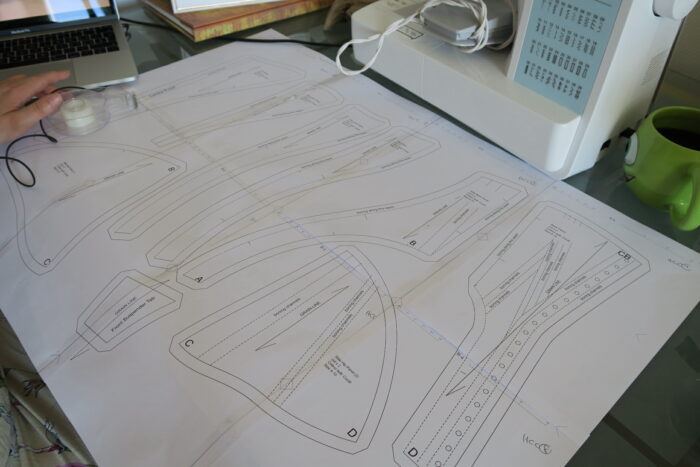
This pattern is, I am pretty sure, based on Nora Waugh’s pattern in “Corsets and Crinolines”. Because the only two bones that are in the right place are the ones Nora Waugh marked on her pattern. All the other bones are placed on the seams which is not right. So you can use this pattern, but you will have to figure out the boning placement yourself. There are also no instructions.

A long long time ago, I did sew a mock up for this s-bend corset. Back then, it was too big for me. I didn’t want to fuss around with the pattern so I just left it as it was and decided to revisit it later. It is not really a mock up, I didn’t insert boning or anything, I just sewed all the panels together to get an idea of the fit. Here is a picture of my mock up where you see actually nothing:
And here is Mr. Spinalzo sitting on my mock up:
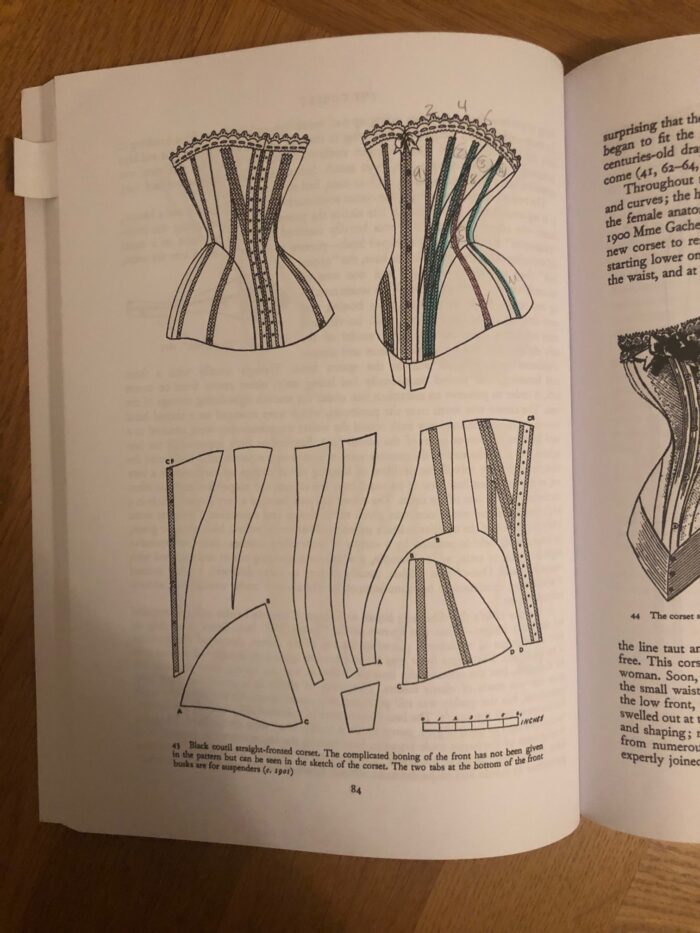
So first of all, I had to guess the boning channel placement. And by guess I really mean guess. I used Nora Waugh’s book, where she marked the boning channel placement on an illustration and tried to work with it.
I used different colours to be able to tell the different channels apart. At the end, my pattern looked like this:

This is certainely not right. But guess what, I went with it 🙂
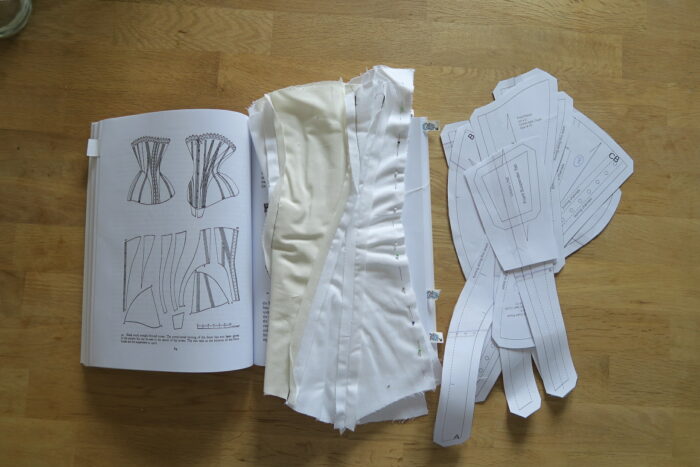
As already mentioned, I must have cut out this corset sometime during the last two years. I have no photo proof of this step, you have to believe me that I did it :P. Without sewing another mock up, I went straight to cutting the corset from coutil. I probably cut the corset out with my usual method, which is marking and cutting out each piece separately to make sure, they’re perfectly on the grainline. That is an important step, don’t miss it.
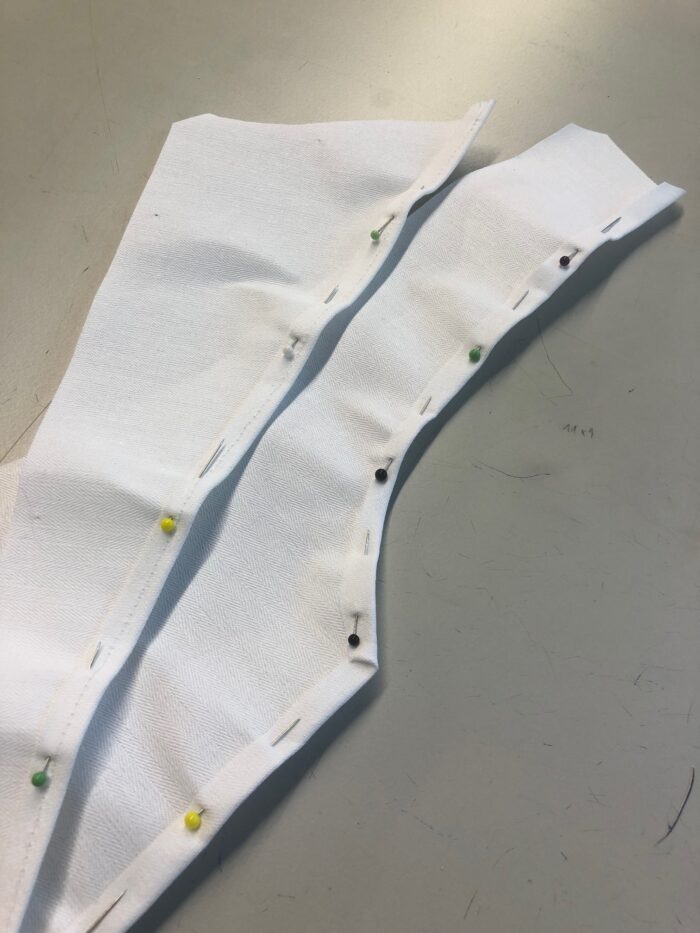
Then I marked all my lovely boning channels onto the different pieces.
Then it was time to assemble the corset. I used flat felled seams for this, my usual method when sewing a corset. You create a flat felled seam by sewing the wrong sides together, then cut the seam allowance down on one side, and then fold the seam of the other side allowance over the leftovers you just cut. Complicated? Don’t worry, I got you. I’m currently writing a mini tutorial for felled seams, stay tuned.

Assembling it went quite well, I only had a few problems when I inserted the hip panel. I messed up my flat felled seams a bit there, it was tricky with the curves and the other seams.
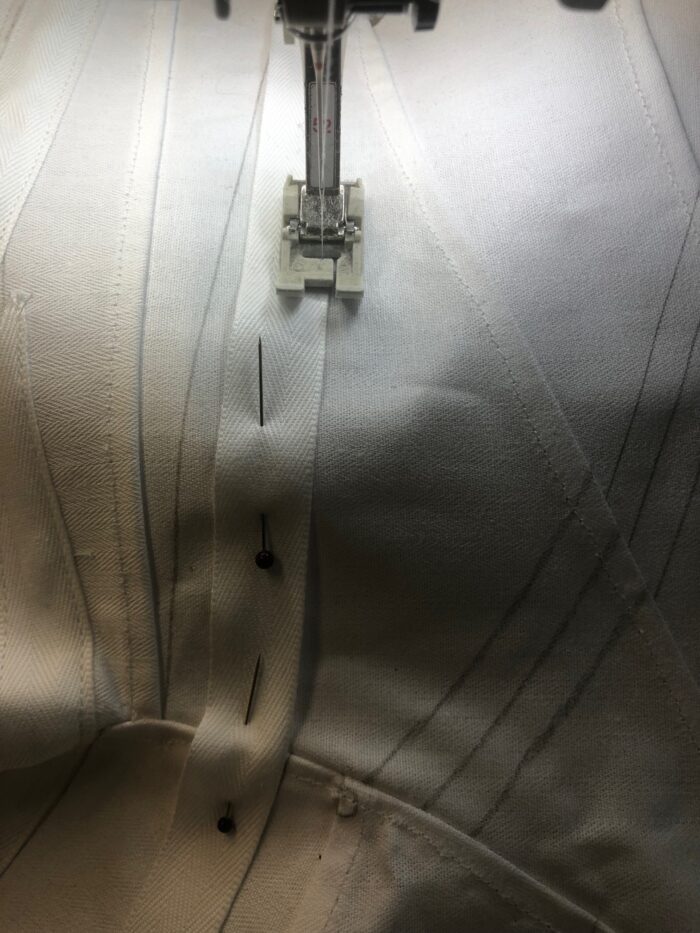
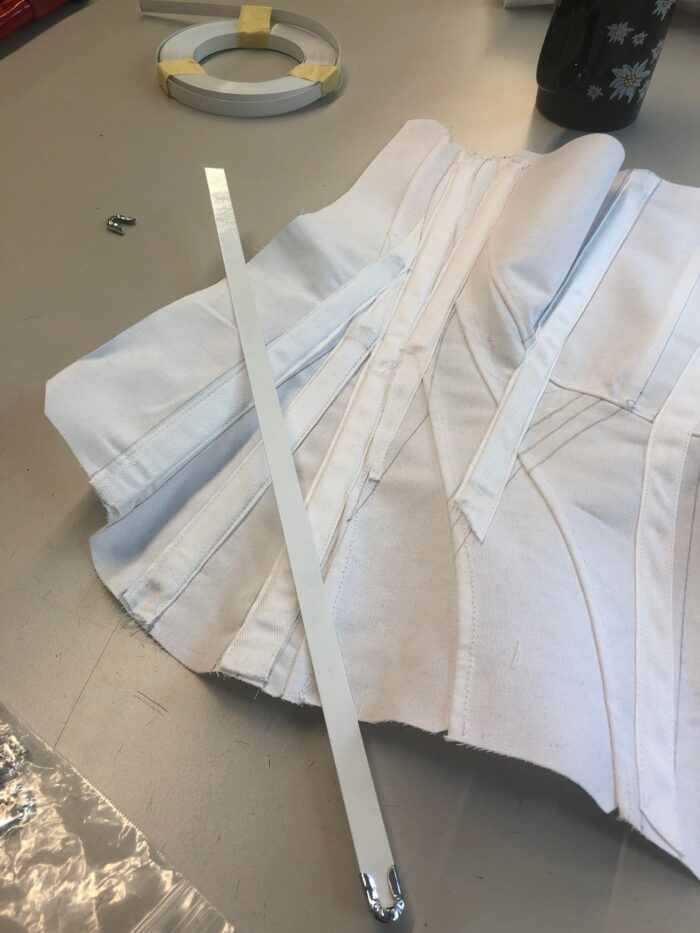
After assembling the corset, I added the boning channels. I always use twill tape for this because it’s nice and stable.
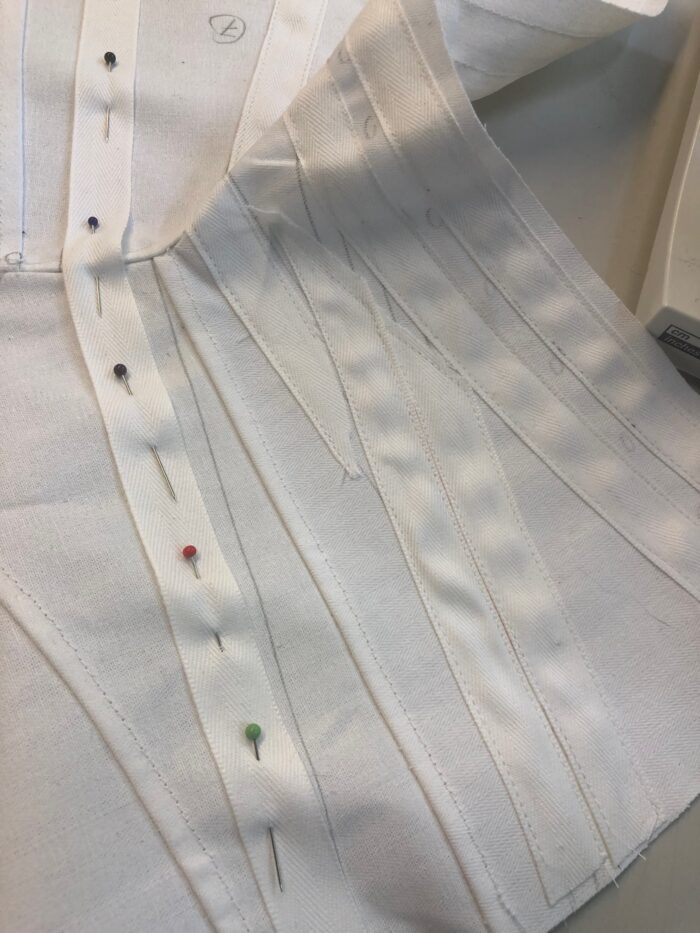
My boning channels did not align because of the guessing nature of deciding about their placement so I had to guess some more. I tried to connect them as good as possible leaving me with some curved ones. But also here, I went with it because I wanted to make this corset. Also, I decided to use the same width of boning for all seams so I sometimes sewed just one boning channel where Nora Waugh wanted two. That does count as creative liberty, doesen’t it? No? Well, it happened, no going back now.
I sewed as close to the edge of the twill tape as possible since my boning was 1 cm wide.
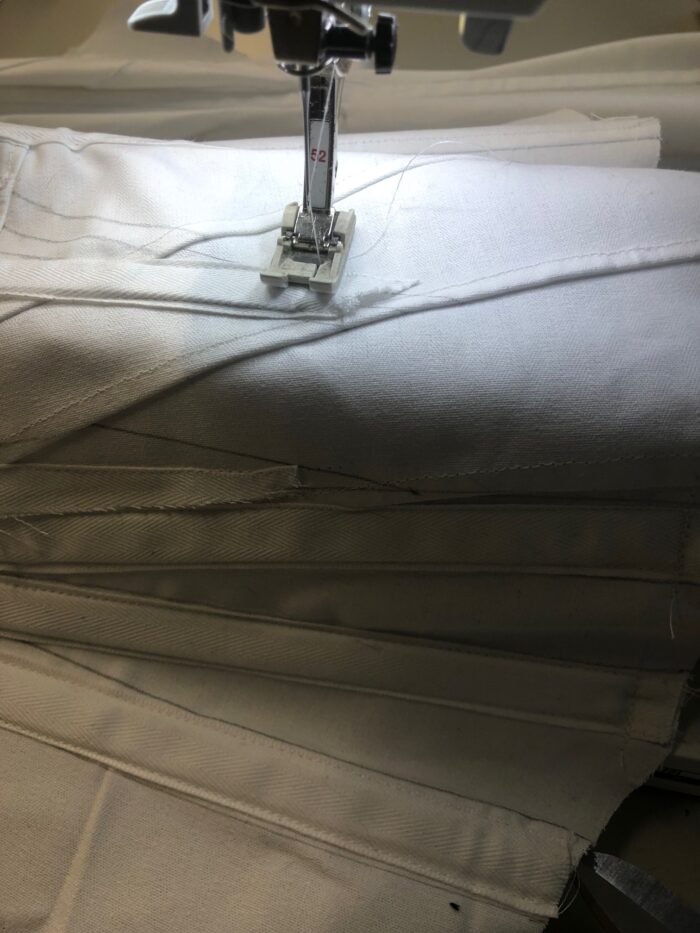
Then I inserted the boning. I used steel boning for this one because I didn’t have enough spring steel boning around. I am not sure if I like the steel boning to be honest. It worked well for my stays but for this corset it might be a bit too stiff. But we’ll see, should this thing ever fit me.
I used ending caps for the bones instead of taping them and it didn’t really work out. But since I wasn’t sewing at home, I had nothing else around and tried to make it work. This is not the safest corset I ever made but I think, the caps will stay on, there is not much room for them to come off.
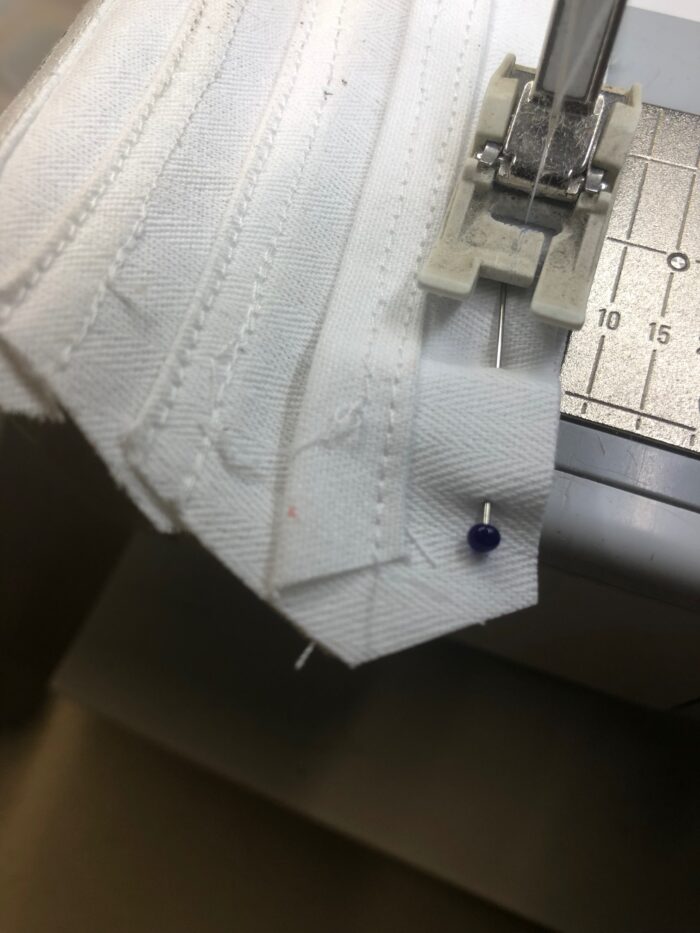
Then I closed my boning channels. I broke two needles there because I wasn’t concentrated enough.
Then it was time to sew the lining of the front and back panels for my corset on. I always line those two panels, the front to insert the busk and the back to give it more stability for the eyelits. I used coutil to line it, because I forgot to cut the lining pieces out of another fabric and I only had coutil around. My fingers did not thank me for that later. Don’t do it. Use a cotton or something else that is light weight.
First, I finished the raw edge of the side that would connect to the next corset panel.
Then I sewed the lining on, right sides facing each other.
And that is it. Iron the two panels to theinner side of the corset and pin them at the top and the bottom. No need to finish top and bottom because we will bind the corset later. That will also keep the lining panels in place.
Then it was time to insert the busk. I won’t discuss this in detail in this post, if you want to know, how to insert a busk, I have a dedicated blogpost where I show you in detail how I do it.
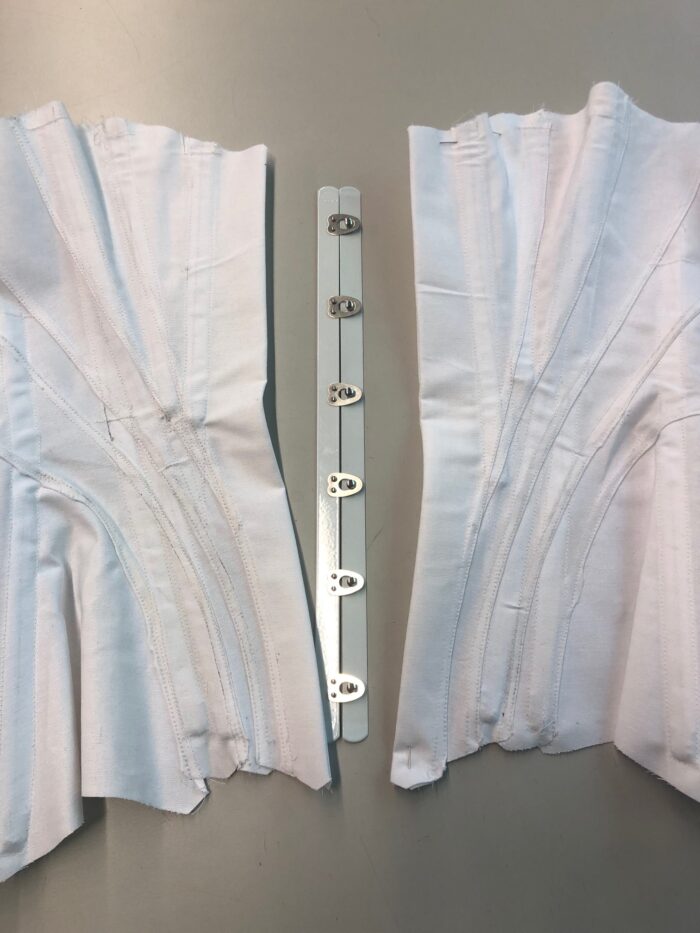
A little bit of magic and the busk is in:
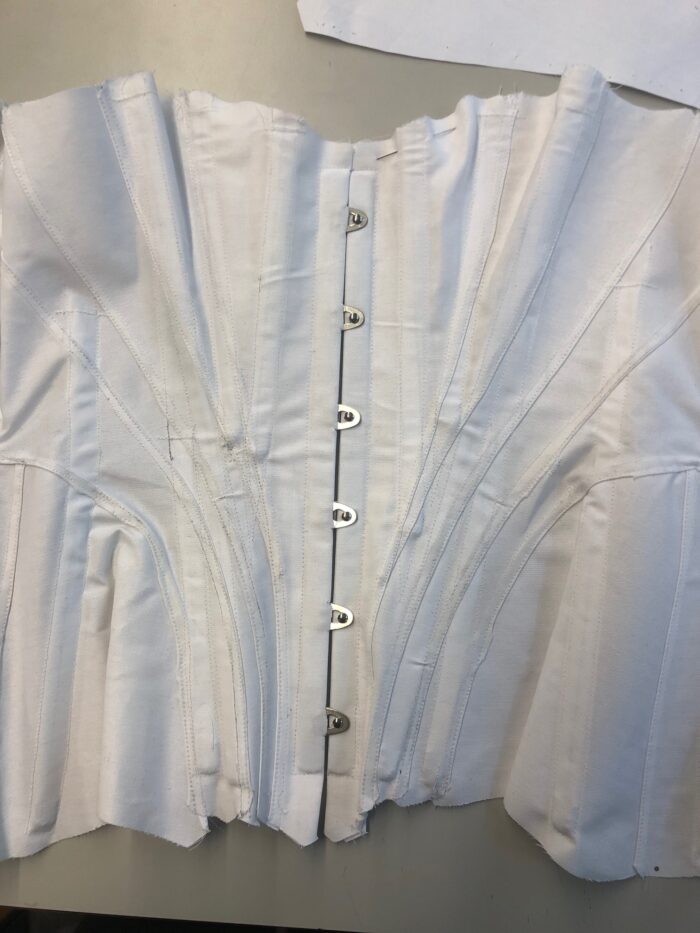
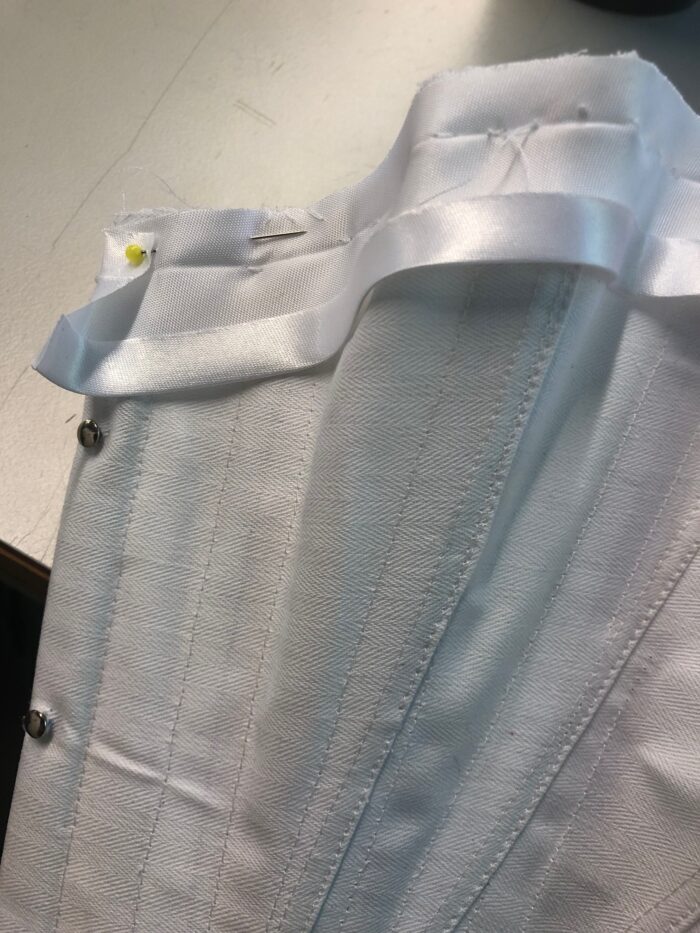
I decided to use steel eyelets for this one. Normally I prefer hand finished eyelets but I wasn’t in the mood for hand sewing. First I marked the placement for the wholes, then I punched them:

Then I inserted the eyelets. I didn’t have enough silver ones, so a few ones are copper. As I said in the beginning, this is not my most beautiful corset. I just wanted to finish it. And since I am on a tight budget, I didn’t buy more silver eyelits and just used what I had at hand.
I was so miserable when binding the corset, I tell you. I had to use the needle they had at my workplace and it was blunt and thick. It was hard to get it through the coutil, especially for the front and back panel where I had two layers of coutil. But I managed to do it somehow 😀 I had to do it by hand btw, because some of the boning was a bit too long and I didn’t want to risk breaking more needles.
I didn’t decorate my corset with lace or anything, it’s not pretty to begin with, so I didn’t bother.
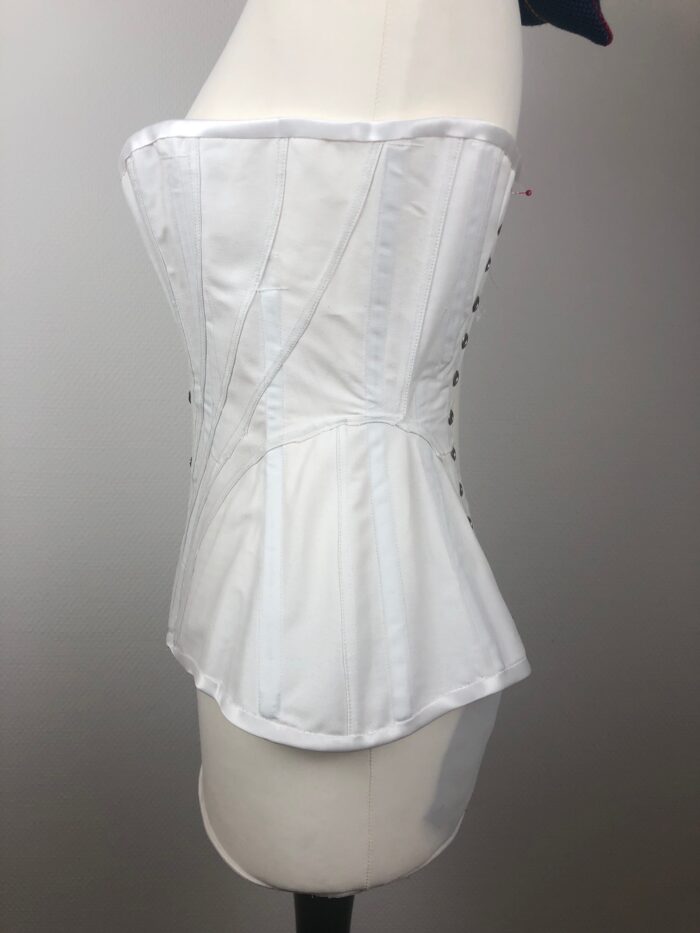
And here is the finished s-bend corset:

As I said, not the prettiest creation I ever made… It has a lot of flaws. But for a project that I just wanted to get done, I think it came out not half bad. Here it is from the side:
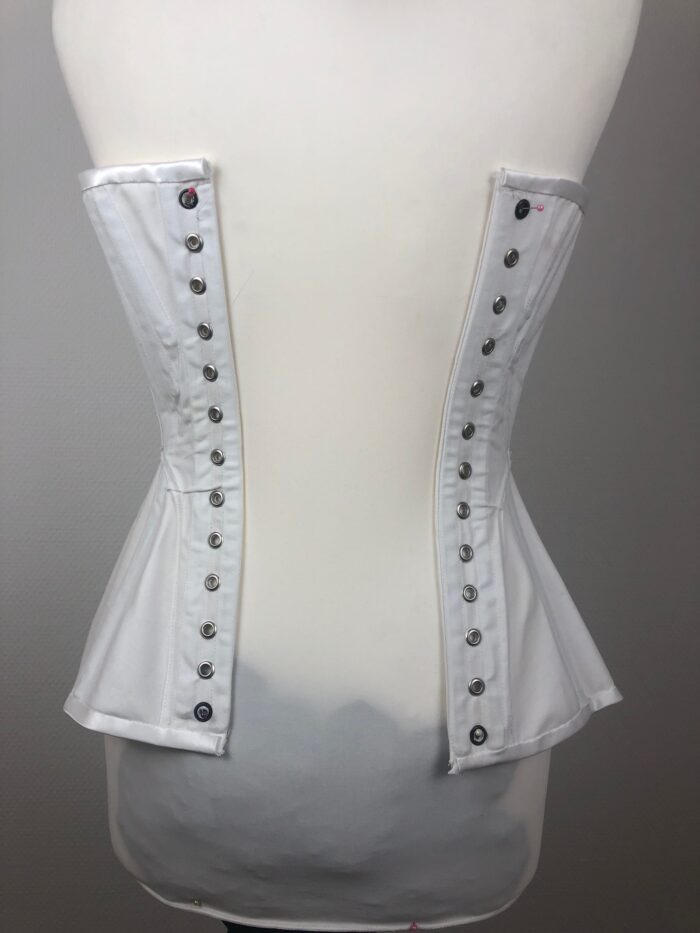
And from the back where you can see all the different eyelits I used, because I didn’t have enough of the silver ones… 😀 We make work what we have in my work room 😛
As you can see, there’s a lot of room for hip and bust padding here 😉 I will sew these next. The corset came out pretty small, but I think, on a human body, it will work better as on my dress form.
Before we finish this post I would like to give you a short review of Ralph Pink’s corset pattern. Now. It is a good pattern, everything lines up and I had no problem with sewing it together. But, and it’s a big but, you need to have some knowledge in corset making because there are no instructions at all. All you get are the marking on the pattern. This is no beginners pattern. You need to have a corset or two that you already made to know how to sew a corset together.
Another thing you need to be aware of, I already mentioned this, is that you will have to figure out the placement of the boning channels yourself. There are only a few marked on the pattern and for everything else, Ralph Pink wants you to bone the seams. Which is not historically accurate, the boning channels do not run along the seams. So you’ll have to figure it out yourself with the help of either originals, or if you have it, Nora Waugh’s “Corsets and Crinolines” where you have a drawing of the corset with it’s boning channels. But it is a task, let me tell you. Mine are certainely not accurate as well. But at least more accurate than boning the seams.
The last thing I want to mention is, that this pattern only comes in one size, which is a German size 38 or an American S / small M. It used to fit me, before I gained weight. But now it doesen’t. Which is sad. You might be able to size the pattern up, but it will probably distort the shape of the corset. Which is something you don’t want, you want the silhouette of the 1900s and for that, you need the proportions of the corset without changing them too much.
So that’s my two cents on this pattern. If you are a size 38, have some corset sewing experience and want to take up the task of figuring out the boning channels, by all means go for it. I liked it (at least when it still fit me :P). It’s just nothing for a beginner. And one size. And there’s the boning channel riddle. But for a more experienced sewist, it might actually be a good alternative to commercial patterns.
I will also try out the other corset patterns Ralph Pink has on his website, I printed them all out. There’s a 1880s corset and two stays patterns. Again for a size 38. But at least, the boning channels seam to be accurate on these, so no riddles to solve before sewing.
And that is it you guys. That’s all I have to say today. I thank you so much for reading and I hope you enjoyed the post. I wish you a good one!
Love,
Ella