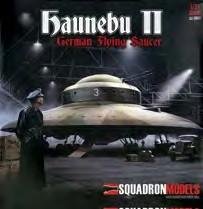
Andy Davies delves into the murky world of German ‘Wonder Weapons’ and builds Squadron Models’ imposing new Haunebu II

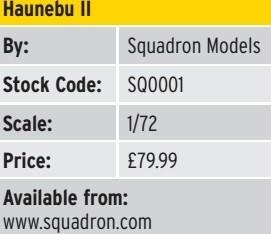
HAUNEBU II
German ‘what-if’ subjects are a burgeoning area of interest, and since the end of World War Two several have linked advanced German aviation projects with so-called UFO technology.
Chief among these ‘Wunderwaffe’ or Miracle Weapons, were the Haunebu series of flying discs. According to these counterfactual histories, after successful testing of the smaller Haunebu I, the enlarged 85 1/3 ft (26m) diameter Haunebu II was ready for flight testing in 1942. The craft had a crew of nine and could supposedly achieve hypersonic speeds of between 3,700 and 13,000mph (6,000 and 21,000km/h), with a flight endurance of 55 hours. A few models of these machines have been released in the past, notably Anigrand’s 1/144 resin kit of the larger Dornier Do-Stra version, Wave’s 1/72nd kit (although this was based more on the ‘Adamski’ UFO than a Haunebu design) and recently Pegasus Model’s 1/144th injection-moulded version (see p. 60), but there’s a new flying saucer in town…
Box of delights
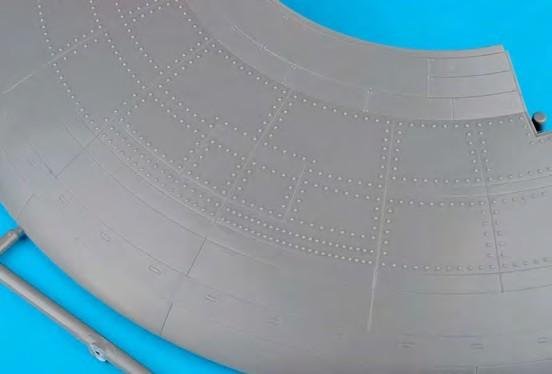
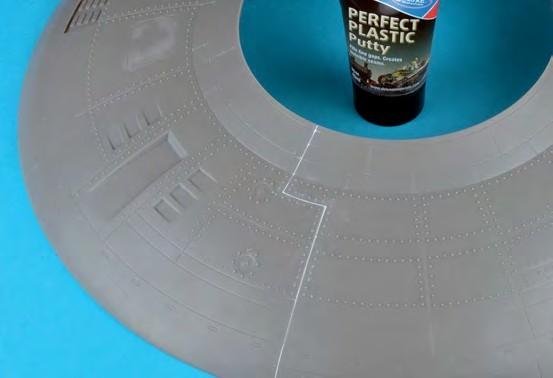
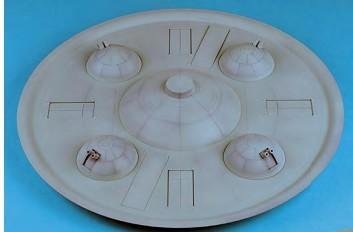
Squadron’s all-new 1/72 offering comprises approximately 112 parts on 13 styrene runners, a single clear frame for the windows, a decal sheet, glossy full-colour painting guide and CAD-style instructions, with notional Haunebu development history. There was no flash on the styrene parts, nor sink marks or blemishes of any kind and they fitted flawlessly without the need for filler (the only exception being the upper saucer sections). Surface panel details were defined neatly, though the rivets seemed somewhat over-scale and some modellers may wish to remove them altogether. The clear observation window parts were commendably clear and fitted flush into their respective locations.
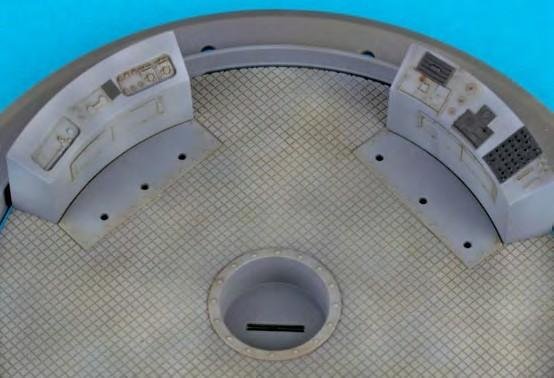
Bridge of size
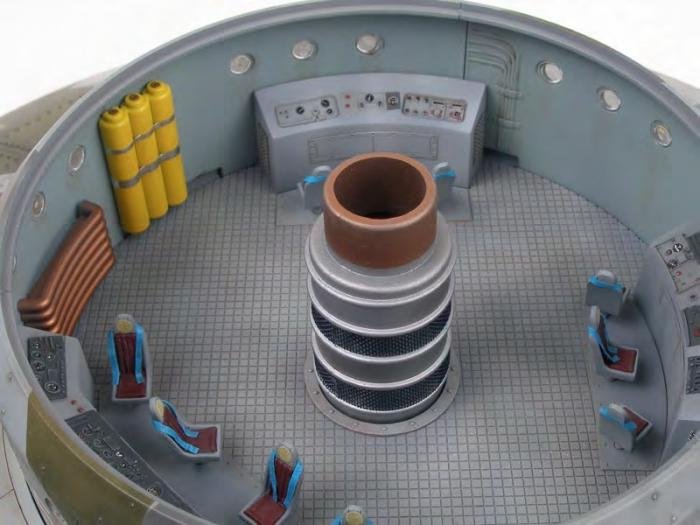
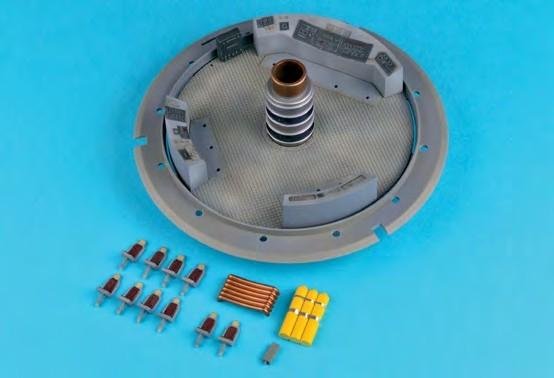
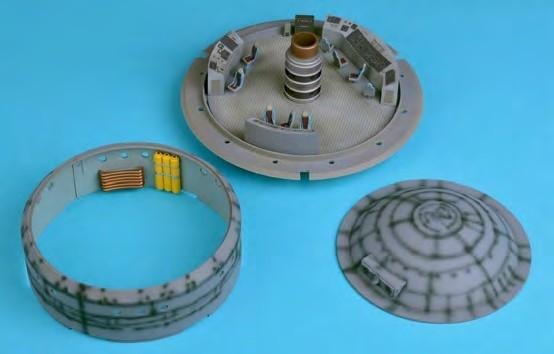
A detailed cockpit/operations room was provided, complete with textured flooring and ceiling, crew seats, control consoles, gas storage cylinders, hollow central Thule Triebwerk/ Tachyonator Drive core and various pieces of floor-mounted ancillary equipment. The three interconnected cabin walls fitted perfectly and featured excellent detail, although sidewall ribbing would have been appreciated. Three consoles, with moulded controls and dials were included, and decals for the latter were obtained in the form of Mike Grant’s CKP-072 1/72 Cockpit Details WWII.
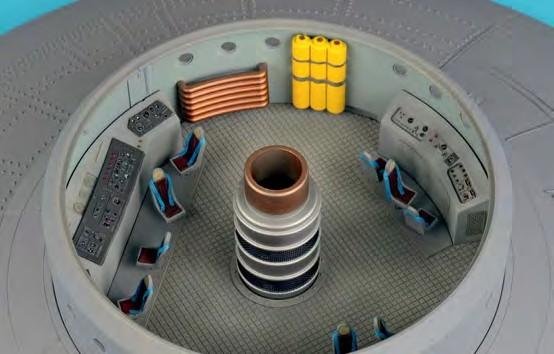
The bridge’s interior wall surfaces were airbrushed with AKAN AK73059 Grey (faded) and the consoles sprayed a darker hue by adding several drops of Xtracrylix XA1201 Grau RLM 02 to the original tone. Once random mixes of the grey base colour had been applied to the diamond-patterned floor, AK Interactive’s AK-025 Fuel Stains wash provided further contrasting shades. Shadows were then added behind and beside the consoles with LifeColor’s LPW17 Surfaces Shadower wash. The instrument decals were brushed with Tamiya X-22 Clear Gloss to ensure good adhesion and provide a gloss surface to the dial faces. To add extra interest, black wire mesh was sourced from the spares box and fitted to control console sides, before these received an Abteilung 502 ABT-F510 Starship Filth wash, to add depth.
Although these items would doubtless have been kept clean, it was decided to apply an ‘oil paint filter’, employing AMMOMIG’s Oilbrusher paints (A.MIG- 3504 Dark Blue, A.MIG-3502 Yellow, A.MIG- 3503 Red and A.MIG-3515 Ochre).
The whole area was then wiped with a thinner-moistened cotton bud, to add subtle tones to those parts. The latter’s oil washes were also applied to the walls and floors, before being treated to mistings of AK73059 Grey (faded).
Extra detail was added to the basic crew seats, with harnesses and headrests fashioned from lead foil, and buckles from shaped wire. Once completed, these were set at random angles, with several straps left to hang, while others were gathered onto the cushions.
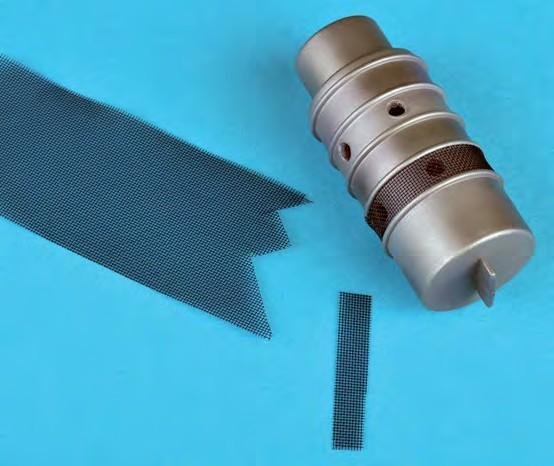
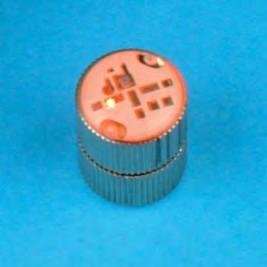
The central cylindrical core, which supposedly housed the powerplant, was rather bland, being a simple ribbed tube devoid of detail, so eight 4mm holes were drilled in the two central bands, (four in each) and two strips of black wire netting were fixed around each section using Gator’s Grip PVA glue. The core tube was sprayed AK488 Matte Aluminium and the top AK473 Copper. A small multicoloured LED unit was obtained, activated and simply dropped inside the core. As the unit flashed colours randomly, it only added to the model’s ‘other-worldly’ nature.
MODEL SPEC
What lies beneath
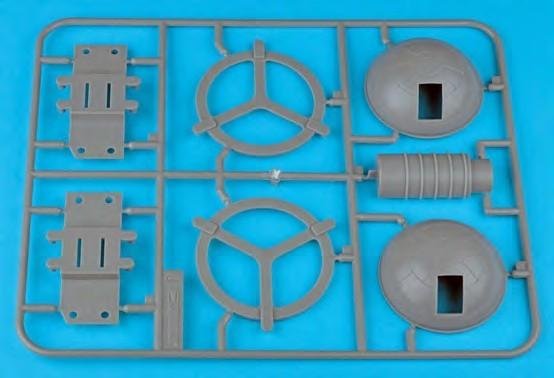
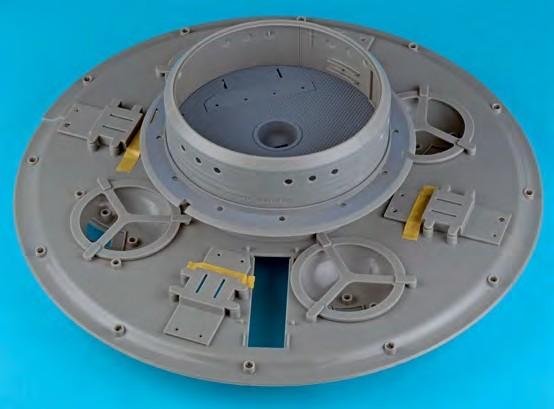
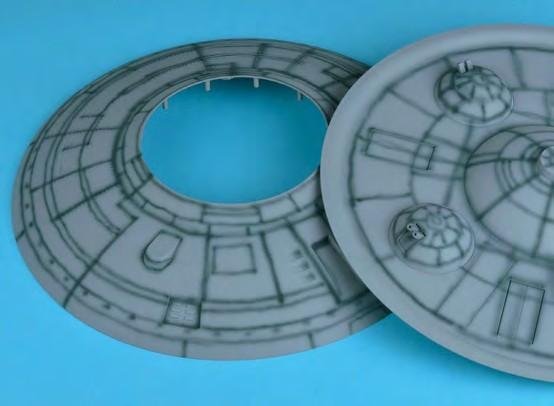
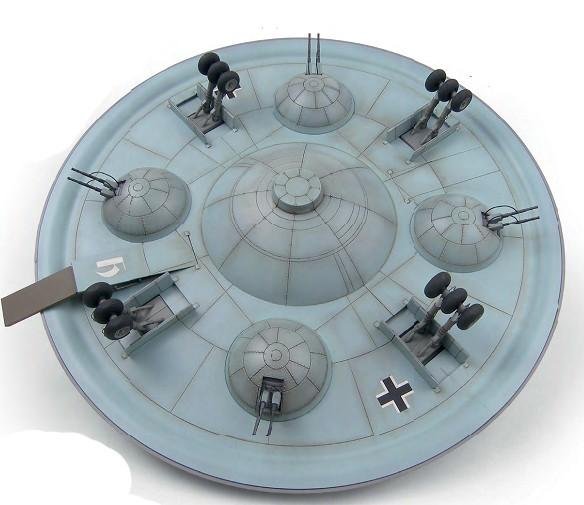
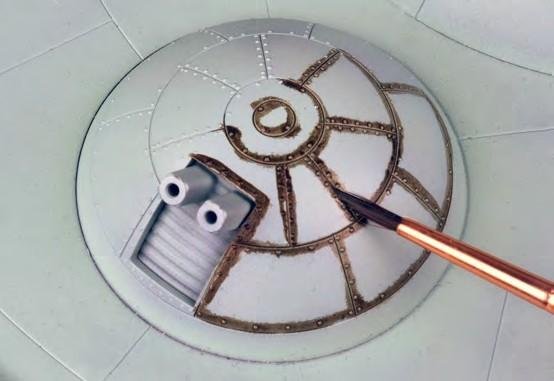
The underside of the saucer was provided as halves, and included apertures for the four domed gun turret/Magnetic Field Impulsor (MFI) housings, four undercarriage units and two boarding/loading gangways; either could be detailed and shown deployed.
A separate central dish slotted into the base, which covered the central join line neatly…in fact the whole model was designed so minimal filling would be needed for any of the joins. Each turret/ MFI unit was equipped with a pair of Kraftstrahlkanone (KSK) phased-energy cannons. These could be rotated into any position and the cannon barrels moved vertically, though for this build it was decided to fix them in the ‘up, facing outward’ position, to prevent them coming into contact with the base. Squadron’s clever engineering meant each housing was secured by a circular frame, which fitted snugly, yet allowed the full range of turret movement.
The undercarriage bays were rather bare, which at first appeared disappointing, until it was realised the top of each main gear leg filled the entire area.
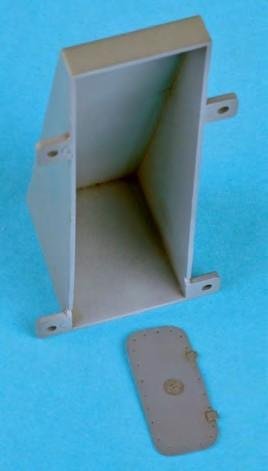
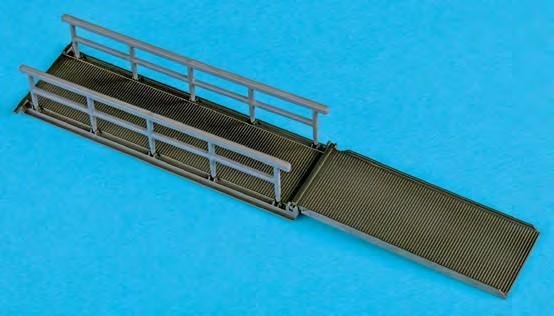
A neat touch was the provision of hinged undercarriage doors, so they could be displayed open or closed; as the landing gear could be clipped into place, it was possible to remove them and close the doors, to portray an in-flight machine. The gangway was highly detailed and included a ribbed floor, handrails and a hinged loading ramp. This assembly was also moveable and had to be installed prior to the upper section of the entrance tunnel being attached to the lower saucer hull.
Those leg
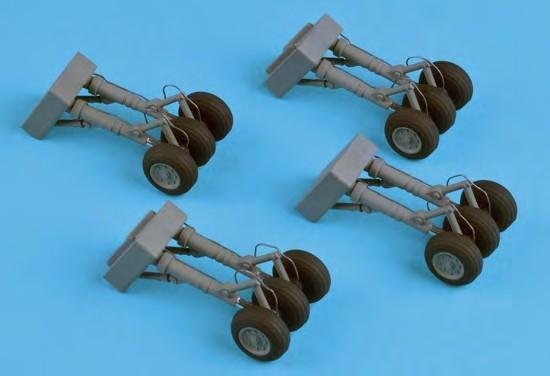
The undercarriage had an interesting arrangement that comprised four twin-legged, three-wheeled units reminiscent of the SR-71 Blackbird’s main gear. Given the weight of the completed model, the undercarriage needed to be sturdy and Squadron’s parts were certainly fit for purpose.
Once assembled, the units were airbrushed with XA1201 Grau RLM 02 and the upper blocks then painted a slightly darker tone of the same colour, which created a depth effect. To simulate chromedmetal oleos, Bare-Metal FT00048 Chrome self-adhesive foil was applied to each of the eight undercarriage legs and 2mm lead wire from Little Cars (wwwmodellingtools.co.uk) added to represent hydraulic lines.
The tyres were then sprayed XF-69 NATO Black, before the tread areas were treated with a lightened mix of the same colour; the wheel hubs being painted RLM 02. Heavily diluted Abteilung 502 Raw Umber oil wash was then applied, which really bought these units to life.
It was at this point that a strange anomaly presented itself. As fitted, each landing gear would be facing outward…this meant moving the craft freely on the ground would have been difficult, if not impossible. Some may argue it was designed to hover and therefore wouldn’t require ground manoeuvring but the idea of firing up the craft every time it was to be moved seemed unlikely. The solution was to turn two opposing gears through 90 degrees and have them all aligned in the same direction. Luckily this was easy to achieve, though a sliver of plastic needed to be removed from the rear of the two repositioned units, as they fouled the doors slightly. Eventually three gears were angled rearwards and one forwards, though what actually constituted front and back was open to debate.
Saucy colours
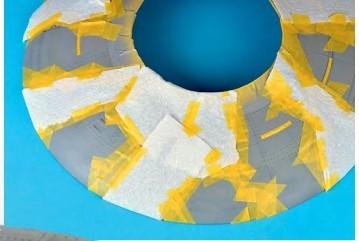
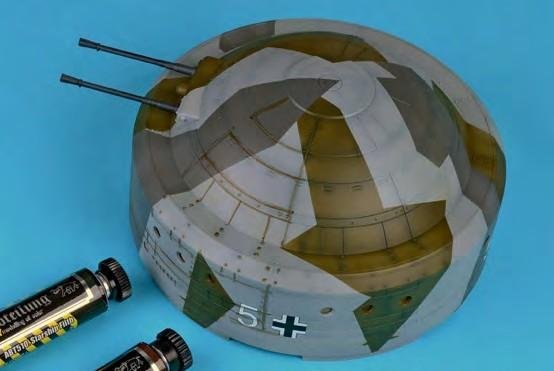
Due to the kit breakdown, it was easy to deal with each section separately, making priming and painting straightforward. The upper and lower saucer halves received grey automotive plastic primer, before being smoothed with various grades of Micro-Mesh polishing cloth. A light pre-shade of Tamiya XF-17 Sea Blue was applied along panel lines, around hatches and over exhaust ducts; this would be allowed to show through the final finish. Regarding the latter, it was decided to adopt the suggested Luftwaffe splinter scheme, which comprised Vallejo’s Model Air 71.259 Grey Violet RLM75, 71.015 Dark Green RLM71 and 71.101 Light Blue RLM78. These paints sprayed perfectly when mixed with a few drops of Winsor & Newton’s Flow Enhancer.
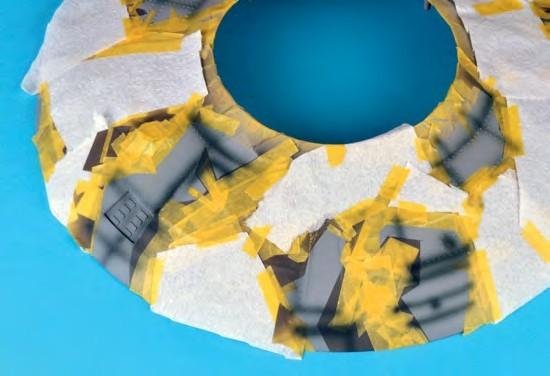
The model would be painted in three stages, firstly the main upper saucer disc, then the underside and finally the upper cupola/ bridge. Starting with the saucer, RLM 77 Light Grey (in this case AKAN 73059 Grey [faded]), was misted to avoid obliterating the underlying pre-shade. The inner sections of each panel were then resprayed with a lightened and thinned mix of the base colour, applied in several stages, until a satisfactory effect had been achieved. Masking was required for the complex camouflage, and this proved to be time-consuming, as it was applied in several stages with constant reference to the printed colour guide.
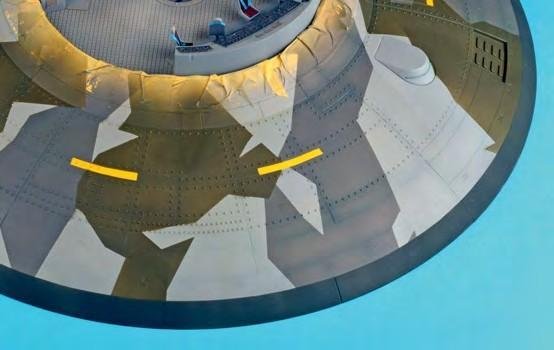
The latter was also employed as a measuring template, as it was easy to apply too much or too little paint to one area, which would have resulted in an uneven camouflage pattern. To maintain a subtle nuance, these areas received a further pre-shade of XF-17 Sea Blue, after which RLM 75 Grey Violet was added. Once again, inner sections of certain panels were lightened (and a few darkened), to add tonal variance and avoid uniformity. Finally, the same process was applied to the RLM 71 Dark Green… corrections and/or touch-ups being addressed before final assembly
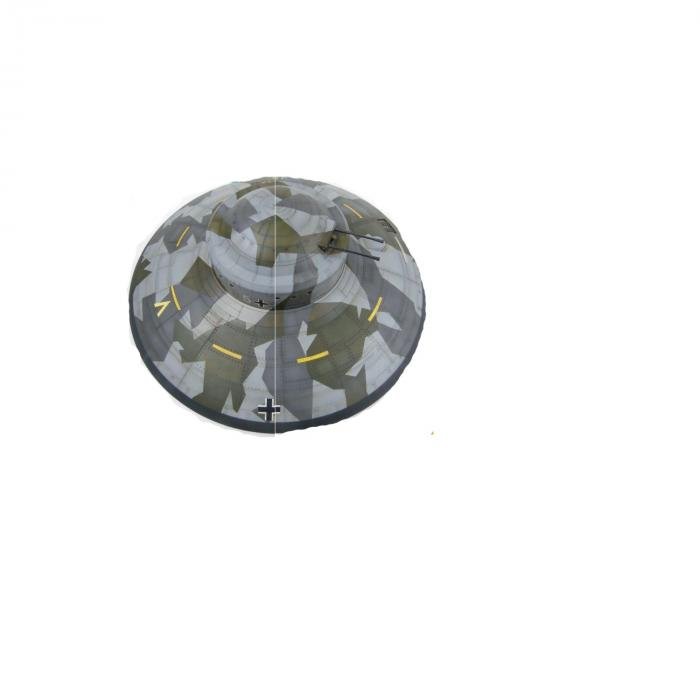

Additional care was needed to ensure the scheme between the saucer and upper cupola matched seamlessly, so a pencil was used to mark the areas to be aligned. To disrupt the pattern further, short yellow strips were painted along the central band (with the aid of masking tape and XF-3 Matt Yellow), and XF-85 was applied to the outer edge of the upper disc. This was faded later, with streaks of thinned XF-18 Sky Grey. Having looked at many Haunebu II images, it seemed the height of the cupola was slightly low, so instead of locating the bottom edges into the recesses provided, the lower edge of the cupola was allowed to sit on the base, which raised the height by 5mm. It may not seem much, but the result was more in keeping with available CGI renderings and speculative drawings.
The dangerous bits
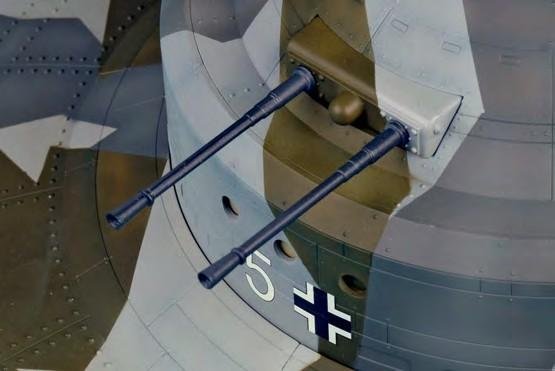
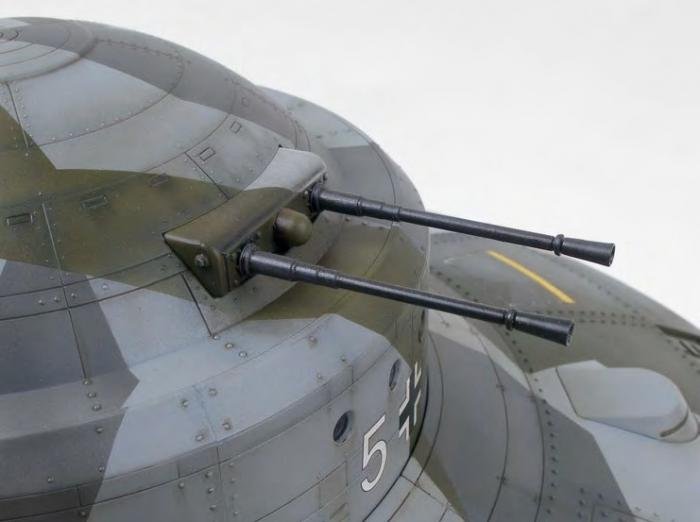
Attention then turned to the weapon systems, in the form of eight 3 1/8in (80mm) KSK phased-energy cannons (housed in four rotating turrets) and two high-powered 4 1/3in (110mm) KSK cannons, the latter mounted in a recessed fairing in the cupola dome. The barrels were treated with Alclad ALC-120 Gunmetal mixed with ALC-417 Hot Metal Violet, and highlighted with Mr. Metal Color 213 Stainless. Once fitted, the cannons received individual 1mm lead-wire power cables, which ran from the base of the barrels to the muzzles.
Supposedly, these channeled high-voltage energy (filtered from the drive units), to ball cascade oscillators, which flowed down to the two charged barrels. These were wrapped in precision tungsten spirals and were capable of absorbing substantial amounts of heat. The power settings could be changed so it was basically regarded as a crude phaser weapon…allegedly!

Weathering heights
One could assume these machines would have suffered heavy weathering, when taking into consideration the extreme environment in which they were supposed to operate (with some units based in Antarctica). The wash process was the same for both the upper saucer and the cupola, with ABT-007 Raw Umber and the colourfully named ABT-510 Starship Filth employed. These were applied via an Abteilung 502 00-grade flat brush to areas above each panel line and below open areas such as windows, doorways and hatches. After approximately five minutes drying time, a wide sable brush loaded with ABT112 Matt Effect Thinner didn’t just diffuse the paint, but also gave it a truly matt finish…as opposed to other thinners that often leave a glossy sheen.
Various cotton buds and brushes were used to manipulate the paint and create shadow areas, with swirls and eddies where vortices would have affected the surface grime. With the disc and cupola completed, attention then focused on the underside.
Here, the overall RLM 78 Pale Blue appeared slightly bland, even with the pre-shade showing through, so it was decided to use a bolder approach, and apply neat Abteilung Raw Umber oil paint to the panel lines. After approximately 10 minutes, this was swabbed with a cotton bud loaded with thinner, and streaked downwards carefully. Initially, the effect appeared stark against the blue, but as the paint dried, it became much subtler.
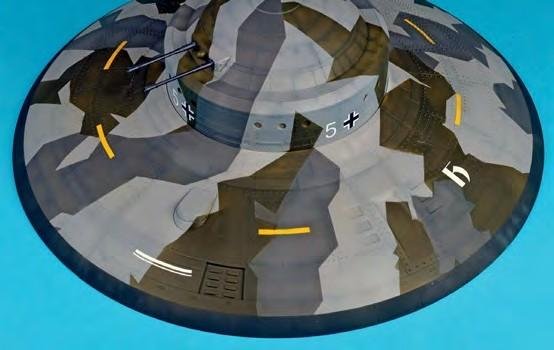
The Cartograf decals were basic, but well produced, being of perfect colour and register. They included several Swastikas (not used), airframe codes, a squadron chevron, stylized letter ‘h’ and four small Balkenkreuze. The latter were added around the cupola, with larger examples from the spares box applied beneath and on top of the disc.
Luftwaffe UFO
The finished model was very impressive, and Squadron should be congratulated on this, its first full kit; the subject made a welcome change to the seemingly endless procession of World War Two aircraft from other manufacturers. Though some additional interior details would be of benefit, the finished model was striking, with assembly straightforward and the fit of parts exemplary. Squadron even has its own YouTube channel, which includes tutorials on how to better build and finish the Haunebu. If one is seeking something a little different then look no further, this is highly recommended to all.
Materials
Abteilung 502 (www.abteilung502.com)
Alclad II lacquers (www.alclad2.com)
Daler-Rowney products: (www.daler-rowney.com)
Gator’s Grip ‘Thin Blend’ glue (www.Gator’smask.com)
Jammydog Micro Masking Tape (www.jammydog.com)
Mr. Hobby acrylics (www.albionhobbies.com)
Microscale Micro Set and Sol (www.microscale.com)
AMMO-MIG: (www.migjimenez.com)
Tamiya acrylics (www.hobbyco.net)
Vallejo Model Air acrylics (www.acrylicosvallejo.com)