:quality(75))
:quality(75))


:quality(75))

It’s about more than getting from A to B. Traveling in cars is something most of us are privileged to enjoy – road trips, carpool karaoke, beautiful views, uncharted territories, and playing I-Spy. This tutorial celebrates how cool cars are!
In today’s step-by-step tutorial, we’re drawing a 1965 Ford Mustang. These were the first “pony cars” – compact-size, affordable sports cars with long hoods and many customization options to reflect the lifestyles and personalities of a new class of up-and-coming car owners.
Ford Mustangs have featured in some 007 movies and other silver-screen classics, such as Bullitt (1968) and the John Wick series (2014 -).
Pony cars are about power, speed, beauty, and fun. So, come and take a low ride with us!
Jumpstart your ideas with Linearity Curve
Take your designs to the next level.
Step-by-step car drawing tutorial
Before we start, let's make sure you have all the drawing materials you need.
• iPad
• Apple Pencil
• The latest version of Linearity Curve (formerly Vectornator)
What you'll learn
• How to prepare a document and Color Palette in Curve
• How to use the Shape Tool
• How to use the Pen Tool
• How to create a sense of depth with shadows and highlights
• How to select multiple objects with the Selection Tool
• How to use the Shape Builder Tool to combine objects
• How to use Gradients
Prepare your car color palette
You can make your Mustang hot rod illustration using your favorite color, but we chose a deep crimson red for the car body.
It’s a good idea to prepare your colors beforehand, so you can quickly select your chosen colors from the Color Palette in Curve while drawing. Below are the Hex Color Codes for the colors we use in this tutorial.
Blue black - #02081A
Cream - #FDFAE3
Dark gray - #6A6A6A
Light gray - #9DA2AC
Crimson - #CF2F5C
Dark red - #941134
Medium pink - #DD6585
Light blue shade - #BDCDDE
White - #FFFFFF
Blue - #2E96FF
Tire black gradient - #474641 - #02081A
Car body red gradient - #C51645 - #FF4375
We’ve warmed up our engines, are you ready to put the pedal to the metal? Let’s start drawing!
Prepare your document
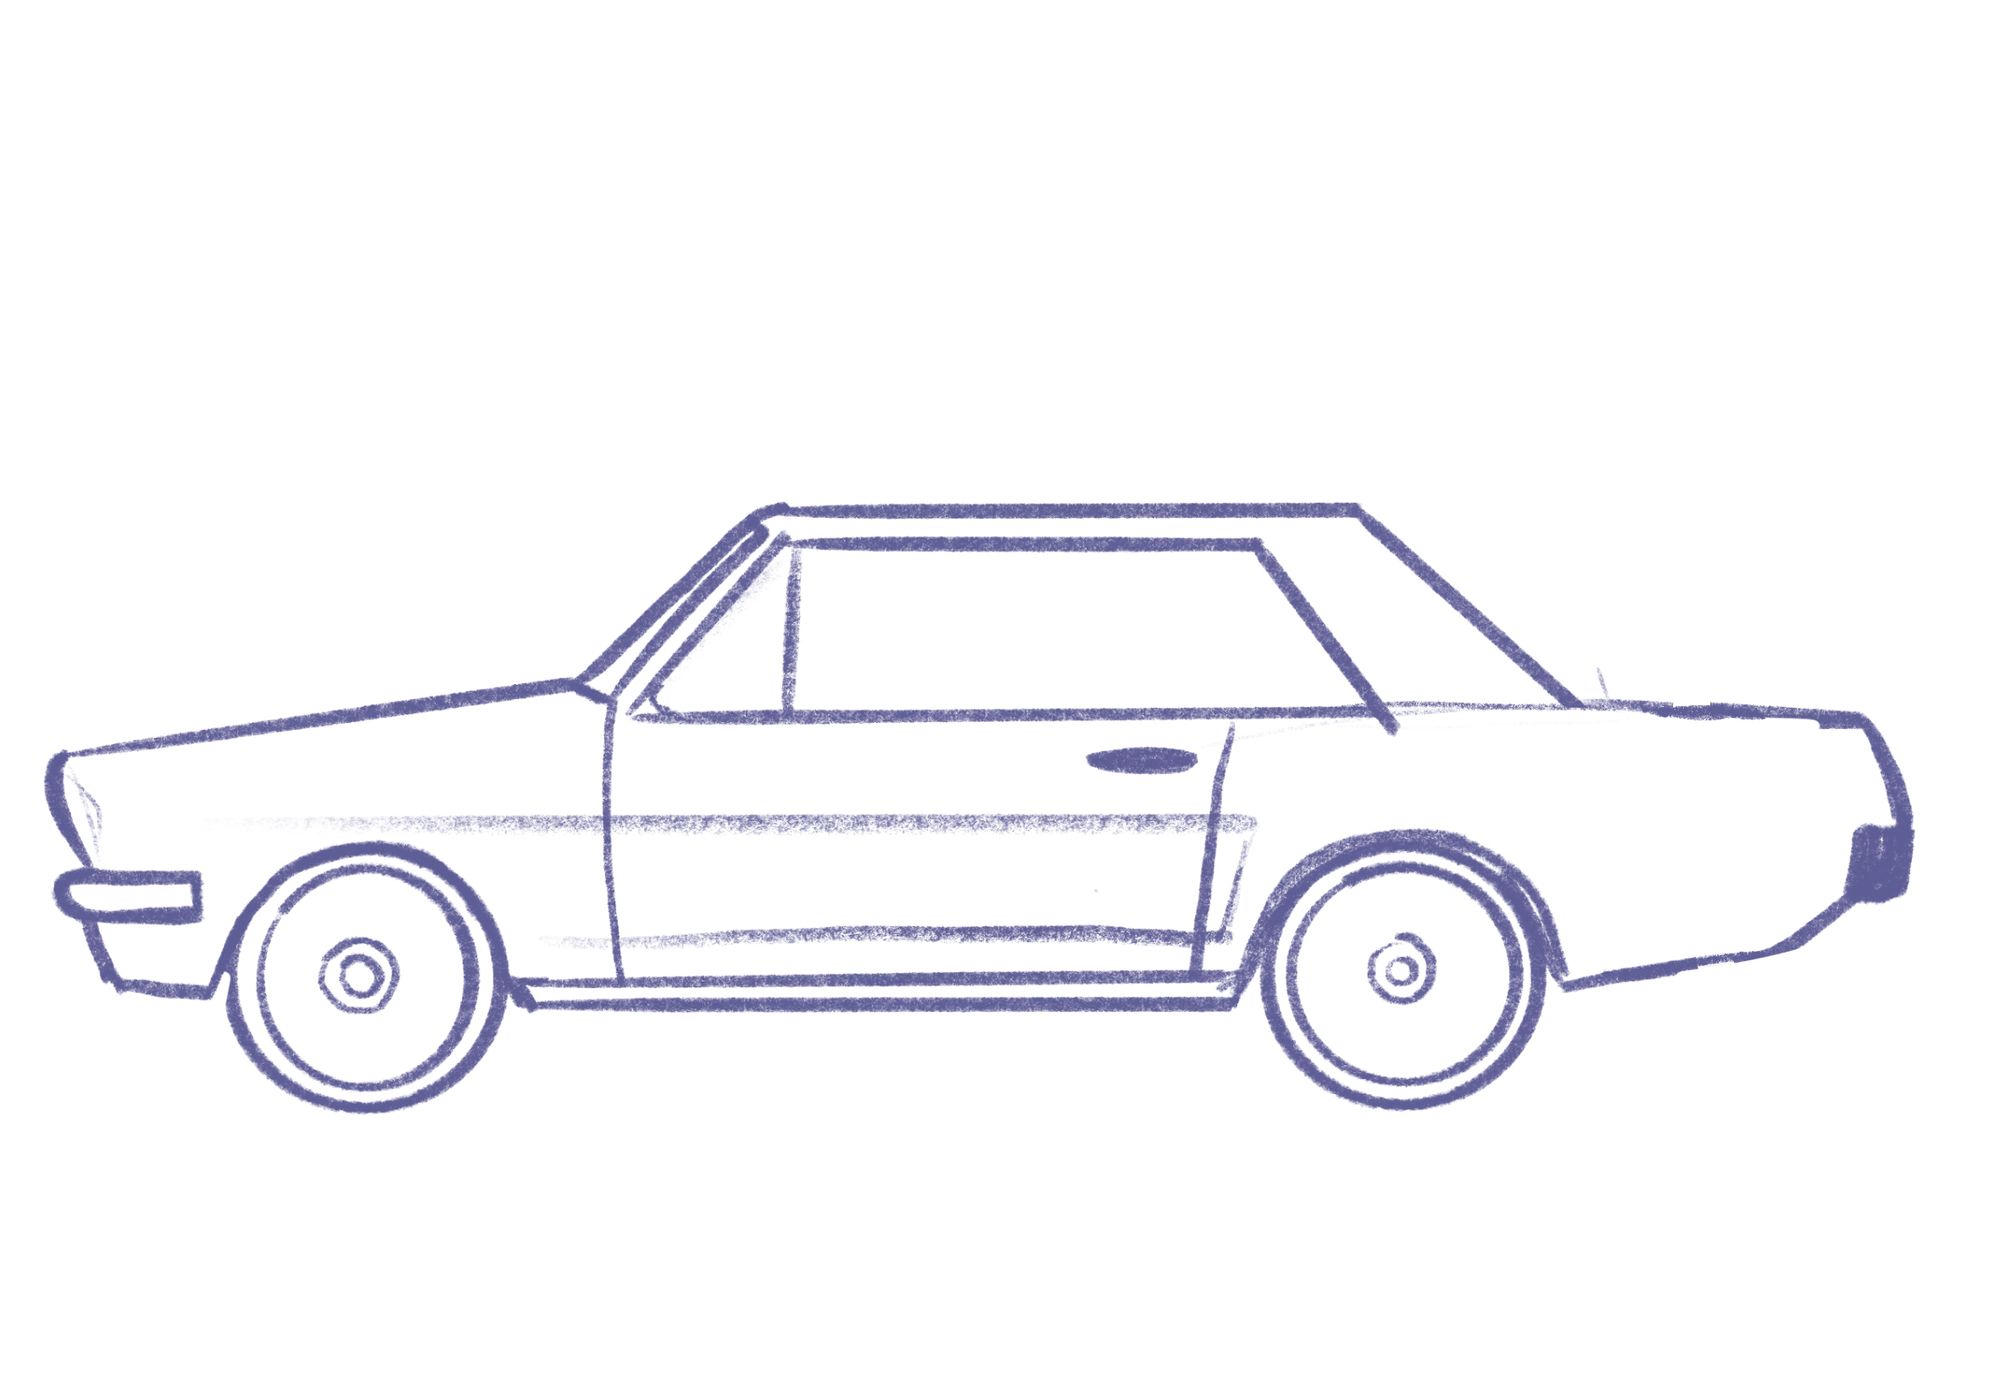
Find a reference photo of the car you’d like to draw and create a preparatory sketch with simple lines to have the basic car shape. Here’s ours:
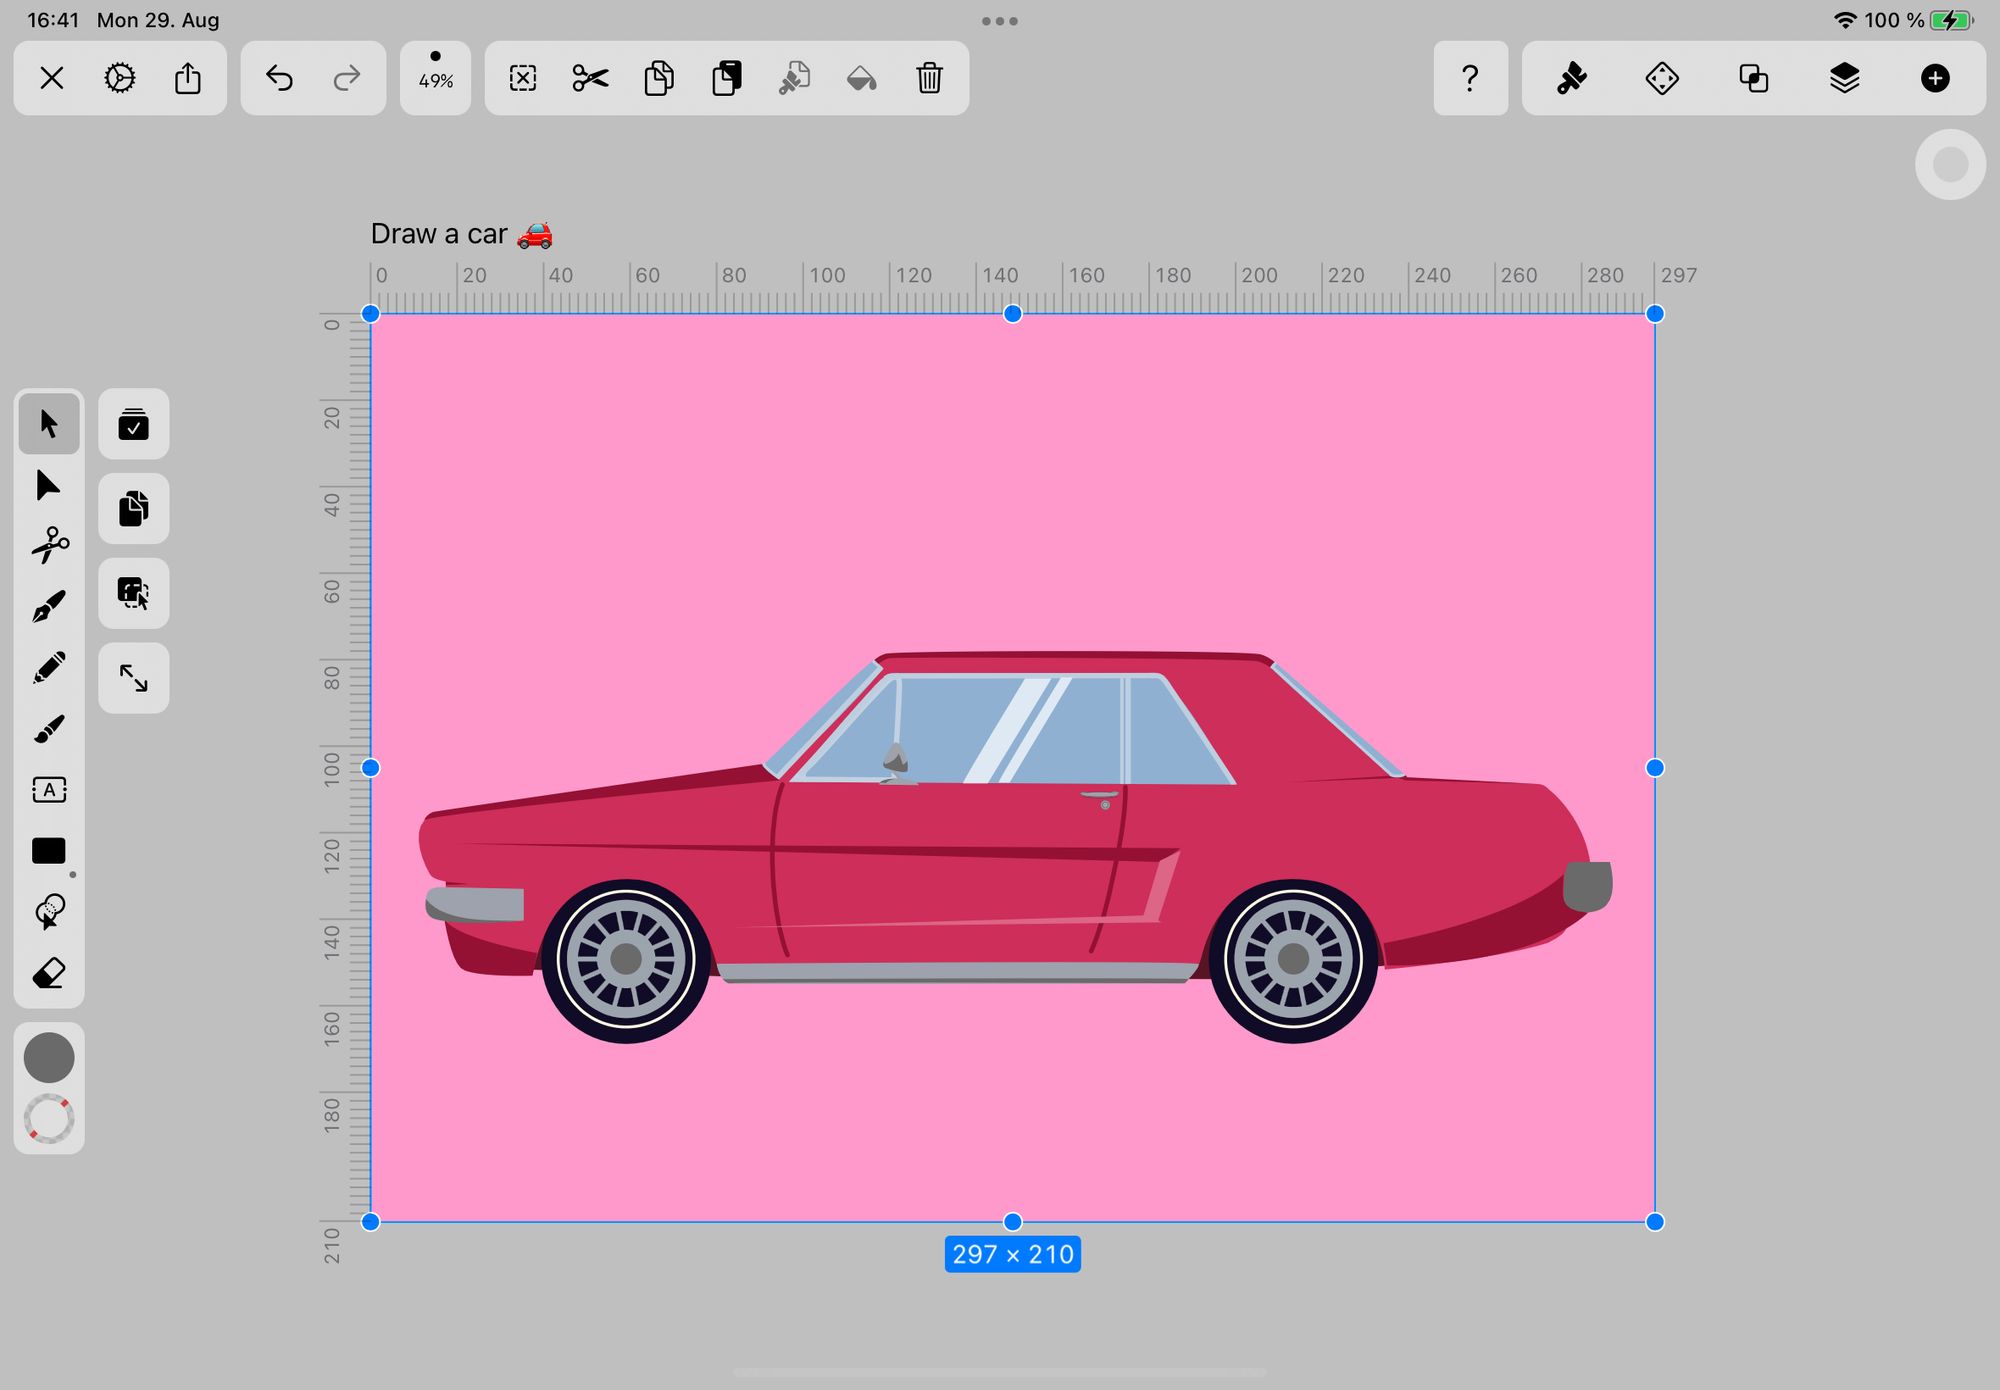
Now, let’s set up your drawing document in Curve.
Open Curve and tap the + button to create a new document. You can either choose a pre-made template or set the document size manually.
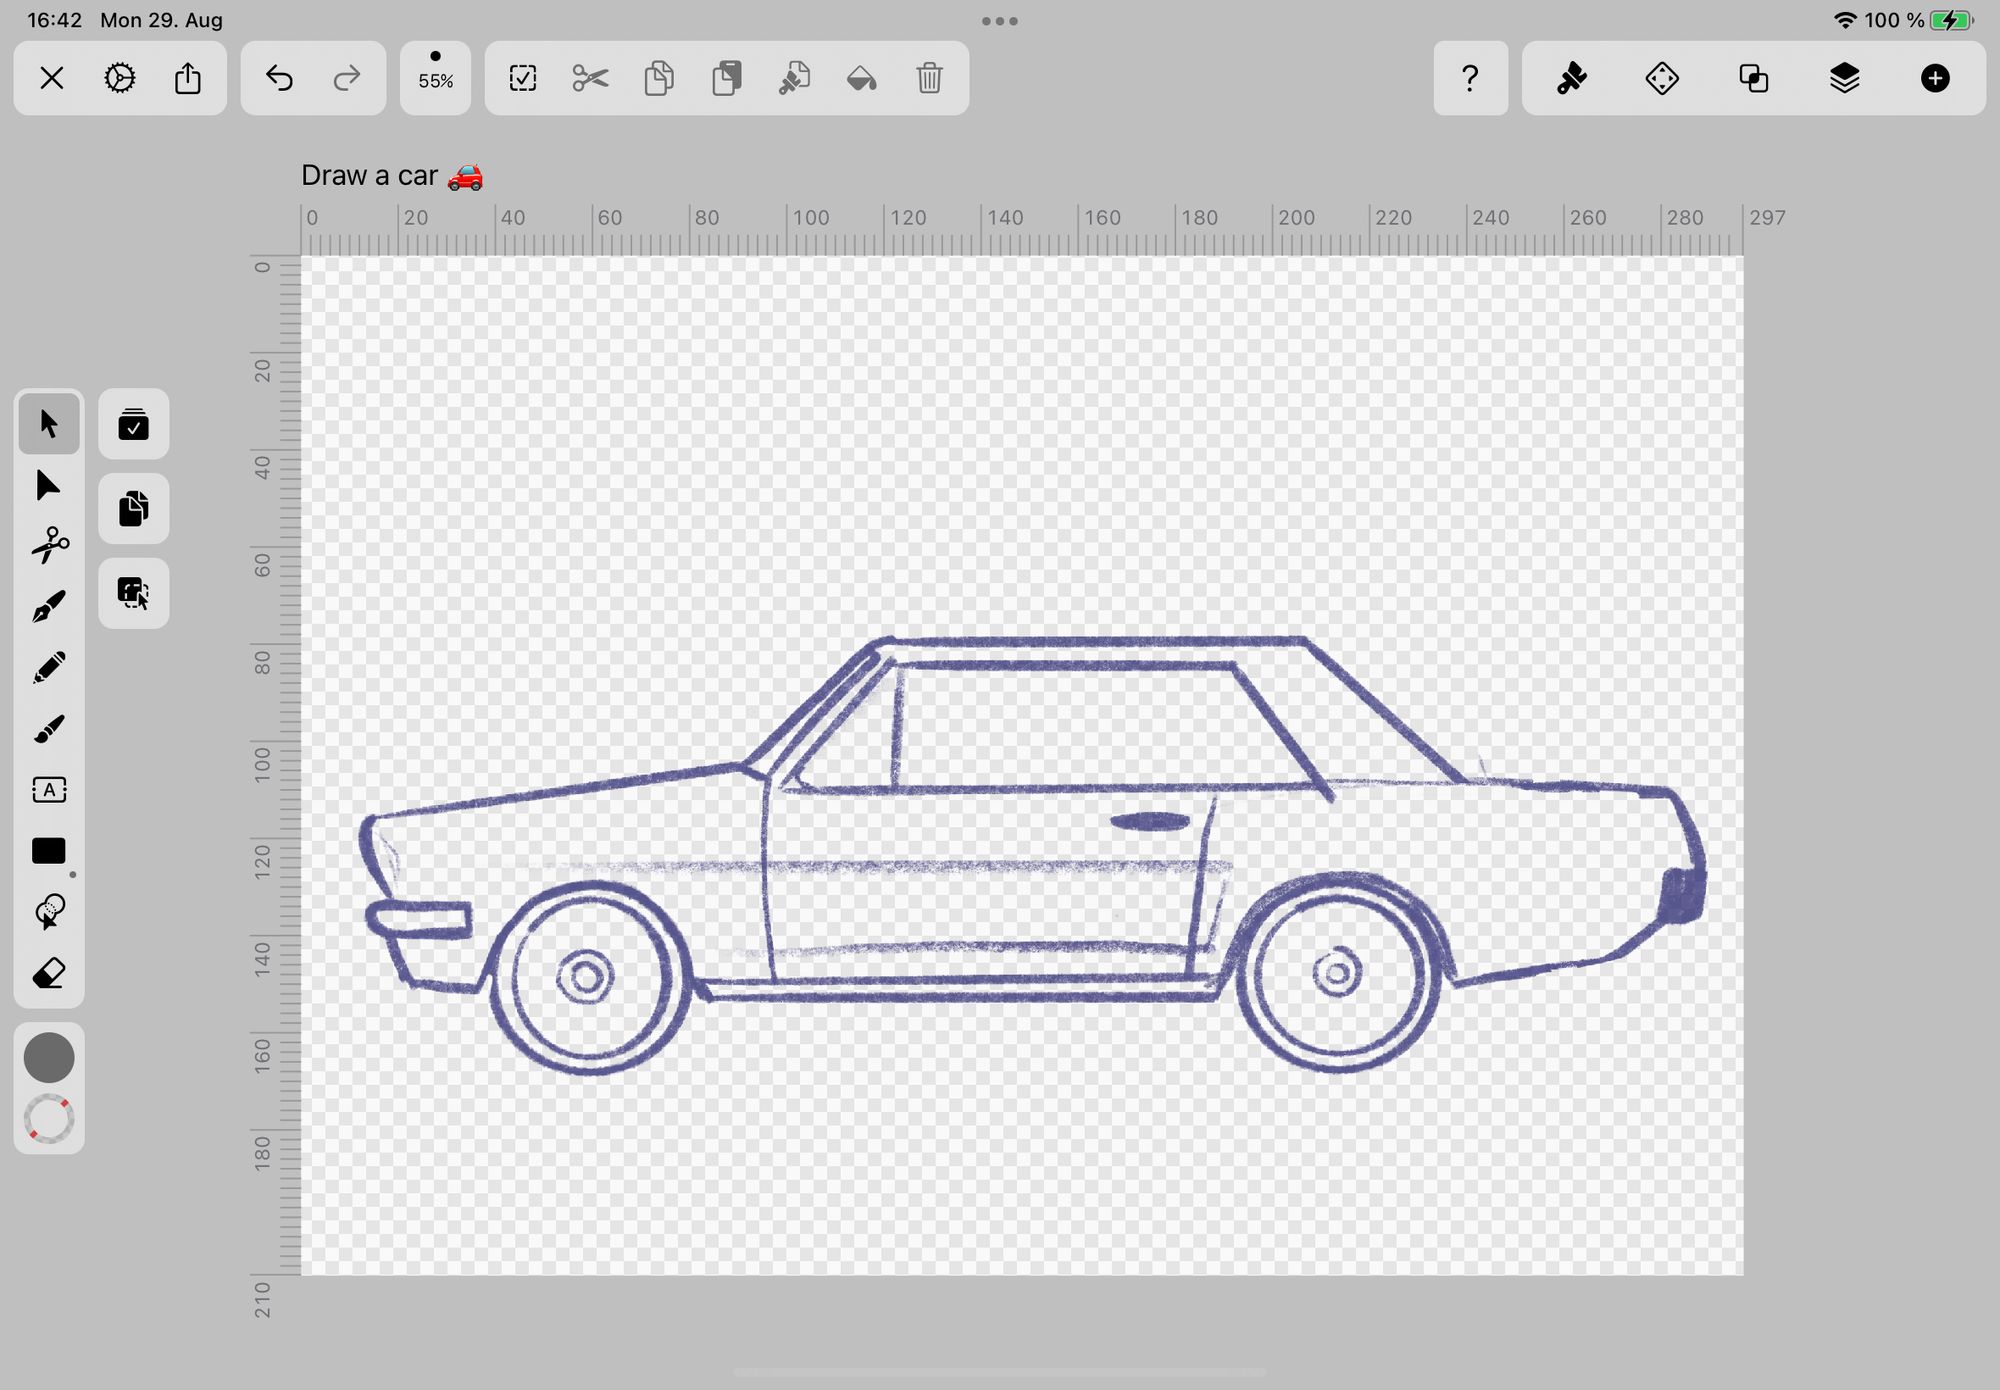
Import your sketch into Curve and decrease the Opacity slightly. Call this layer “Background” and lock the layer so that you don’t accidentally select it while drawing.
Draw the car wheels
Let’s begin with the most complex part of the car: the wheels. These are made up of a bunch of basic shapes and lines. We’ll make one complete front wheel and then duplicate it for the back wheel.
Tap the Shape Tool in the Toolbar on the left and select the Circle Shape. Toggle the Stroke off and Fill on, and set the Fill Color to Blue Black #02081A.
Draw a perfect circle by holding down a finger on the screen while dragging with your Apple Pencil. This is the car tire.
To make the white line on the tire, toggle Fill off and Stroke on and set the Stroke Color to Cream #FDFAE3. Draw a perfect circle inside the tire.
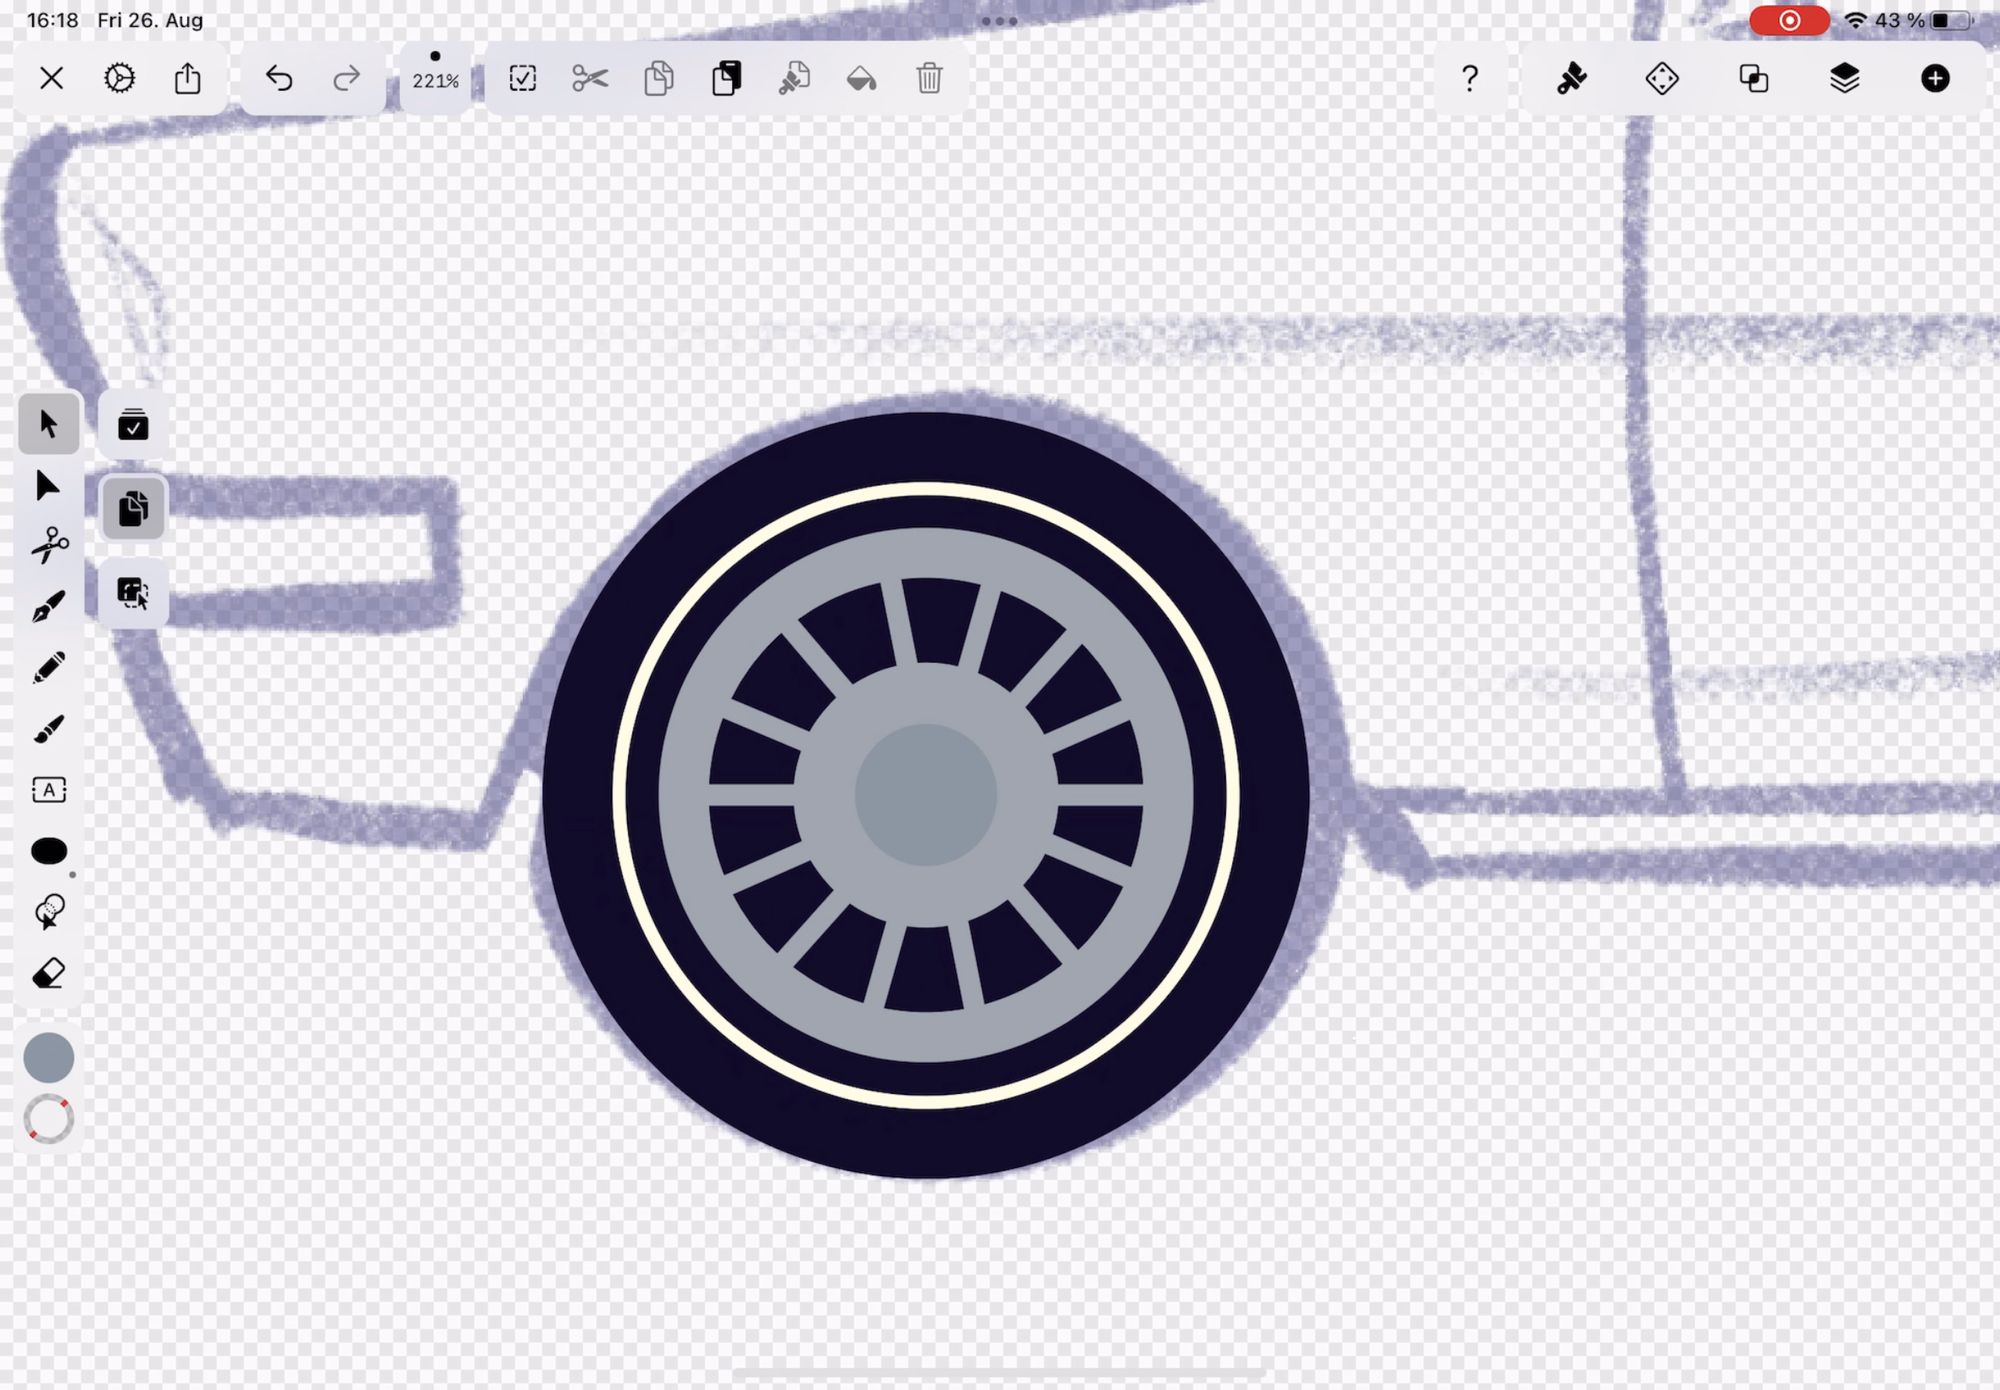
Use Light Gray #9DA2AC for the wheel rim and spokes, and Dark Gray #6A6A6A for the center cap.
Ready to learn something new?
Check out our list of great design courses online.
Depending on the car model you chose for this tutorial, the wheels may look a bit different. Play around with different shapes and lines until you’ve recreated a simplified version of the wheel from your reference image.
Watch the video below to see how we created the entire wheel before selecting Duplicate Mode and duplicating it for the back wheel.
Make the car body shape
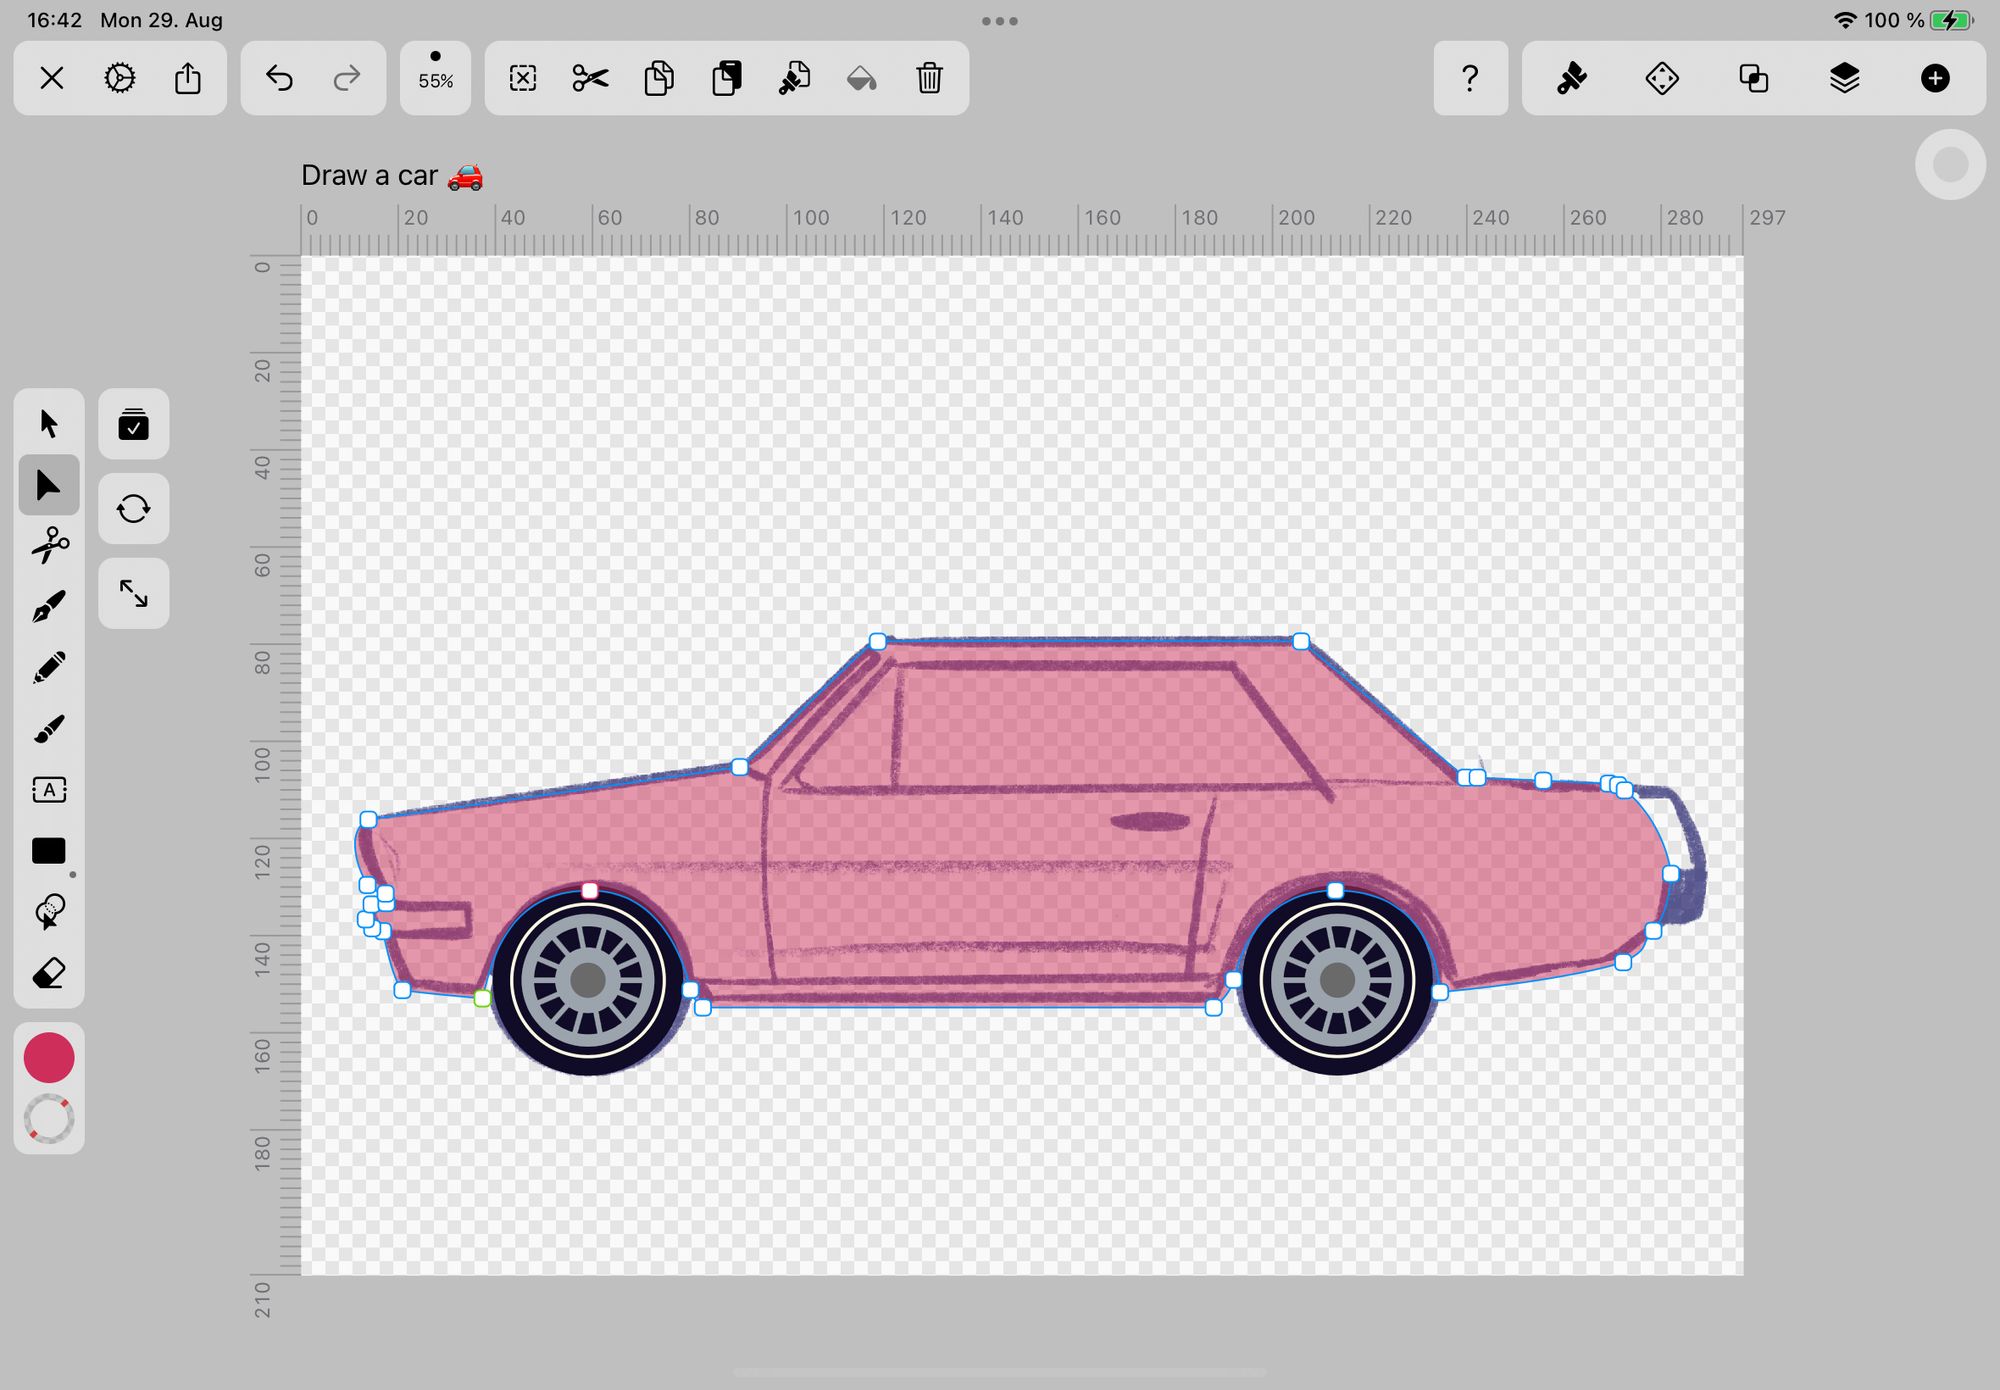
The wheels are ready; now, we can draw the car's body shape.
Select the Pen Tool and toggle Stroke off and Fill on. Set the Fill Color to Crimson #CF2F5C and follow the curved lines of your sketch to trace the car's shape.
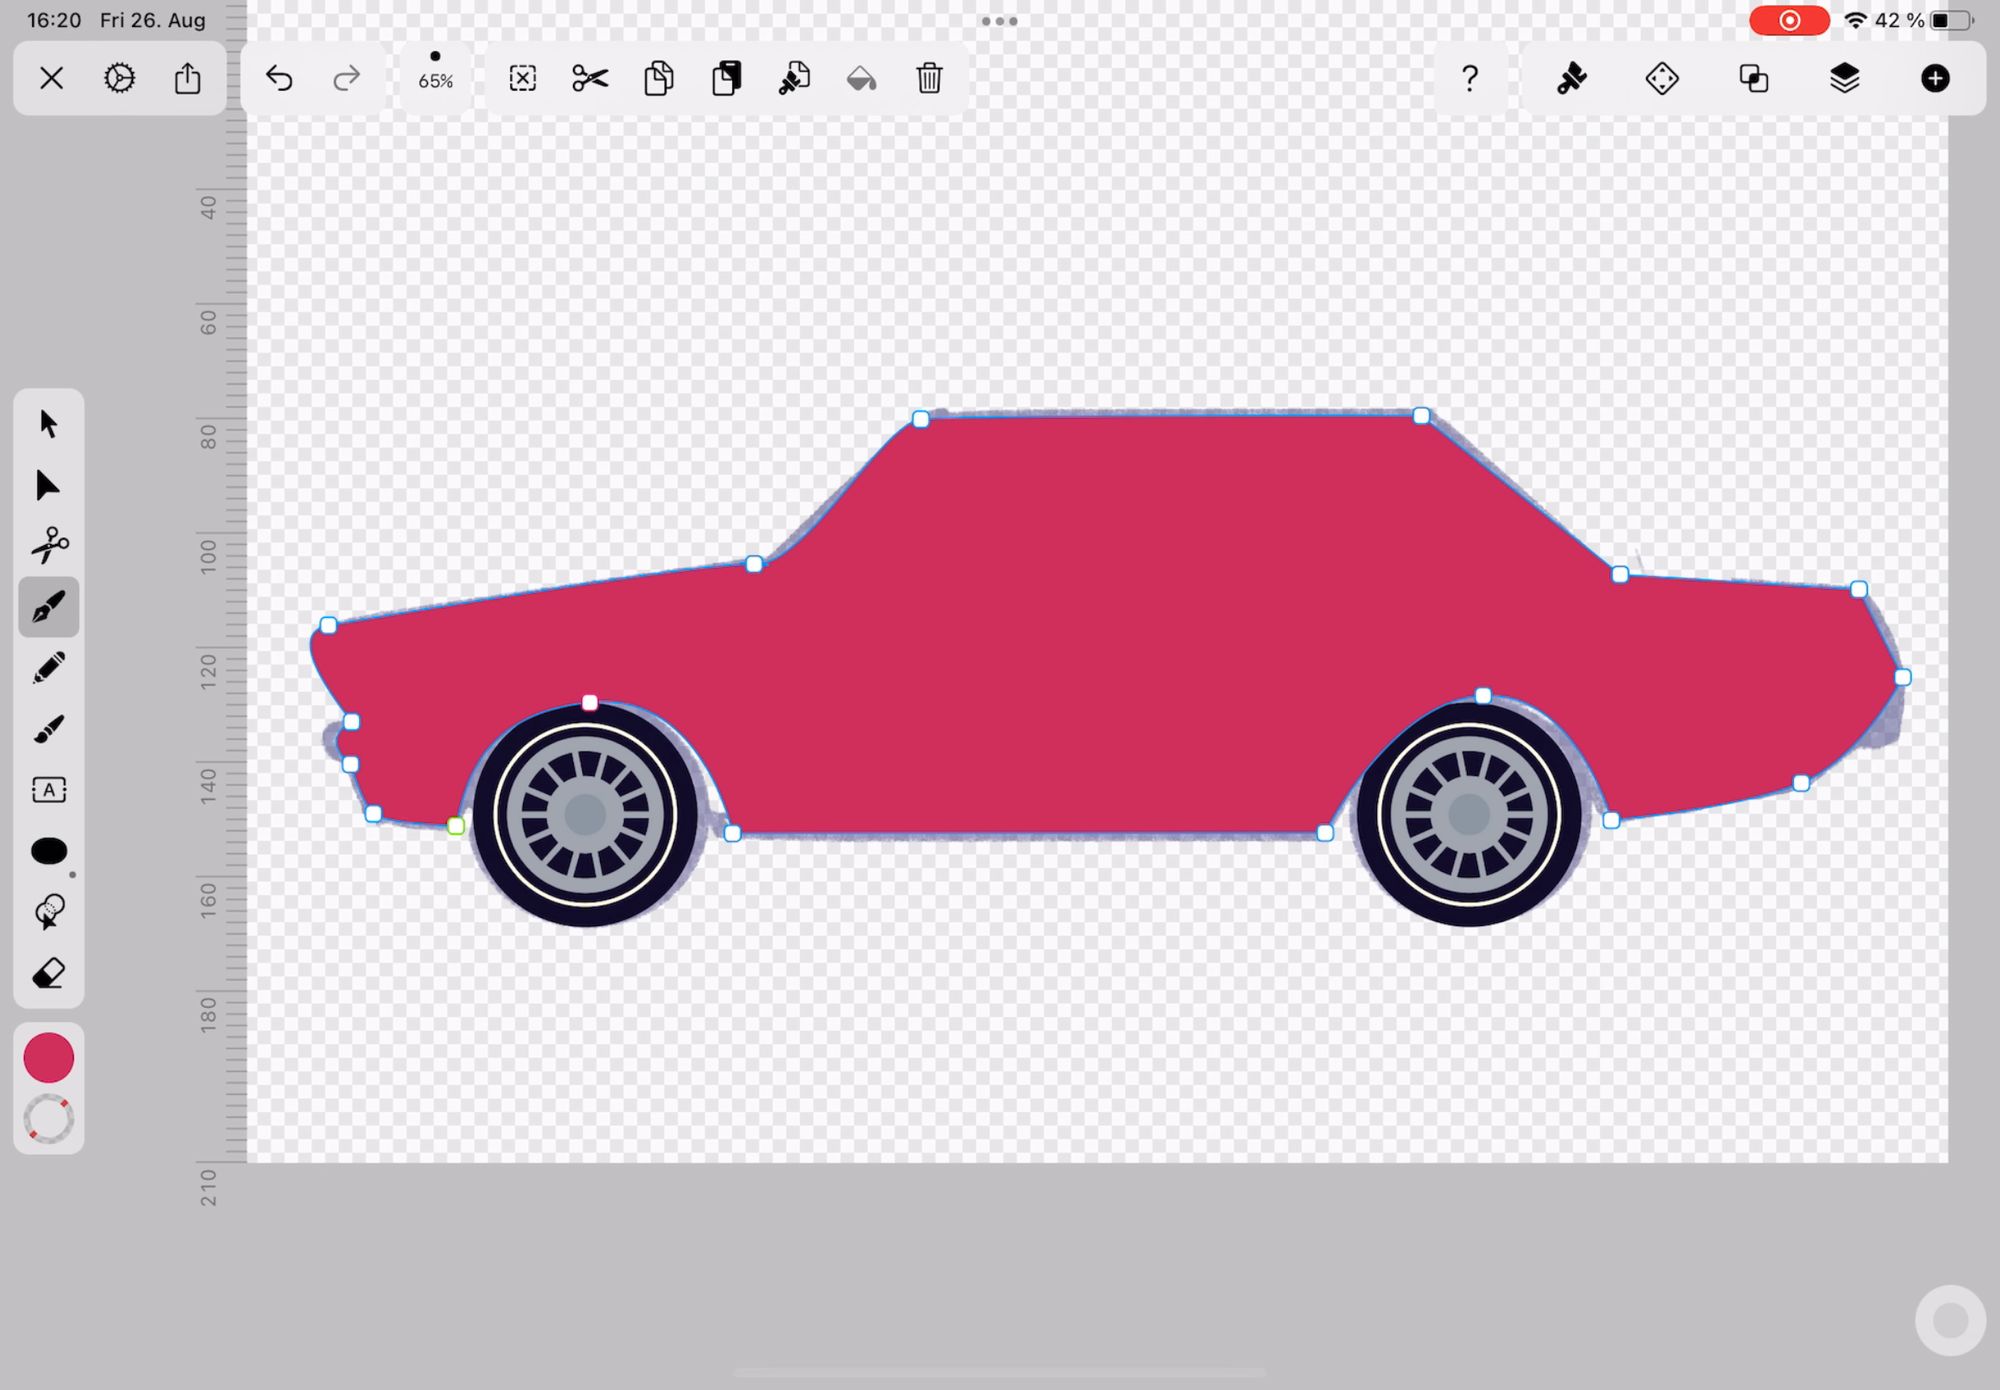
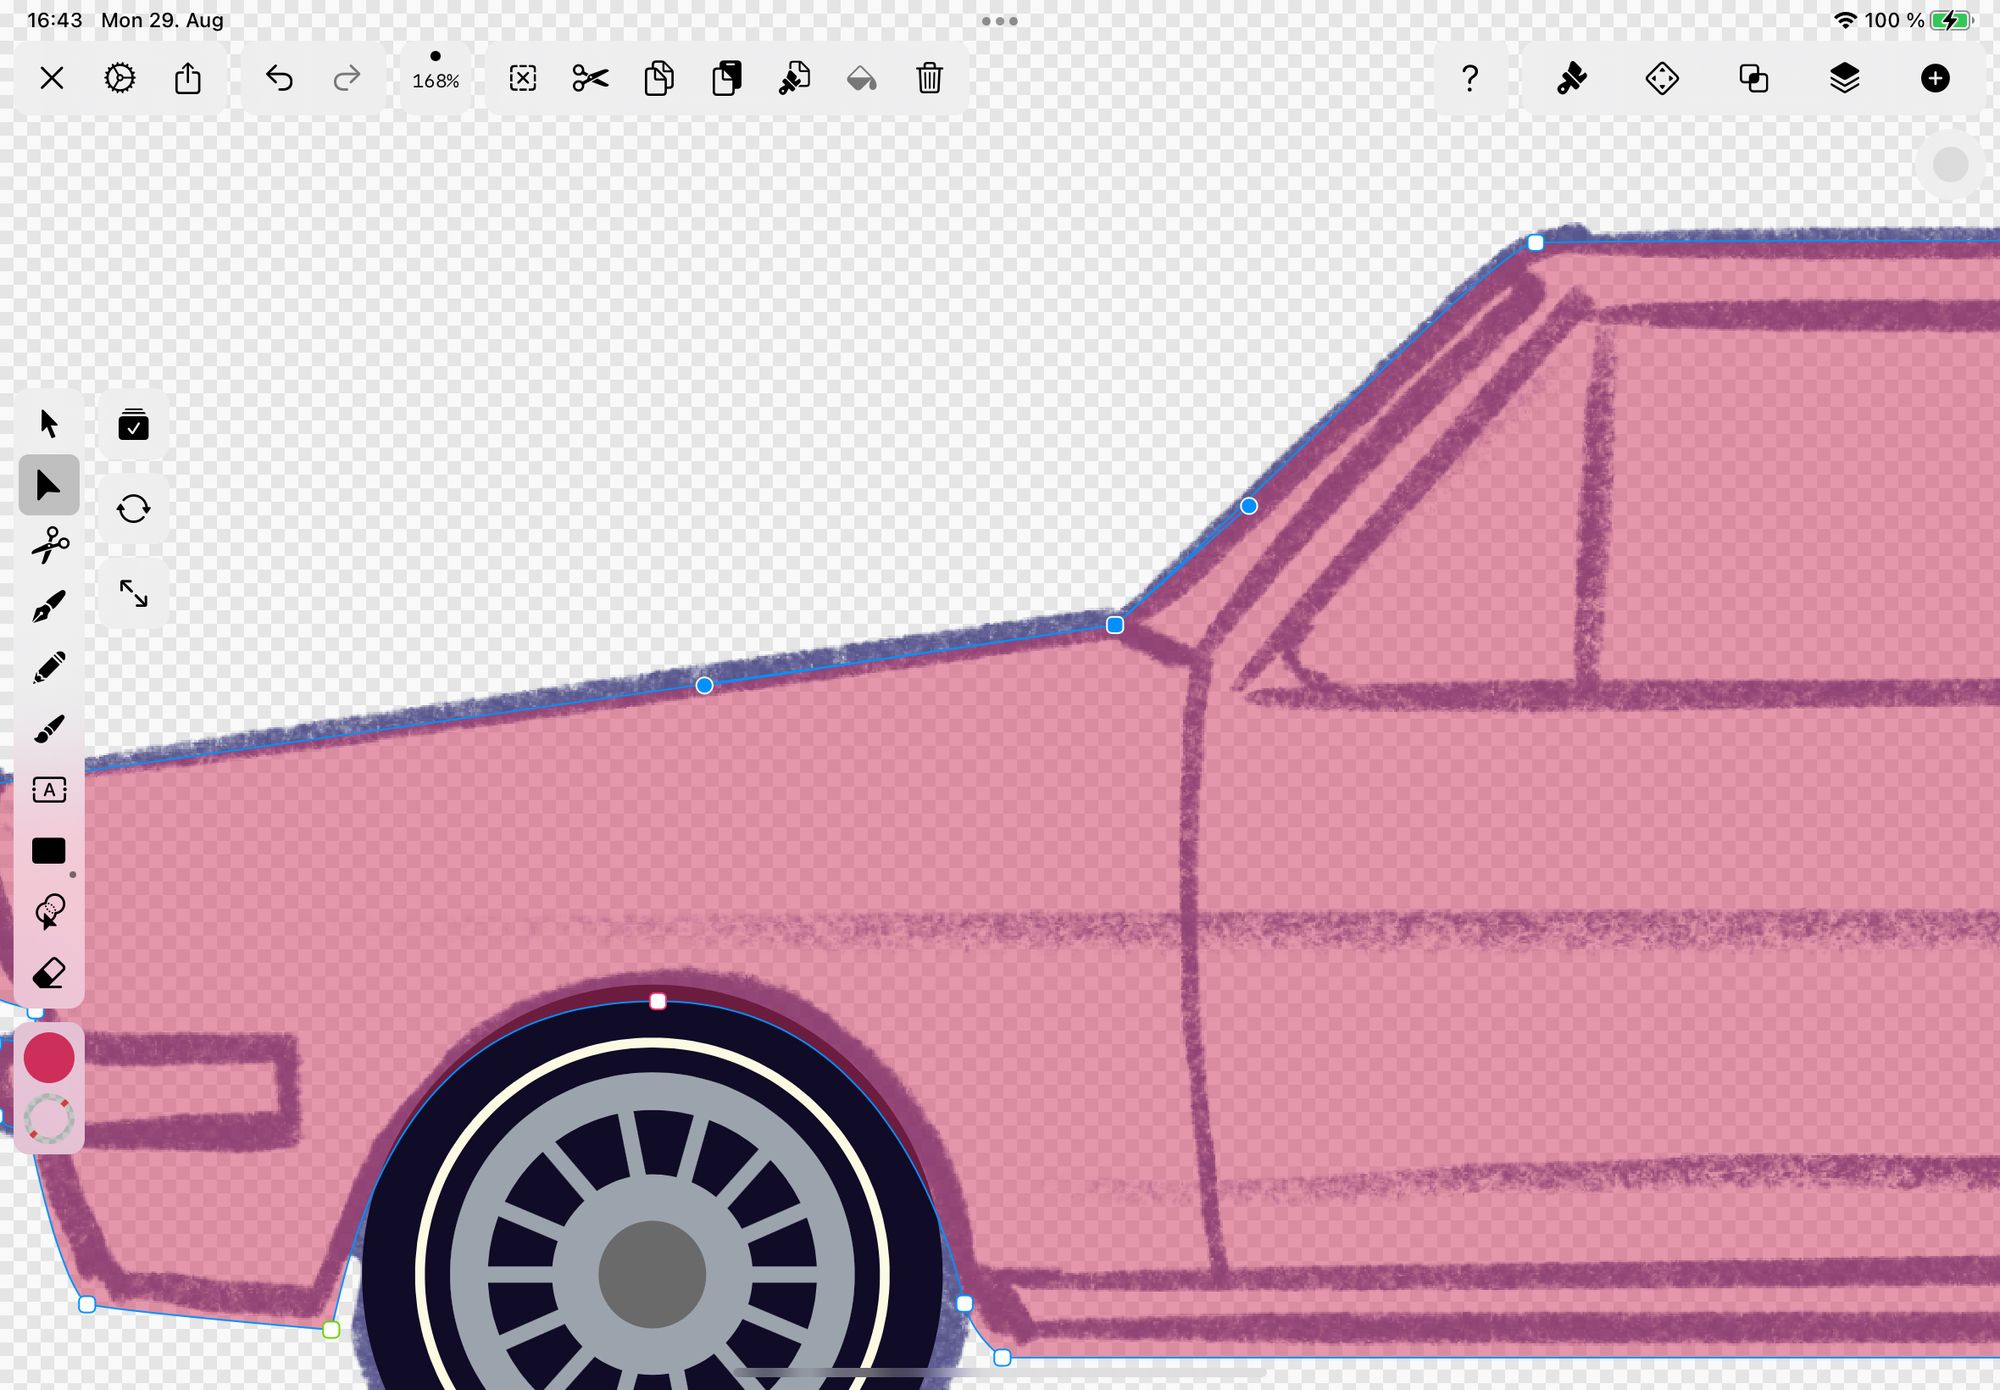
Now that you have the rough outline select the Node Tool from the Toolbar and fine-tune any details until you’re completely satisfied with the aerodynamic shape of your car body. Take care to make both wheel arches look the same.
Draw the car windows, bumpers, and side skirt
Select the Pen Tool and set the Fill Color to a light blue shade #BDCDDE. Trace the car windows.
Once you’re done, switch to the Node Tool again to refine your window shapes.
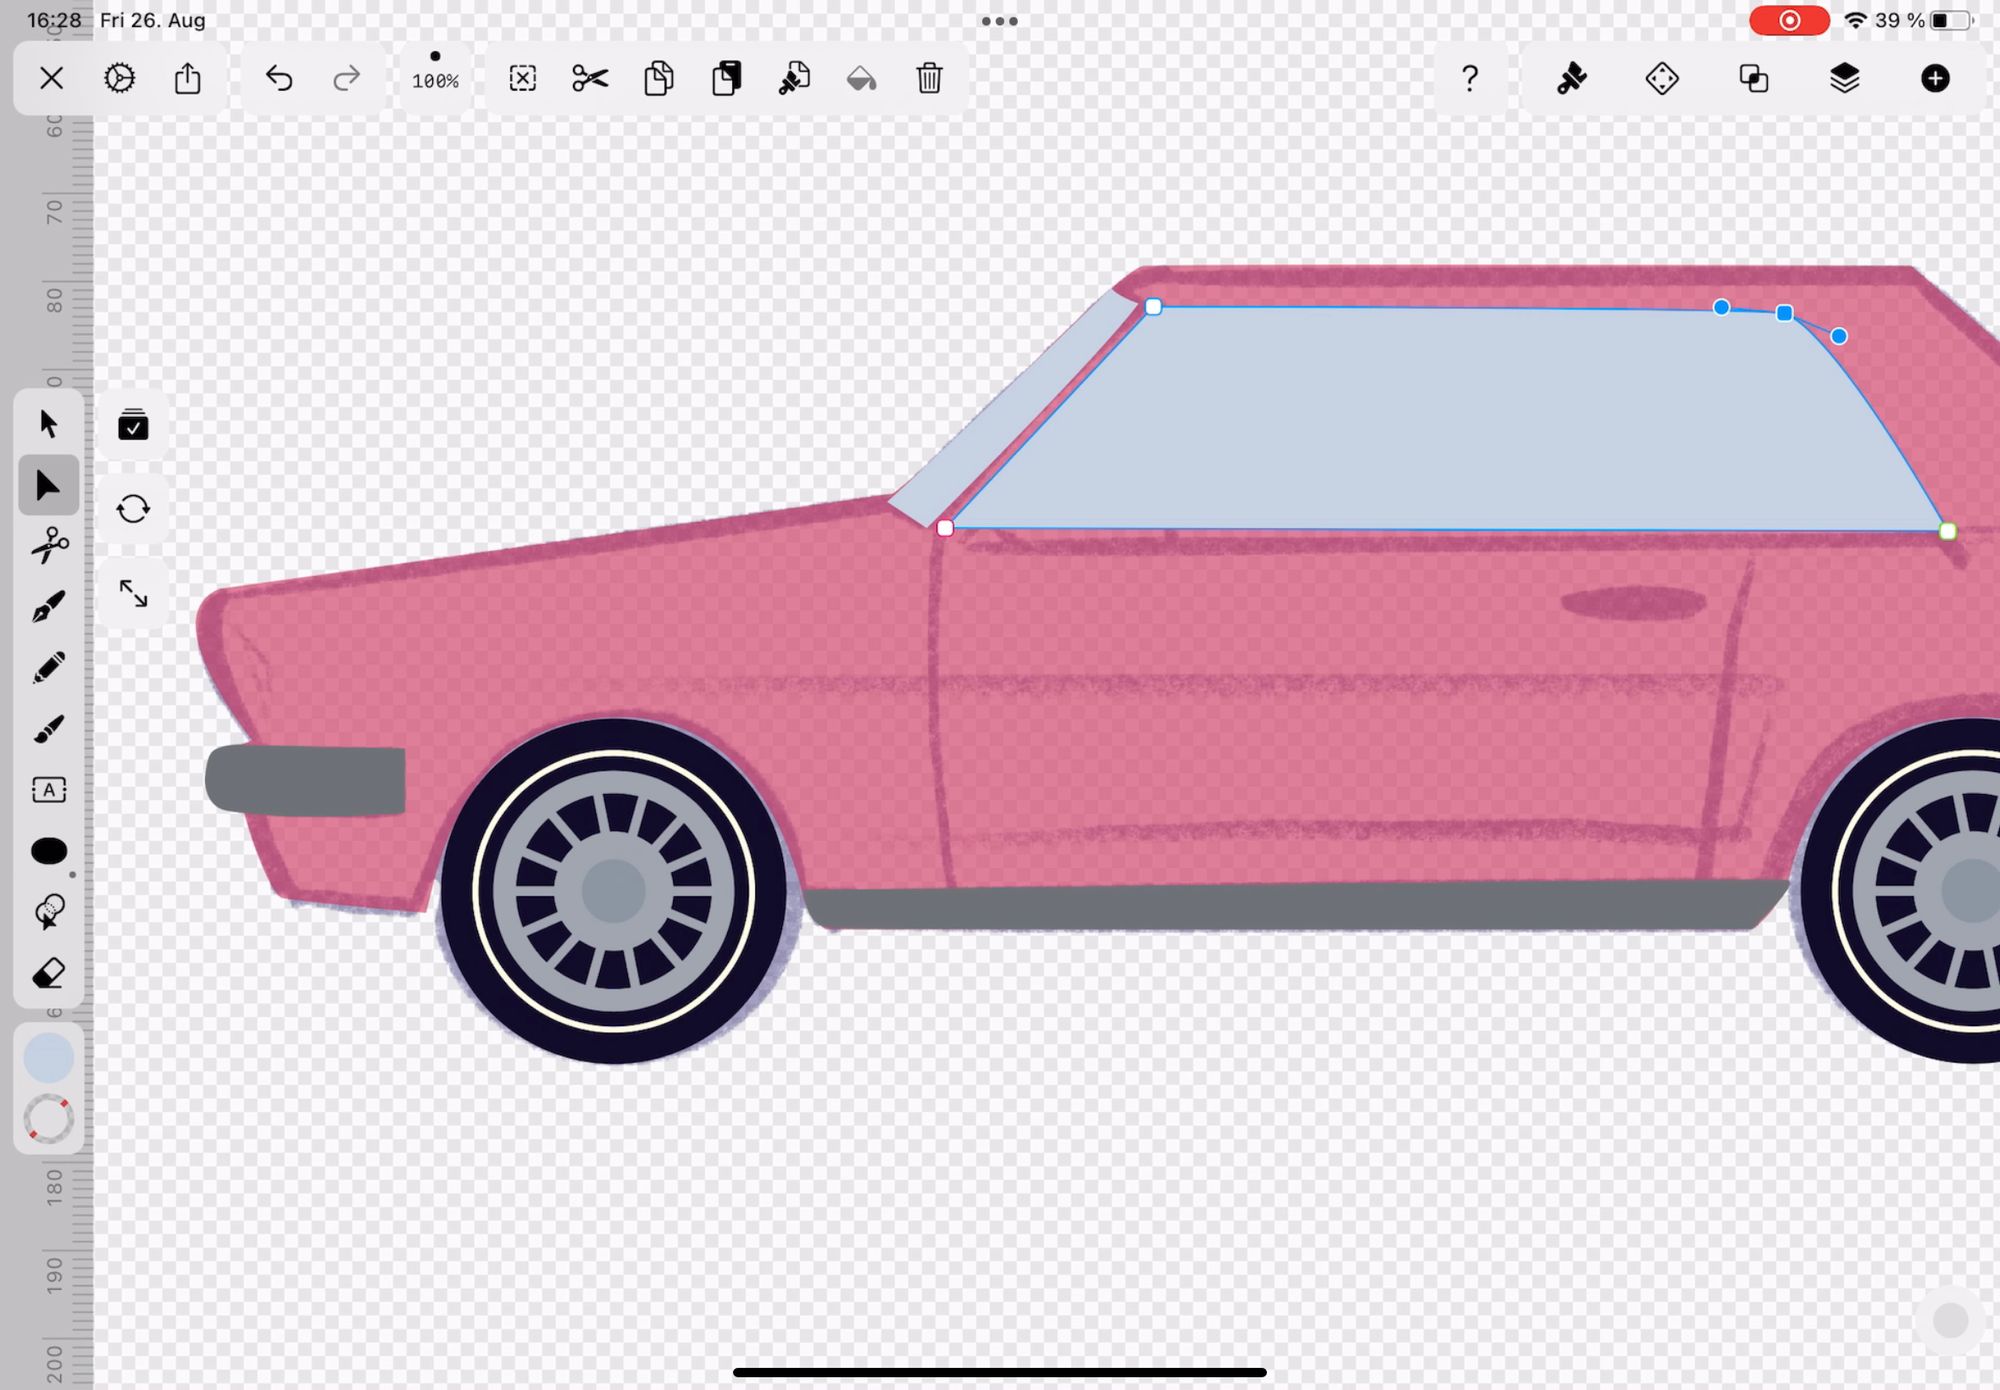
As you can see, we’ve also started adding the car’s front and rear bumpers and side skirts using the Pen tool and dark gray #6A6A6A as the Fill Color.
Add the shadows and highlights
We have a complete car shape in place, so we can now draw the finer details.
What makes cars so appealing to look at? Yes, of course, the way light reflects and refracts off the shiny curves!
To create facets and a sense of depth, we’re using darker shades to add shadows and lighter tints to add highlights.
Look at your reference image and identify all the areas that appear darker.
Select the Pen Tool, set the Fill Color to dark red #941134, and create the shaded areas on the car.
To create highlights on the car body, select the medium pink #DD6585 color in your palette and continue drawing with the Pen Tool.
Draw the highlights on all the window frames using the baby blue #C2E1FF Fill Color.
Watch the video below to see how we drew the window frames and car body highlights.
Draw the key lock and car door handle
More detail! Now we’re drawing the car door handle and key lock. Our Mustang is a 2-door, so we’re only drawing one door handle.
Choose the Shape Tool, toggle Stroke off, and Fill on. Set the Fill Color to light gray #9DA2AC and use the Circle shape to draw a perfect circle for the key lock.
For the door handle, draw three oval shapes using the same Fill Color and Circle Shape Tool.
Choose the Selection Tool and select one of the small oval shapes. Toggle Stroke on and set the Stroke color to dark gray #6A6A6A. Set the Stroke Width to 0.3 pt. Do the same for the other small oval.
Ready to create brand assets that pack a punch?
Visit our Academy for free marketing design courses.
Switch to the Pen Tool and use the dark gray fill Color to add shading to the door handle's bottom.
Use the Selection Tool to select the large ellipse (oval) and then choose the Style Tab in the Inspector Menu on the right. Scroll down and toggle Shadow on, then tap on the arrow next to it for more options.
Tap on the Shadow Color Well and set the color to dark gray. Play around with the Offset and Blur settings until you’re happy with the look of your Drop Shadow.
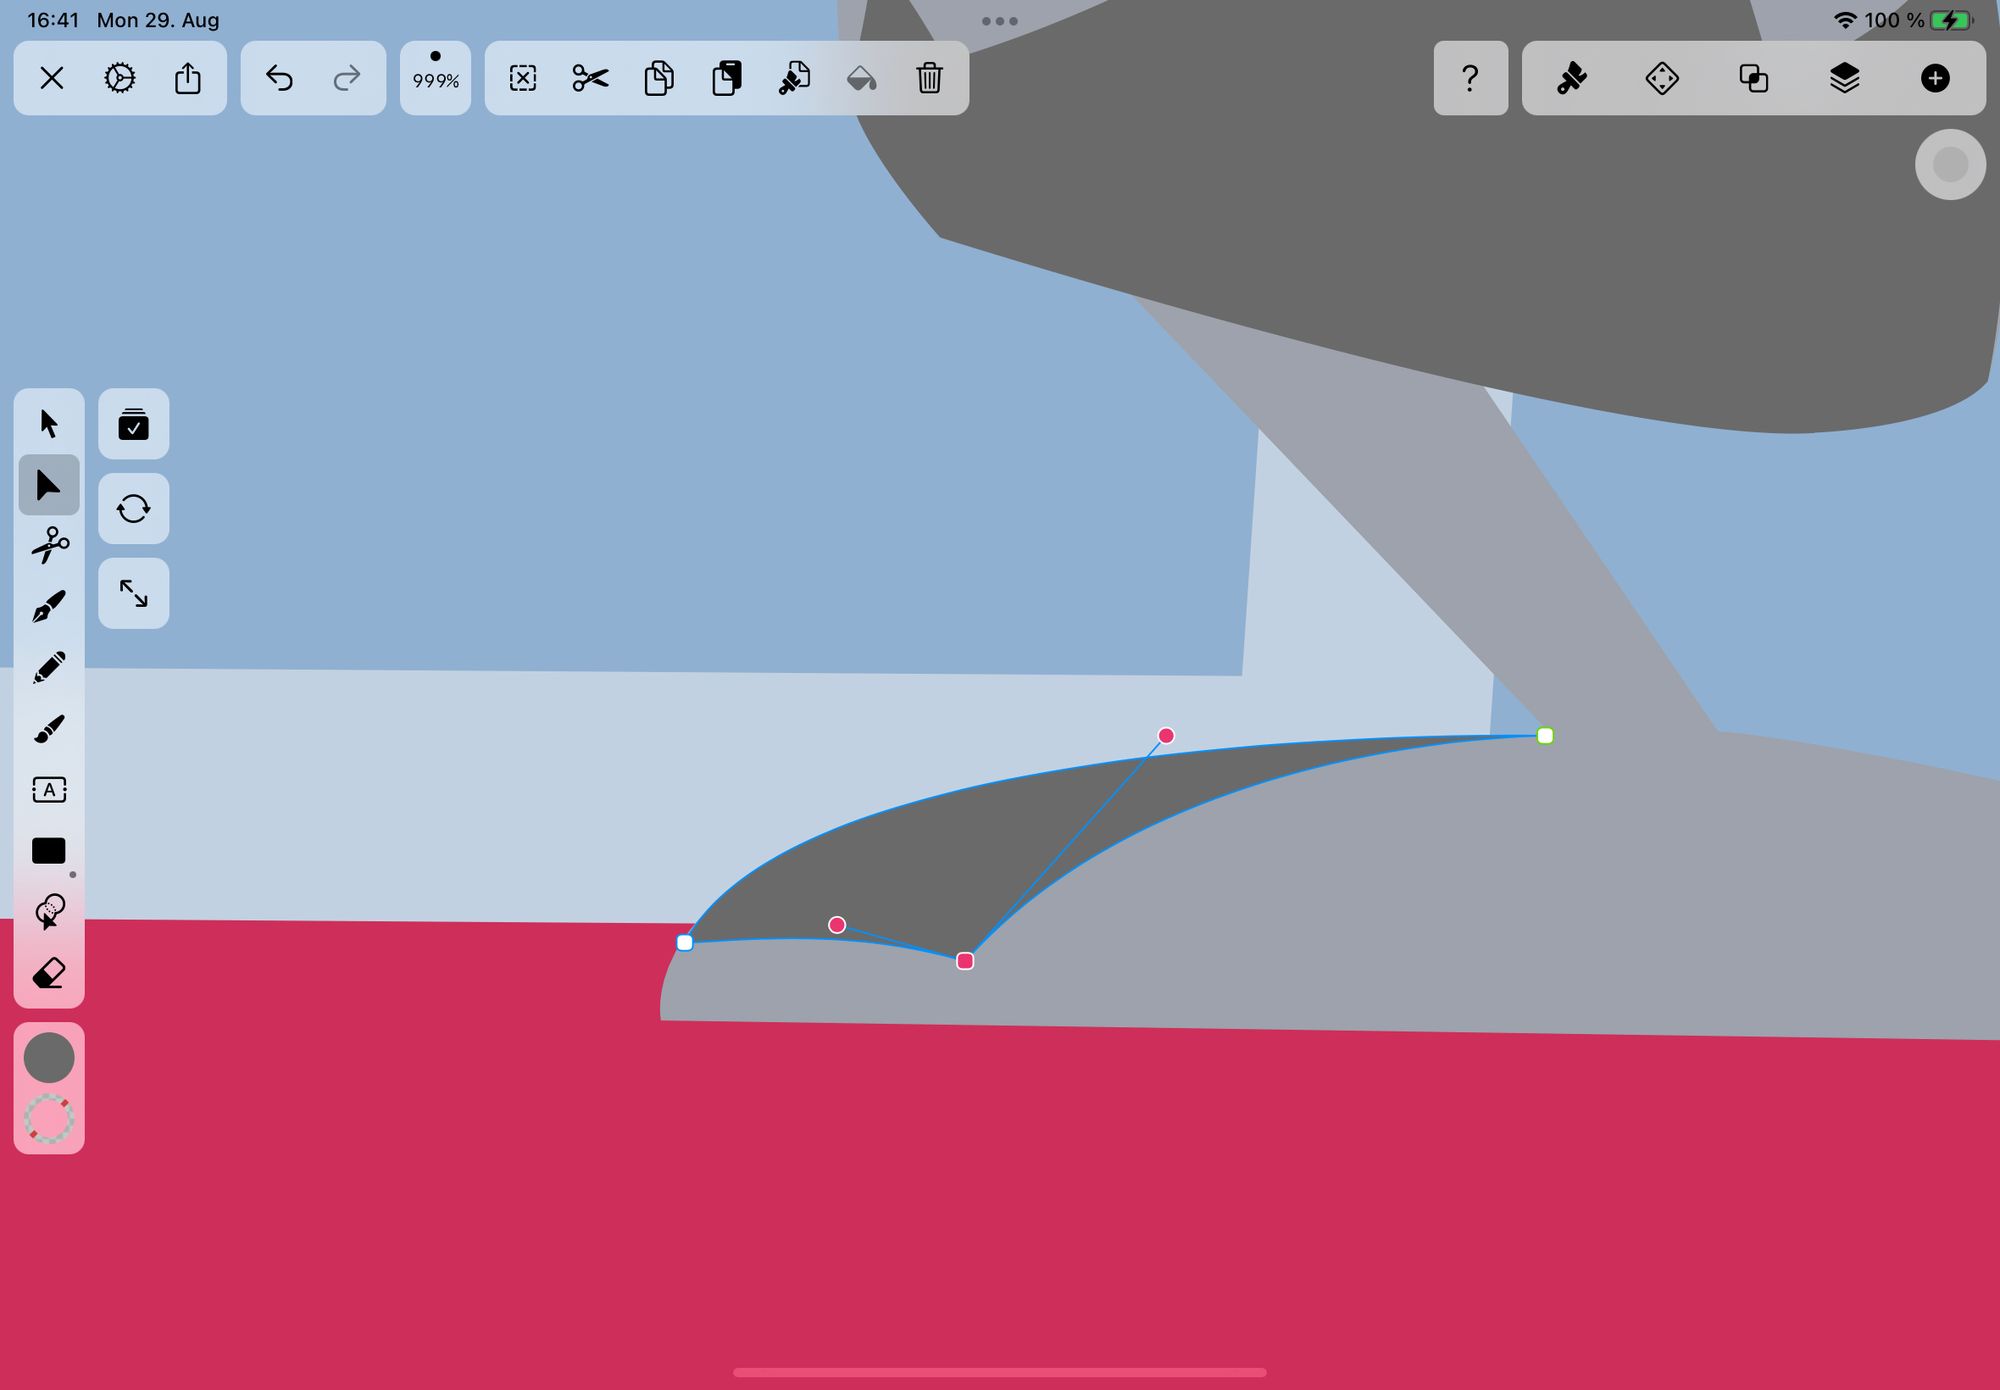
Draw the side mirror
To draw the side mirror with the Pen Tool, change the Fill Color to light gray #9DA2AC and create the mirror’s shapes. Again, use the Node Tool to refine your shapes until you’re happy with them.
Switch to the Selection Tool in the Toolbar on the left and choose Multi Select Mode. Select all your mirror’s shapes, then choose the Shape Builder Tool in the Toolbar on the left.
Activate Merge Mode (usually activated by default) and then drag your Apple Pencil over the areas of the selected shapes you want to merge. Switch to the Selection Tool again to see the new merged body that has been created.
[Pro Tip: Learn more about our new Shape Builder Tool and how you can use it in Merge or Erase Modes to create dynamic new shapes!]
Use the Node Tool to refine your shape and get the angles just right. You can tap multiple Nodes to keep the mirror shape the same while adjusting the angle of the mirror’s arm.
Switch to the Pen Tool and choose dark gray as the Fill Color. Draw the shading on your side mirror.
Draw the window reflections
Looking good! Let’s add a flash of light reflecting off the window.
Choose the Pen Tool and set the Fill Color to white #FFFFFF. Draw a diagonal line from the top to the bottom of the window. Use the Node Tool to adjust the shape’s width and angle.
Choose the Selection Tool and select the shape you just drew. Tap on the Selection Tool’s Duplicate Mode icon and duplicate the shape.
Make the second shape slightly thinner and place it next to the original shape. Leave a slight gap between the two shapes.
Now, select both shapes and tap on the Fill Color icon in the Toolbar on the left. Lower the Opacity from 100% to about 70%.
Adjust the colors and add gradients
You’re almost done with your car drawing! For our next and final step, we’re adding color gradients to the wheels and car body to give it more three-dimensionality.
:quality(75))
:quality(75))
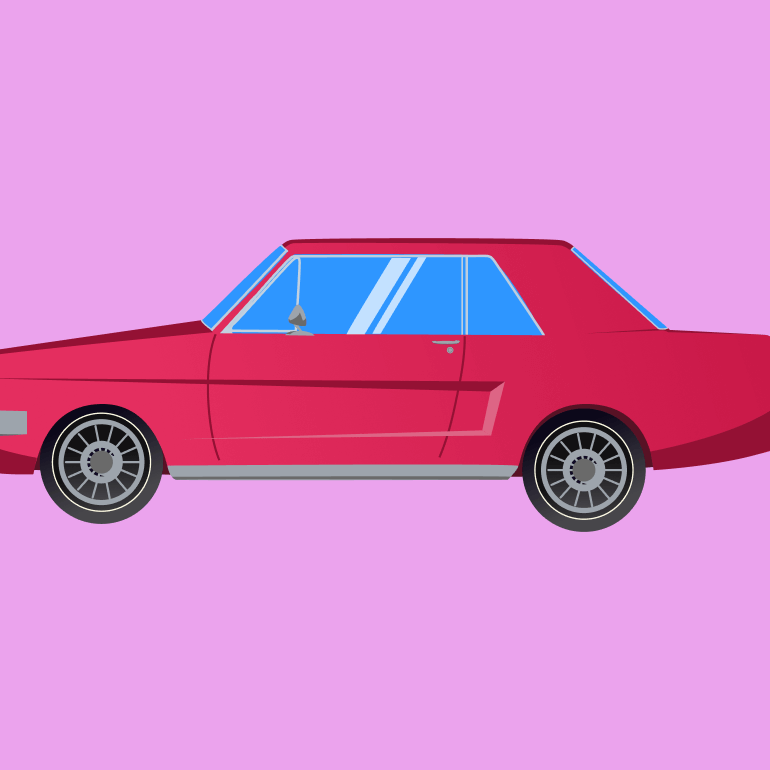
We’re also going to change the color of the windows to give them an extra pop.
First, tap the Selection tool in the Toolbar and select your car's body shape. Tap on the Fill Color icon in the Toolbar and switch from Solid to Gradient.
Choose the Linear Gradient setting and make the color on the left #FF4375 and the color on the right #C51645.
Use the Selection Tool to select your tires (the outermost Blue Black circles of your wheels) and switch the Fill from Solid to Gradient. Set the gradient colors to #474641 and #02081A.
Choose the Linear Gradient setting, but change the direction of the gradient so that the darker color is at the top and the lighter color is at the bottom.
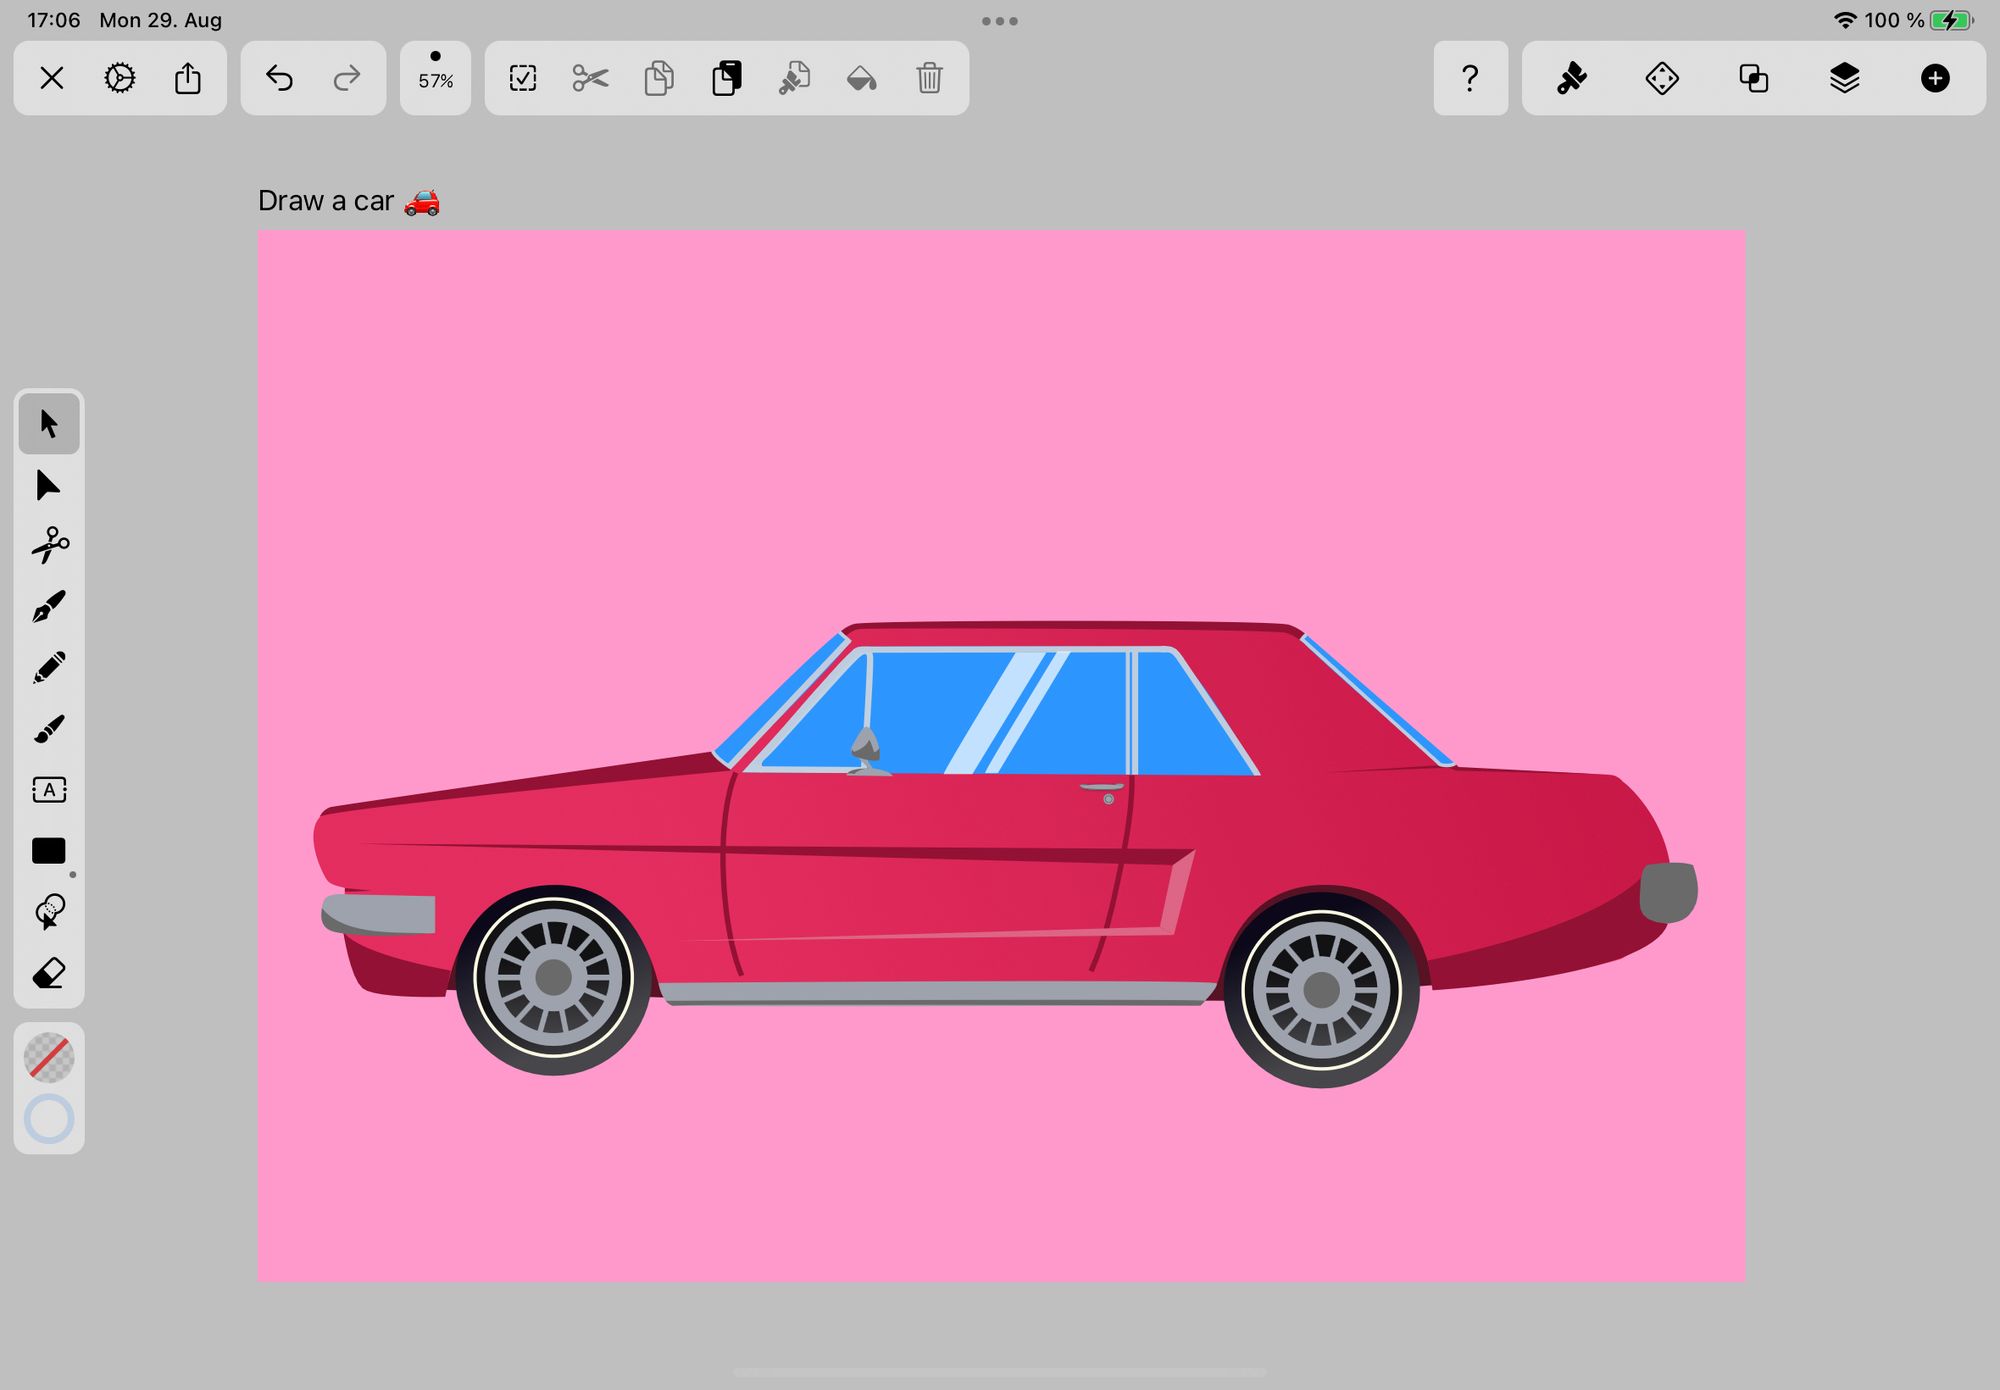
The last step is to select the windows with the Selection Tool and change the Fill Color to blue #2E96FF – that looks much better, right?
You’ve just completed your awesome car drawing! We’d love it if you would like to share your masterpiece with us on social media and in the Linearity Community.
Jumpstart
your ideas with
Linearity Curve
Take your designs to the next level.
Share this!
Sharné McDonald
Sharné is a contributing writer to the Linearity Blog. She has 10+ years' experience in graphic design and marketing and holds a Master's degree in Art Education.