Line 6 POD® HD300 Edit Pilot's Guide (Rev C, v.103) - Musifex
Line 6 POD® HD300 Edit Pilot's Guide (Rev C, v.103) - Musifex
Line 6 POD® HD300 Edit Pilot's Guide (Rev C, v.103) - Musifex

Create successful ePaper yourself
Turn your PDF publications into a flip-book with our unique Google optimized e-Paper software.
®<br />
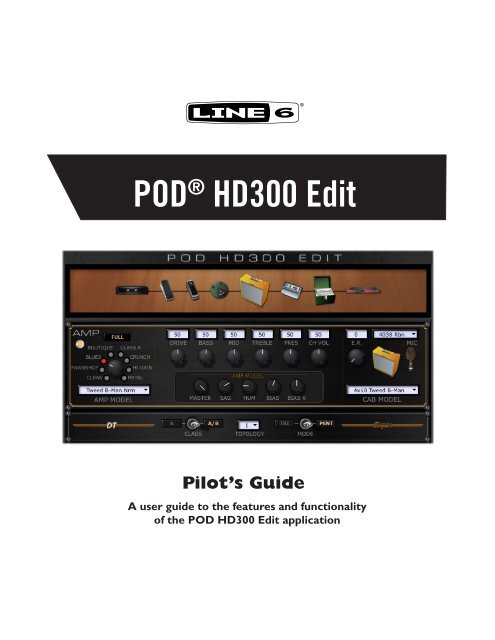
POD ® <strong>HD300</strong> <strong>Edit</strong><br />
Pilot’s <strong>Guide</strong><br />
A user guide to the features and functionality<br />
of the POD <strong>HD300</strong> <strong>Edit</strong> application
POD <strong>HD300</strong> <strong>Edit</strong>: Table of Contents<br />
Table of Contents<br />
Graphical User Interface..........................................................................1•1<br />
What’s in it for Me ........................................................................................................ 1•1<br />
The Main GUI................................................................................................................. 1•1<br />
Save Panel........................................................................................................................ 1•2<br />
Presets Panel.................................................................................................................... 1•2<br />
Signal Flow Panel............................................................................................................ 1•4<br />
Amp & FX Panels............................................................................................................ 1•4<br />
Menu Commands.......................................................................................................... 1•10<br />
Workflow...................................................................................................2•1<br />
Overview.......................................................................................................................... 2•1<br />
Computer Connectivity.................................................................................................. 2•1<br />
Saving and Opening POD <strong>HD300</strong> Preset Files............................................................... 2•2<br />
POD <strong>HD300</strong> - Manual Mode & Quick Loop................................................................. 2•3<br />
POD <strong>HD300</strong> <strong>Edit</strong> - Offline Mode................................................................................... 2•3<br />
Pedal Control................................................................................................................... 2•4<br />
<strong>Line</strong> 6 Monkey & Additional Resources...............................................3•1<br />
Using <strong>Line</strong> 6 Monkey...................................................................................................... 3•1<br />
Additional Resources....................................................................................................... 3•2<br />
<strong>Line</strong> 6, POD, DT50, CustomTone, L6 LINK and <strong>Line</strong> 6 Monkey are trademarks of <strong>Line</strong> 6, Inc. All other<br />
product names, trademarks, and artists’ names are the property of their respective owners, which are in no way<br />
associated or affiliated with <strong>Line</strong> 6.<br />
Copyright © 2011 <strong>Line</strong> 6, Inc.<br />
ii
POD <strong>HD300</strong> <strong>Edit</strong>: GUI<br />
Graphical User Interface<br />
Welcome to the <strong>POD®</strong> <strong>HD300</strong> <strong>Edit</strong> Pilot’s <strong>Guide</strong>. This guide contains details of the <strong>POD®</strong> <strong>HD300</strong><br />
<strong>Edit</strong> application’s features and functionality. All behaviors are the same on Mac® or Windows®,<br />
unless otherwise noted.<br />
This <strong>Guide</strong> covers POD <strong>HD300</strong> <strong>Edit</strong> software version 1.03 (or later). To check for current software<br />
and hardware updates for your device, see “<strong>Line</strong> 6 Monkey & Additional Resources” on page 3•1.<br />
What’s in it for Me<br />
POD <strong>HD300</strong> <strong>Edit</strong> is a simple, but powerful, Preset editor/librarian application. It allows you to easily<br />
see and tweak all the individual Amp & FX models’ parameters within one attractive Graphical User<br />
Interface, create and customize your own Tone Presets, backup and store an unlimited number of<br />
Preset files on your computer, and send them to your POD <strong>HD300</strong> device’s User Bank locations, in<br />
whatever Channel order you prefer. You can also tap into the <strong>Line</strong> 6 CustomTone site where you can<br />
share your POD <strong>HD300</strong> Tones and download from the huge library of artist & user Presets!<br />
The Main GUI<br />
In software terms, the main window of the POD <strong>HD300</strong> <strong>Edit</strong> application is referred to as the Graphical<br />
User Interface (or “GUI”). Here we’ve laid out descriptions for all the important things you need to<br />
know as you start clicking around in there.<br />
Save Panel<br />
Signal Flow Panel<br />
Amp & DT50 Panels<br />
Presets Panel<br />
1•1<br />
Tempo Panel<br />
FX Panels
POD <strong>HD300</strong> <strong>Edit</strong>: GUI<br />
Save Panel<br />
The buttons within the Save Panel allow you to “Send” and “Receive” Tone Preset data between the<br />
application and the POD <strong>HD300</strong> device’s internal memory. Using the Send buttons overwrites the<br />
existing Preset data in your device’s internal memory, effectively Saving the transferred Preset(s) to<br />
your POD <strong>HD300</strong>.<br />
The Save Panel<br />
• Send Selected button - Transfers the currently selected Preset (or multiple selected Presets*)<br />
from the application to the POD <strong>HD300</strong>, overwriting the respective Presets within the device’s<br />
internal memory.<br />
*Note that the selected (highlighted) Preset may not be the one currently loaded in the editor. The SEND<br />
SELECTED and RECEIVE SELECTED buttons act only on the selected Preset(s). To select multiple<br />
Presets, hold Shift or Ctrl (Windows®), Cmd (Mac®) while clicking within the application’s Presets Panel.<br />
• Send All button - Transfers all Presets (regardless of any selected Presets) from the application<br />
to the device, overwriting all Presets within the device’s User Bank locations.<br />
• Receive Selected button - Transfers the currently selected Preset(s) from the device to the<br />
application.<br />
• Receive All button - Transfers all Presets from the device to the application.<br />
Note that the editor always “receives” the device’s saved Preset settings, even if the selected Preset(s) are<br />
currently in an edited (unsaved) state.<br />
Presets Panel<br />
The Presets Panel lists Channel locations (01A through 32D) that correspond to the respective<br />
numbered User Bank Channel locations within your POD <strong>HD300</strong> device’s internal memory.<br />
Channel number<br />
Currently loaded Preset<br />
(indicated by arrow at left)<br />
Selected Preset<br />
(highlighted)<br />
The Presets Panel<br />
• Load a Preset - Double-click on any Preset to load its settings into the editor, or hit “Enter” on<br />
your computer keyboard to load the currently selected Preset.<br />
1•2
POD <strong>HD300</strong> <strong>Edit</strong>: GUI<br />
• Select a Preset - Click once on any Preset to “select” it. Note that this does not load the Preset in<br />
the editor, but rather allows you to perform actions on the Preset - such as to “Send” or “Receive”<br />
Presets (see “Save Panel” on page 1•2). It is also possible to select multiple Presets:<br />
• Press and hold your Shift key+click to select a contiguous number of Presets.<br />
• Press and hold your Cmd key+click (Mac®) or Ctrl key+click (Windows®) on the desired<br />
Presets to select a non-contiguous number of Presets.<br />
• “Insert” a Preset into a different Channel location - Click on a Preset and drag it up or down<br />
within the Presets Panel. Drop the Preset onto the desired Channel location to move the Preset<br />
there.<br />
Note: Since the “insert” action re-orders Presets in the application, all the moved Presets are now in<br />
different Channel locations as compared to the Channel contents within your device’s User Bank and,<br />
therefore, are marked as “unsaved” in the Presets Panel. Use the Send buttons in the Save Panel to save<br />
the new Channel settings to your POD <strong>HD300</strong>.<br />
• “Swap” the Preset settings between two Channel locations - Click on a Preset to select it, then<br />
press your Shift key and left-click and drag the Preset to the new desired Channel location.<br />
• Copy & Paste a Preset to a new Channel location - Click on a Preset to select it. Then press<br />
your Option key (on Mac®) or Ctrl key (on Windows®) and left-click and drag the Preset to<br />
the new desired Channel location.<br />
• Save a Preset to your computer - There are a few ways to save a copy of the currently loaded<br />
Preset to your computer:<br />
• Use the File menu’s “Save As” command (see page 2•2 for more about saving and opening<br />
Preset and Bundle files).<br />
• Drag a Preset (or multiple selected Presets) from the Presets Panel directly onto your<br />
Desktop, or into any folder on your computer.<br />
• To rename a Preset - Select the desired Preset, wait a second, then click again directly on the<br />
Preset name. You’ll see the Preset’s name become highlighted. Type in your own text and hit the<br />
Enter key.<br />
Note: Changing the name of the Preset in the Presets Panel is not reflected on your device until you “Save”<br />
the Preset to your device’s internal memory, via the Send functions in the Save Panel.<br />
• Unsaved Preset indicator - Whenever a Preset’s settings or name has been changed from the<br />
saved state of the Preset that resides in your device’s internal memory, its title appears in amber<br />
text and an asterisk (*) indicator appears to the right of the Preset name in the Presets Panel,<br />
as shown below. Use the Send buttons within the Save Panel to “Save” edited Presets to your<br />
device’s internal memory.<br />
1•3
POD <strong>HD300</strong> <strong>Edit</strong>: GUI<br />
Signal Flow Panel<br />
The Signal Flow Panel provides a handy visual reference of the enabled/disabled state and signal flow<br />
position of the Amp and all FX models for the loaded Preset.<br />
Enabled/Disabled State<br />
Gate Wah FX1 Amp Volume FX2 FX3 <strong>Rev</strong>erb<br />
The Signal Flow Panel<br />
The Amp, FX1, FX2, FX3 & Wah models each include an enable/disable “LED” button (found at<br />
the left of their FX Panels). The icon for the respective effect within the Signal Flow Panel dims to<br />
indicate its disabled state:<br />
FX1 Enabled<br />
FX1 Disabled<br />
Model Position<br />
The position you see the models appear in left to right in the Signal Flow Panel is precisely the order<br />
your input signal flows through them. Note that when you toggle an effect’s “Pre/Post” position switch<br />
(available within FX1, FX2, FX3, Volume and <strong>Rev</strong>erb panels - see the following sections), the Signal<br />
Flow Panel display dynamically changes to show you the new FX ordering.<br />
“Pre” position<br />
“Post” position<br />
Amp & FX Panels<br />
These panels provide you easy access to the individual parameters of each Amp and FX model that<br />
make up your Tone, making deep editing easier than ever!<br />
Working with Panel Controls<br />
There are several ways to access your Amp & FX controls. To follow are functions that are common<br />
within the application’s <strong>Edit</strong> Panels.<br />
• Knob controls - Click and drag any knob vertically to adjust its value. Or, click to “select” a<br />
knob and then use your computer’s arrow keys or mouse wheel to adjust it. Also, simply hovering<br />
your mouse cursor over any knob allows it to be adjusted via your mouse wheel. Most knob<br />
controls also include a numerical indicator/edit box that provides access to the parameter value<br />
as well (see the following description).<br />
1•4
POD <strong>HD300</strong> <strong>Edit</strong>: GUI<br />
• Mix knob value indicators - When adjusting the Mix knob (as well as various other knobs not<br />
paired with a numerical edit box) within the FX Panels, you’ll see the following two indicators<br />
to assist you in dialing in the desired setting:<br />
Tooltip value indicator<br />
Value display<br />
Adjusting an FX Panel’s Mix knob<br />
• Numerical indicator/edit boxes - The white text boxes that show numerical values serve as<br />
handy indicators for your settings. You can also click and drag up/down to adjust their values,<br />
or double-click within any box to type in a specific numerical value. Also, simply hovering your<br />
mouse cursor over any numerical edit box allows it to be adjusted via your mouse wheel.<br />
Click and drag vertically<br />
Double-click and type in a value<br />
• Enable/Disable FX models - At the left of the Amp, FX1, FX2, FX3, and Wah Panels, you’ll see a<br />
little “LED” control. Click directly on this LED to toggle the model between enabled or disabled.<br />
You’ll see the LED and all edit boxes dim to indicate the model’s disabled state. Note that you’ll<br />
also see the model’s icon within the Signal Flow Panel dim when disabled.<br />
FX1 Enabled<br />
FX1 Disabled<br />
Amp Panel<br />
Amp enable/disable<br />
Amp model type<br />
Tone controls<br />
E.R. control<br />
Mic selector<br />
Amp selector<br />
Power Amp parameters<br />
Cab selector<br />
1•5
POD <strong>HD300</strong> <strong>Edit</strong>: GUI<br />
• Amp enable/disable - When disabled, bypasses the Amp, Cab & Mic models, as well as the<br />
Power Amp & DT50 amp settings. When the Amp panel is disabled, the CH VOL knob<br />
changes to an active BYP VOL (bypassed volume) knob, providing level adjustment.<br />
Amp disabled<br />
BYP VOL becomes available<br />
Amp Panel - Amp Model is in the disabled state<br />
Note: The FX ONLY button on POD <strong>HD300</strong>, when activated (lit), will also disable the Amp panel.<br />
However, the FX ONLY button setting is a Global one, and its state is not saved with any Preset. Your<br />
Amp panel enable/disable state is saved with the Preset, and is over-ridden if the FX ONLY button is<br />
active.<br />
• Amp selector - Use the familiar rotary Amp selector knob, or click on the Amp model menu to<br />
select an Amp model by name.<br />
• Amp model type switch - This is the equivalent of the Amp model type option found in the<br />
POD <strong>HD300</strong> device’s SETUP menu. You can choose Full to utilize the full Amp model, or<br />
Preamp to utilize only the preamp section of the selected Amp model.<br />
• Tone controls - Just as on your POD <strong>HD300</strong> hardware, use the knobs here to adjust the Amp’s<br />
gain & EQ.<br />
Note: The PRESENCE knob in this panel is the equivalent of the AMP - Presnc control found in the <strong>Edit</strong><br />
Mode of your device.<br />
• Early Reflections (E.R.) control - Add the desired amount of reflective “room” sound to your<br />
amp tone. This is the equivalent of the AMP - E.R. control found in the <strong>Edit</strong> Mode of your<br />
device.<br />
• Mic selector - Choose from among the 8 different microphone models to use to mic your Amp.<br />
• Cab selector - Choose from among the list of speaker cabinets to use with your Amp.<br />
• Power Amp parameters - The 5 knobs here relate to the “Power Amp” parameters (Master<br />
Volume, Sag, Hum, Bias & Bias Excursion) whenever a “Full” Amp Model is in use . These are<br />
the equivalent of the Power Amp options within the device’s Amp <strong>Edit</strong> Mode screens.* When<br />
adjusting one of these knobs, its value is displayed as a numerical tooltip and as a meter within<br />
the Amp Model selector area, as shown below:<br />
The Power Amp parameter knobs - values indicated while adjusting<br />
* Note: When a Preamp Model is in use, the “Power Amp” knobs are not displayed at all within the POD<br />
<strong>HD300</strong> <strong>Edit</strong> Amp Panel.<br />
1•6
POD <strong>HD300</strong> <strong>Edit</strong>: GUI<br />
DT50 Amp Controls<br />
Below the Amp Model settings within the Amp Panel is a set of DT50 Amp options. These controls are<br />
used to configure the DT50 amplifier’s power amp Topology parameters for the selected Amp Model.<br />
These settings are saved with your Preset, but only utilized when your POD <strong>HD300</strong> is connected to a<br />
<strong>Line</strong> 6 DT50 amplifier via the L6 LINK connection.<br />
Class switch<br />
Topology Voicing<br />
selector<br />
Pentode/Triode<br />
Mode switch<br />
Amp Panel - DT50 amp controls<br />
• Class A - A/B - Toggles the DT50 power amp to function in Class A or Class A/B operation.<br />
• Topology - Chooses the DT50 Negative Feedback Loop Topology type (I, II, III or IV).<br />
• Mode - Selects the DT50 power amp mode between Pentode or Triode.<br />
Please also see the and additional POD HD - L6 LINK documentation available at http://line6.com/<br />
support/manuals/ for more details about these DT50 amplifier settings and L6 LINK connectivity.<br />
FX Panels<br />
Below the Amp Panel you’ll see a dedicated <strong>Edit</strong> Panel for each of the available FX. For all <strong>Edit</strong> Panels,<br />
except for the Gate,Volume & Tempo, a Model menu provides a list of FX models. You’ll see that the<br />
controls displayed within the <strong>Edit</strong> Panel are specific to the Model selected. To follow are descriptions<br />
of the controls within the FX Panels (also see page 1•4 for common <strong>Edit</strong> Panel options).<br />
FX1 Panel<br />
Enable/Disable LED switch<br />
Pre/Post position switch<br />
Model-specific controls<br />
FX model menu<br />
• Pre/Post position switch - Toggles the FX model’s position within the signal chain to be before<br />
the Amp (“Pre”) versus after the Amp (“Post”). You’ll see the exact position of the FX reflected<br />
within the Signal Flow Panel.<br />
• FX Model menu - Click the down arrow to select from the list of Models. The FX1 panel<br />
offers a large assortment of Dynamics, Filters and “Stomp” type FX to choose from (overdrives,<br />
distortions, fuzzes, compressors, EQs and more!).<br />
Note: See “Pedal Control” on page 2•4 for info about controlling the FX1 Pitch Glide!<br />
1•7
POD <strong>HD300</strong> <strong>Edit</strong>: GUI<br />
FX2 & FX3 Panels<br />
The FX2 & FX3 Panels include all the same controls as the FX1 panel (as described above), as well as<br />
an additional “Tap” control. The FX2 panel offers several tasty Modulation type FX (phasers, choruses,<br />
rotary speaker, etc.). The FX3 panel offers an arsenal of Delay type FX (analog & digital echoes &<br />
delays).<br />
Tap Ctl selector<br />
Speed control<br />
Tap Ctl selector<br />
Time control<br />
• Tap Control selector - For any effect model selected within the FX2 or FX3 Panels is the option<br />
to select “Control” or “Don’t Control,” allowing you to choose to have the effect’s modulation<br />
or delay time follow the current Tap Tempo value, as configured within the Tempo Panel. You’ll<br />
also see the following controls:<br />
• FX2 Speed - This knob & edit box allow you to configure the modulation rate. With the<br />
Tap selector set to “Don’t Control,” you can set the Speed manually, independent of the<br />
current Tap Tempo. With the Tap selector set to “Control,” this setting is disabled.<br />
• FX3 Time - This knob & edit box allow you to configure the Delay time. With the Tap<br />
selector set to “Don’t Control,” you can set the Time manually, independent of the current<br />
Tap Tempo. With the Tap selector set to “Control,” this setting is disabled.<br />
<strong>Rev</strong>erb Panel<br />
Pretty straight-forward here... The <strong>Rev</strong>erb Panel offers the same set of controls as the FX1 Panel,<br />
except that the <strong>Rev</strong>erb panel offers no Enable/Disable switch at the left. Just turn the Mix knob to 0%<br />
if you don’t want any <strong>Rev</strong>erb added to your signal. Within the Effect Model menu you’ll find a number<br />
of <strong>Rev</strong>erbs in assorted flavors.<br />
Gate Panel<br />
The Gate effect is always in a fixed position (the first item in the signal chain), therefore, no Pre/<br />
Post switch is offered. Also, note that there is no Enable/Disable LED switch at the left of the panel,<br />
however, you can select “Off” within the Mode menu to completely disable it.<br />
Mode menu<br />
• Mode menu - Select between “Gate” (a Noise Gate), “NR” (Noise Reduction), both, or “Off.”<br />
1•8
POD <strong>HD300</strong> <strong>Edit</strong>: GUI<br />
Wah Panel<br />
Like most other FX Panels, the Wah Panel offers an LED Enable/Disable switch and model menu. The<br />
model menu offers several classic Wahs for your choosing. The Wah effect is always fixed in the “Pre”<br />
signal flow position.<br />
Wah enable/disable switch<br />
Audition control<br />
Model menu<br />
• Audition - Use the knob or edit box to preview the Wah. This will audibly function whenever<br />
the Wah model is enabled. Note that this knob is for previewing the effect only and its setting is<br />
not saved with your Preset.<br />
• Enable/Disable LED switch - This allows you to toggle the Wah’s enabled/disabled state. Note<br />
that this action is the equivalent of pressing the pedal’s “toe” switch on your device, which not<br />
only turns the Wah on/off, but also toggles the pedal to the VOL assignment. This setting is<br />
stored within your saved Preset. See “Pedal Control” on page 2•4 for more about the POD <strong>HD300</strong><br />
pedal behaviors.<br />
Volume Panel<br />
The Volume effect is always “on” whenever the POD <strong>HD300</strong> pedal is set to control it and, therefore,<br />
offers no Enable/Disable LED switch. Use the options in this panel to edit the pedal behavior.<br />
Minimum & Maximum pedal controls<br />
• Min & Max controls - Use these knobs to limit the Min (“heel down” position) and Max (“toe<br />
down” position) values for your controller pedal.<br />
• Pre/Post position switch - Toggles the Volume effect’s position within the signal chain to be<br />
before the amp (“Pre”) or after the amp (“Post”). You’ll see the exact position of the effect<br />
reflected within the Signal Flow Panel.<br />
Tempo Panel<br />
Tempo edit box<br />
Tap button<br />
The Tap button is the equivalent of the TAP footswitch on your device. Click rhythmically on the Tap<br />
LED button to set the Tap Tempo for device, which your Modulation (FX2) and Delay (FX3) models<br />
can follow (see “FX2 & FX3 Panels” on page 1•8). The edit box indicates the numerical tempo value.<br />
Alternately, you can click and drag, or double click in the Tap edit box and type in a specific BPM<br />
value.<br />
1•9
POD <strong>HD300</strong> <strong>Edit</strong>: GUI<br />
Menu Commands<br />
To follow are descriptions of the application’s menu commands and their functions. The location of<br />
some commands are different on Mac® versus Windows® systems, as noted below.<br />
POD <strong>HD300</strong> <strong>Edit</strong> (This menu is shown only on Mac®)<br />
• About POD <strong>HD300</strong> <strong>Edit</strong> - Launches the About box, which includes info about your connected<br />
hardware and software version.<br />
• Quit POD <strong>HD300</strong> <strong>Edit</strong> - Exits the application.<br />
File (Also see “Saving and Opening POD <strong>HD300</strong> Preset Files” on page 2•2.)<br />
Help<br />
• Open - Allows you to load a saved POD <strong>HD300</strong> <strong>Edit</strong> Preset (.h3e) file from any folder on your<br />
computer.<br />
• Save As - Allows you to save a copy of the loaded Preset as a POD <strong>HD300</strong> <strong>Edit</strong> Preset file (.h3e)<br />
to any folder on your computer.<br />
• Save Bundle - Allows you to save all current Preset settings as a POD <strong>HD300</strong> <strong>Edit</strong> “Bundle”<br />
(.h3b) file to any folder on your computer.<br />
• Load Bundle - Loads a saved POD <strong>HD300</strong> <strong>Edit</strong> “Bundle” (.h3b) file from any folder on your<br />
computer, replacing all Presets within the application.<br />
• Exit (Windows ® only) - Exits the application.<br />
• POD <strong>HD300</strong> <strong>Edit</strong> Help - Launches this PDF document you are now reading.<br />
• Online Help - Takes you directly to the <strong>Line</strong> 6 Community site, the place to find additional<br />
documentation, FAQ’s, User Forums, Technical Support, breaking news and more!<br />
• CustomTone.com - Takes you to the <strong>Line</strong> 6 CustomTone site, where you can share your Tone<br />
Presets with thousands of other <strong>Line</strong> 6 users, and download free Tones from the huge library!<br />
• About POD <strong>HD300</strong> <strong>Edit</strong> (Windows® only) - Launches the About box, which includes info<br />
about your software version and connected device.<br />
1•10
POD <strong>HD300</strong> <strong>Edit</strong>: Workflow<br />
Workflow<br />
In this chapter, we’ll focus on the common tasks you’ll perform with the <strong>POD®</strong> <strong>HD300</strong> <strong>Edit</strong> application.<br />
Overview<br />
Once the POD <strong>HD300</strong> <strong>Edit</strong> application is launched, it automatically “receives” the complete set of<br />
stored Presets from your device’s User Bank into the application, allowing you to view or customize<br />
any Amp & FX models’ settings. While connected, communication between the application and your<br />
POD <strong>HD300</strong> device’s internal memory is instant - adjust any parameter within the application’s loaded<br />
Preset and the modified settings are heard on your device. Likewise, adjustments made to your device’s<br />
controls are visually reflected in the software.<br />
Two-way communication exists between your device & computer via the USB connection<br />
This interactive communication allows you to tweak any individual Amp or FX models’ settings within<br />
the application GUI and instantly hear and preview the changes made on your POD <strong>HD300</strong>. These<br />
settings changes are temporarily stored on your POD <strong>HD300</strong> - that is, they do not overwrite the stored<br />
settings until you choose to save the Preset. You can also move the Tone Presets to different User Bank<br />
locations (01A through 32D) within the application, to manage the contents of your device’s User<br />
Bank Presets order. Once you are done with your Tone tweaking, you can “send” one or all the current<br />
Tone Presets from the application to your device, to save all settings within your device’s internal<br />
memory. You can also choose to save Presets to your computer’s hard drive to build an unlimited library<br />
of Tones, which you can reload into the application, and to your POD <strong>HD300</strong>, at any time. Read on<br />
for a tour of the application’s features!<br />
Computer Connectivity<br />
To put POD <strong>HD300</strong> <strong>Edit</strong> to work, connect your POD <strong>HD300</strong> device to your computer’s USB port to<br />
establish two-way communication. Exit any <strong>Line</strong> 6 applications that might be running, and with your<br />
POD <strong>HD300</strong> device powered on, launch POD <strong>HD300</strong> <strong>Edit</strong>:<br />
• On Mac ® , go to Applications > <strong>Line</strong> 6 > POD <strong>HD300</strong> <strong>Edit</strong><br />
• On Windows ® , go to the Start button menu > Programs > <strong>Line</strong> 6 > POD <strong>HD300</strong> <strong>Edit</strong><br />
Upon launch, the application will detect your POD <strong>HD300</strong> and automatically retrieve and load all<br />
the device’s current Tone Presets. You’ll see an indicator at the bottom of the application window<br />
informing you of the device connection status:<br />
2•1
POD <strong>HD300</strong> <strong>Edit</strong>: Workflow<br />
If you see the “No <strong>Line</strong> 6 device” alert, exit the application and check that your device is correctly<br />
connected and powered on.<br />
Note: It is possible to disconnect your device from your computer to run POD <strong>HD300</strong> <strong>Edit</strong> in “Offline<br />
Mode” (see page 2•3).<br />
Saving and Opening POD <strong>HD300</strong> Preset Files<br />
Note that there are two methods for “Saving” within the <strong>Line</strong> 6 POD <strong>HD300</strong> <strong>Edit</strong> application. The<br />
Save Panel allows you to “Send” one or all Presets from the application to your POD <strong>HD300</strong> device -<br />
see the “Save Panel” on page 1•2.<br />
The other way to “Save,” as covered here, is to create a copy of a Preset to any folder on your computer<br />
as a POD <strong>HD300</strong> <strong>Edit</strong> Preset file (.h3e) file. This allows you to create a library of .h3e Preset files that<br />
can be reloaded onto your device anytime!<br />
To Save a Preset to your Computer:<br />
• Double-click on a Preset within the application’s Presets Panel to load it and select “Save As”<br />
from the File menu. This launches the familiar Mac® or Windows® file “Save As” window,<br />
where you can edit the file name and choose a destination folder. By default, all .h3e files are<br />
saved to:<br />
• Mac® - /Documents/<strong>Line</strong> 6/Tones/POD <strong>HD300</strong> <strong>Edit</strong> folder<br />
• Windows® - \My Documents\<strong>Line</strong> 6\Tones\POD <strong>HD300</strong> <strong>Edit</strong> folder<br />
• It is also possible to drag any Preset from the Presets Panel and drop it onto your Desktop, or<br />
into any folder on your computer to copy it there. Or, select multiple Presets in the Presets Panel<br />
(using Shift+left click or Ctrl+left click) to drag and Save copies of each in one drop!<br />
To Save a Bundle to your Computer:<br />
POD <strong>HD300</strong> <strong>Edit</strong> allows you to instantly save all the applications’ current Preset settings into one<br />
consolidated “Bundle” (.h3b) file. This is extremely handy for making a complete backup of all your<br />
current Presets, allowing you to load them all back to your device at any time! Just go to the File menu<br />
and select “Save Bundle” to launch a “Save As” dialog, where you can enter a name and choose any<br />
folder to save the Bundle file (the default Bundle folder locations are shown above). Note that the<br />
Save Bundle feature always includes all 32 Banks of Presets, regardless of any Presets(s) that might be<br />
selected within the Presets Panel.<br />
To Open a Preset or Bundle File from your Computer<br />
When opening a Preset or Bundle file, the Preset(s) are loaded into the application and appear as<br />
“edited.” Once you are ready to commit these to your device, use the Save Panel “Send” functions.<br />
• To open a Preset - Select “Open” from the application’s File menu and browse to the location<br />
where your Preset (.h3e) files are stored (the default Preset folder locations are shown above).<br />
Selecting a Preset file loads its saved settings, replacing the currently loaded Preset and its<br />
Channel location within the application.<br />
• To load a Bundle - Select “Load Bundle” from the application’s File menu and browse to the<br />
location where your Bundle (.h3b) files are stored (the default Bundle folder locations are shown<br />
above). Selecting a Bundle file loads its full set of 128 Presets, replacing all the currently loaded<br />
Presets within the application.<br />
2•2
POD <strong>HD300</strong> <strong>Edit</strong>: Workflow<br />
• Alternatively, you can drag a Preset or Bundle file from any folder on your computer and drop it<br />
directly in the POD <strong>HD300</strong> <strong>Edit</strong> window to load the file’s settings.<br />
POD <strong>HD300</strong> - Manual Mode & Quick Loop<br />
The POD <strong>HD300</strong> “Manual Mode” and “Quick Loop” functions are not accessible within the POD<br />
<strong>HD300</strong> <strong>Edit</strong> application. These features are still available via the device’s on-board switches while<br />
using POD <strong>HD300</strong> <strong>Edit</strong>, however, there are no functions within the application’s GUI to specifically<br />
control or save Manual or Quick Loop Modes. The following behaviors apply:<br />
• If you set your POD <strong>HD300</strong> device into Manual Mode or one of the Quick Loop (Record,<br />
Overdub or Play) Modes, the application simply remains showing the same currently loaded<br />
Preset, even though your device’s Tone may be changed as you adjust the hardware controls.<br />
• When the device is in Manual Mode or Quick Loop Mode, clicking on the application’s Save<br />
Panel - Receive button will receive the stored Preset from the device’s internal memory (rather<br />
than the device’s Manual Mode settings). The device remains in its current Manual or Quick<br />
Loop Mode.<br />
• Double-clicking on a Preset within the Presets Panel loads the saved Preset in the application<br />
and on the device:<br />
• If the device is currently in Manual Mode, this action will force it out of Manual Mode, and<br />
the saved Preset settings will be loaded on the device (replacing any Manual Mode Amp<br />
tone knob values).<br />
• If the device is currently in Quick Loop Mode, it will simply remain in this mode, and the<br />
saved Preset settings will be loaded on the device.<br />
POD <strong>HD300</strong> <strong>Edit</strong> - Offline Mode<br />
In some cases, you might want to load previously saved Presets or a Bundle from your hard drive, tweak,<br />
rename or reorder your Presets, and save the files back to your computer without committing them to<br />
your POD <strong>HD300</strong> device... No problem! To do this, launch the POD <strong>HD300</strong> <strong>Edit</strong> application without<br />
your device connected. You see the “No <strong>Line</strong> 6 Device” alert at the bottom of the application - which<br />
means you have launched the application in “Offline Mode.”<br />
Load your desired Preset or Bundle file using the File menu’s “Open” commands, edit to taste and<br />
save the file back to your computer. When you are ready to save the Presets or Bundle to your device,<br />
connect your POD <strong>HD300</strong> device and then launch the application. Open the desired Preset or Bundle<br />
from your computer, and use the Save Panel’s “Send” functions to save the desired items into your<br />
device’s memory.<br />
2•3
POD <strong>HD300</strong> <strong>Edit</strong>: Workflow<br />
Pedal Control<br />
As covered in the POD <strong>HD300</strong> Advanced <strong>Guide</strong>, your POD <strong>HD300</strong> pedal can be assigned to control<br />
the Wah, Volume & FX1 Pitch Glide. Here are a few helpful notes about the pedal behaviors.<br />
• For most Presets, you’ll see that the device’s “Wah” pedal setting controls the Wah effect, and the<br />
“Vol” pedal setting controls the Volume effect as the default settings.<br />
• Alternatively, for any individual Preset, you can configure the FX1 Pitch Glide effect to be<br />
controlled by either the “Wah” or “Vol” pedal assignment by way of the Pitch Glide’s “PEDAL”<br />
setting:<br />
Select the Pitch Glide model<br />
Choose your Pedal control option<br />
• The Don’t Ctl setting leaves the “Wah” and “Vol” pedals assigned to controlling the Wah<br />
and Volume FX, respectively.<br />
• The Wah:Glid setting assigns the “Wah” pedal to control the Pitch Glide effect. Note that<br />
the Toe switch of your POD <strong>HD300</strong> pedal will toggle the pedal between controlling the<br />
Volume and Pitch Glide model with this setting. You’ll also see the Wah panel’s enable/<br />
disable switch set to “disabled” automatically.<br />
• The Vol:Glid setting assigns the “Vol” pedal to control the Pitch Glide effect. Note that the<br />
Toe switch of your POD <strong>HD300</strong> pedal will toggle the pedal between controlling the Wah<br />
and Pitch Glide model with this setting.<br />
Note: Whenever your device’s pedal is actively controlling the FX1 Pitch Glide, you’ll see both the WAH<br />
and VOL LEDs next to the on-board pedal lit to indicate this.<br />
2•4
POD <strong>HD300</strong> <strong>Edit</strong>: <strong>Line</strong> 6 Monkey & Additional Resources<br />
<strong>Line</strong> 6 Monkey & Additional Resources<br />
<strong>Line</strong> 6 Monkey is the intelligent updater utility automatically installed with the <strong>POD®</strong> <strong>HD300</strong><br />
<strong>Edit</strong> application, or available from line6.com/monkey. It is highly recommended that you run <strong>Line</strong> 6<br />
Monkey often to be sure you have all your <strong>Line</strong> 6 products updated and registered.<br />
Using <strong>Line</strong> 6 Monkey<br />
With your POD <strong>HD300</strong> connected to your computer (see “Computer Connectivity” on page 2•1), power<br />
on your device and launch <strong>Line</strong> 6 Monkey:<br />
• On Mac ® , go to Applications > <strong>Line</strong> 6 > <strong>Line</strong> 6 Monkey<br />
• On Windows ® , go to the Start button menu > Programs > <strong>Line</strong> 6 > Tools > <strong>Line</strong> 6 Monkey<br />
If Monkey prompts you to register your POD <strong>HD300</strong>, then please do so now - it may be required to<br />
register to obtain some product updates. Follow the prompts through the quick online registration.<br />
Return to <strong>Line</strong> 6 Monkey once you’ve completed the registration.<br />
Monkey will then display your POD <strong>HD300</strong> Device Firmware versions, available Applications and any<br />
available updates.<br />
The <strong>Line</strong> 6 Monkey Updates screen, with POD <strong>HD300</strong> connected<br />
3•1
POD <strong>HD300</strong> <strong>Edit</strong>: <strong>Line</strong> 6 Monkey & Additional Resources<br />
As an example, in the above screenshot Monkey has detected that a newer Firmware - Flash Memory<br />
version is available. In this scenario you can select the Flash Memory item and click Update Selection.<br />
Be sure to read the prompts carefully and Monkey will assist you in performing the update in minutes.<br />
It is especially important not to disturb the devices’ controls and cable connections until the update<br />
fully completes!<br />
Additional Resources<br />
Hungry for more info We’ve got plenty of helpful online resources, just a click away.<br />
• Additional Help documentation covering POD <strong>HD300</strong> hardware and related products is<br />
available from the <strong>Line</strong> 6 Support site:<br />
<strong>Line</strong> 6 Product Manuals<br />
• Visit the CustomTone site where you can share your POD <strong>HD300</strong> Tones with the world, and<br />
download free Tones created by <strong>Line</strong> 6 and other users just like you.<br />
CustomTone<br />
• Can’t get enough of that <strong>Line</strong> 6 Gear & accessories Head on over to the <strong>Line</strong> 6 Store!<br />
<strong>Line</strong> 6 Online Store<br />
• Join the Community! Pay a visit to the <strong>Line</strong> 6 Communities page, where you can find FREE jam<br />
tracks, loops, practice tools, tips, special offers, discussion forums and more:<br />
<strong>Line</strong> 6 Communities<br />
• For <strong>Line</strong> 6 Support, including the searchable Knowledgebase:<br />
<strong>Line</strong> 6 Support<br />
3•2