Line 6 POD® HD300-HD400 Advanced Guide (Rev D ... - Musifex
Line 6 POD® HD300-HD400 Advanced Guide (Rev D ... - Musifex
Line 6 POD® HD300-HD400 Advanced Guide (Rev D ... - Musifex

You also want an ePaper? Increase the reach of your titles
YUMPU automatically turns print PDFs into web optimized ePapers that Google loves.
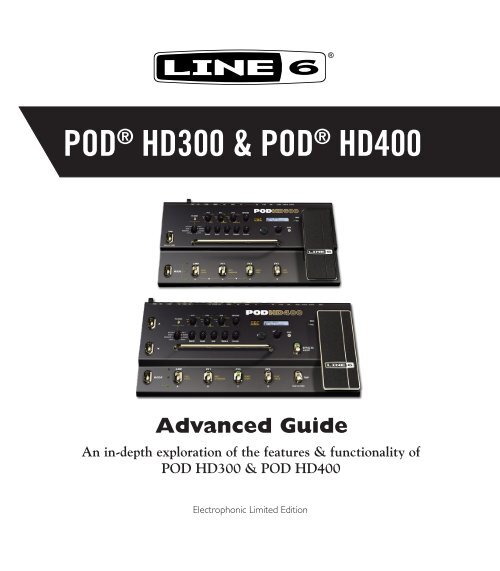
®POD ® <strong>HD300</strong> & POD ® <strong>HD400</strong><strong>Advanced</strong> <strong>Guide</strong>An in-depth exploration of the features & functionality ofPOD <strong>HD300</strong> & POD <strong>HD400</strong>Electrophonic Limited Edition
Table of ContentsSetup Details........................................................................... 1•1Setup Options................................................................................................. 1•1Pedal Calibration............................................................................................ 1•4Factory Restore................................................................................................ 1•5Features & Functionality........................................................ 2•1Tuner Mode..................................................................................................... 2•1Smart FX......................................................................................................... 2•2Noise Gate...................................................................................................... 2•3Volume............................................................................................................ 2•3FX Loop (POD <strong>HD400</strong> Only)........................................................................ 2•4Tap Tempo....................................................................................................... 2•4Pedal Control.................................................................................................. 2•4L6 LINK...................................................................................................... 2•5Output Mode Options..................................................................................... 2•5POD HD Edit Software................................................................................... 2•7Working with Presets............................................................. 3•1Accessing Presets............................................................................................ 3•1Saving Presets.................................................................................................. 3•3Edit Mode................................................................................ 4•1Accessing Edit Mode....................................................................................... 4•1SETUP Menu.................................................................................................. 4•2AMP Menu..................................................................................................... 4•2FX1, FX2 & FX3 Menus.................................................................................. 4•2REVERB Menu............................................................................................... 4•3
GATE Menu.................................................................................................... 4•3WAH Menu.................................................................................................... 4•4VOL Menu...................................................................................................... 4•4FX Loop Menu (POD <strong>HD400</strong> Only).............................................................. 4•5MIDI DUMP................................................................................................... 4•7Amp, Cab & Mic Models......................................................... 5•1Parameter Details............................................................................................ 5•1AMP Edit Mode.............................................................................................. 5•2Manual Mode.................................................................................................. 5•7FX Only Mode................................................................................................. 5•8AutoFX SETUP Parameter............................................................................. 5•8Amp/Preamp Models...................................................................................... 5•9Cab Models................................................................................................... 5•11FX Models................................................................................ 6•1FX1 Models - Reference Table........................................................................ 6•1Common FX1, FX2 & FX3 Parameters.......................................................... 6•3FX1 GAIN Swoosh Models - Parameters....................................................... 6•4FX1 VARIOUS Swoosh Models - Parameters................................................ 6•4FX1 PITCH Swoosh Models - Parameters...................................................... 6•5FX2 Models - Reference Table...................................................................... 6•10Common FX2 Parameters............................................................................. 6•11Common FILTER Swoosh Parameters.......................................................... 6•12FX3 Models - Reference Table...................................................................... 6•13Common FX3 Parameters............................................................................. 6•14<strong>Rev</strong>erb Models - Reference Table................................................................. 6•16Common <strong>Rev</strong>erb Parameters........................................................................ 6•16Wah Models.................................................................................................. 6•18
Using the Looper.................................................................... 7•1Looper Controls.............................................................................................. 7•1USB Audio............................................................................... 8•1The <strong>Line</strong> 6 USB Audio Driver....................................................................... 8•1The <strong>Line</strong> 6 Audio-MIDI Devices Panel......................................................... 8•3Mac® - <strong>Line</strong> 6 Audio-MIDI Devices.............................................................. 8•4Windows® - <strong>Line</strong> 6 Audio-MIDI Devices...................................................... 8•8Appendix A: <strong>Line</strong> 6 Monkey............................................... A•1Launch <strong>Line</strong> 6 Monkey.................................................................................. A•1Login Account............................................................................................... A•1Grab Those Updates...................................................................................... A•2Appendix B: MIDI....................................................................B•1MIDI SysEx Functionality..............................................................................B•1MIDI Dump - Backing Up Presets..................................................................B•2Restoring Presets.............................................................................................B•2USB MIDI - MIDI Control Messages.............................................................B•3<strong>Line</strong> 6, POD, DT50, Vetta, CustomTone, Variax, L6 LINK and <strong>Line</strong> 6 Monkey are trademarks of <strong>Line</strong> 6, Inc. All other productnames, trademarks and artists’ names are the property of their respective owners, which are in no way associated or affiliated with<strong>Line</strong> 6. Product names, images, and artists’ names are used solely to identify the products whose tones and sounds were studiedduring the <strong>Line</strong> 6 sound model development for this product. The use of these products, trademarks, images, and artists’ names doesnot imply any cooperation or endorsement.Copyright © 2011 <strong>Line</strong> 6, Inc.
Setup DetailsSetup DetailsIn this chapter, we’ll cover the options found within the <strong>POD®</strong> <strong>HD300</strong> & <strong>POD®</strong> <strong>HD400</strong>Setup screen, calibrating your device’s on-board pedal, and performing a Factory Reset.1•1This <strong>Guide</strong> covers POD <strong>HD300</strong> & <strong>HD400</strong> devices with Flash Memory version 1.30 (orlater) installed. It is highly recommended to use <strong>Line</strong> 6 Monkey to install the latestavailable Flash Memory version & all available updates - See “Appendix A: <strong>Line</strong> 6Monkey” on page A•1. Details throughout this <strong>Guide</strong> pertain to both POD <strong>HD300</strong> &<strong>HD400</strong>, unless otherwise noted.Setup OptionsThe Setup screen is where you configure system settings for POD HD. Most options can beleft as-is after you’ve set them initially. They’ll be recalled each time you power-up and are“global” (the settings persist regardless of the current Preset). To access the Setup options,press the PRESETS knob, and use the Nav. Disc Left/Right arrow buttons to navigate tothe SETUP menu:Use Left/Right to navigateto SETUP menuUse Up/Down toselect the next/previousSETUP parameterPress knob to enterEDIT modeRotate the knob tochange the setting forthe selected parameter
Setup DetailsFootswitch Mode1•3We’ve offered two types of behaviors for how the MODE footswitch accesses the “Preset,”“Pedal” and “Looper” footswitch modes. (Please also see your POD HD Pilot’s <strong>Guide</strong> formore about the MODE footswitch.)• Normal: Sets the “Normal” behavior, where each click of the MODE footswitchincrementally selects one of the three modes: Preset Mode (green LED), Pedal Mode(amber LED) and Looper Mode (red LED).• Hold4Lpr: Sets an alternative “Hold for Looper” behavior, where clicking theMODE footswitch incrementally selects between only the Preset or Pedal FootswitchModes. To enter Looper Mode, press and hold the MODE footswitch. To exit LooperMode, simply click MODE again.AC RateAll POD HD Amp Models include simulation of AC hum typical of the AC Vacuum TubeHeater component, which is an important part of the tonality of a tube amplifier. Set theAC Rate to match that of the USA (60 Hz) or UK (50 Hz) frequency for authenticity.Note: This setting may be subtle depending on the current Amp Model settings and moreapparent when synchronizing this setting with the AC rate of any tube amplifier that PODHD is plugged into.
Setup Details1•4Tap Tempo Light• TpLite - AlwaysOn: The TAP light on the device will flash constantly, showing thecurrent tempo setting.• TpLite - AlwaysOn: The TAP light will flash only 8 times, immediately after a newTempo value is set, and then remain unlit.Firmware VersionYour device’s current firmware-flash memory version is displayed here. This is aninformational screen only.Pedal CalibrationNote: If you’ve just performed a Factory Restore on your device (see below), that processincluded Pedal Calibration and it is not necessary to perform the following steps again.However, you can use these instructions to perform just the Pedal Calibration process atany time.Before you put the POD HD pedal to use, it is recommended that you calibrate it tooptimize its functionality. Begin with POD HD powered off. Hold down the D footswitchwhile powering the unit on, until you see the LCD display the following:Please skip ahead to step 5 of the Factory Restore section on page 1•5 and follow theremaining steps to complete the Pedal Calibration.
Setup DetailsFactory RestoreTo restore POD HD to all its original factory settings, first back up any Presets you’d liketo keep (“POD HD Edit Software” on page 2•7), then follow these steps:1•5NOTE: This process also performs a Pedal Calibration, and it is necessary that you completeALL the steps listed here when dong a Factory Restore. However, if you want to performonly a Pedal Calibration, please see “Pedal Calibration” on page 1•4.1. Begin with POD HD powered off. Hold down the A footswitch while powering theunit on, until you see the LCD display the following:2. Press the PRESETS knob, then press it again to proceed once you see the followingprompt:3. Watch the LCD screen and you’ll see it display the progress %. Do not touch anycontrols on the device during this process.4. Once it reaches 100%, you are prompted to start the Pedal Calibration process. Pressthe D footswitch to proceed.5. You are next prompted to press and hold the pedal’s “toe” switch:
Setup Details1•66. Press the pedal firmly all the way forward to click the toe switch and hold thisposition for a few seconds until you see the next prompt.7. As instructed, move the pedal to the minimum “heel” position and press the Dswitch.8. Move the pedal to the maximum forward position (but do not click the toe switch)and press D.9. At this point, the pedal is calibrated but not saved. If calibrated correctly, movingthe pedal will display values from 0-127 on the LCD screen.7. Press D switch once again to save if all is correct to perform the save.Please wait while your device re-initializes itself and the Presets screen is displayed.The process is now complete!
Features & FunctionalityFeatures & FunctionalityIt is recommended that you first review the Pilot’s Handbook included with your device forthe basics on hardware controls, inputs & outputs. In this chapter, we’ll dive deeper intothe major features & functionality offered on <strong>POD®</strong> <strong>HD300</strong> & <strong>POD®</strong> <strong>HD400</strong>.Tuner ModeThe Tuner is available whenever the MODE footswitch is set to “Pedal On/Off” or “Presets”Mode. To enter Tuner mode, press and hold the TAP button.* The volume is muted whilein Tuner mode, so you won’t hear any signal from your device.2•1* Note: Holding the TAP button when in “Looper” Mode triggers the “Clear Loop”function. Please see “Using the Looper” on page 7•1 for more info.Pluck an individual string on your guitar. When right-pointing arrows appear, your note isflat; when left-pointing arrows appear, your note is sharp. The fewer the arrows, the closeryou are to the reference note. When two asterisks appear, your string is in tune.Flat In Tune SharpPress the TAP switch, or any other footswitch, to exit Tuner Mode.
Features & Functionality2•4FX Loop (POD <strong>HD400</strong> Only)The FX Loop built into POD <strong>HD400</strong> can be controlled with several options, including“Pre” or “Post” positioning and level control. These options are accessed in the Edit Mode- see “FX Loop Menu (POD <strong>HD400</strong> Only)” on page 4•5.Tap TempoTap Tempo is the term we use to refer to the “system” tempo value that isaccessed via the TAP footswitch on your POD HD device. Stomp rhythmicallyon the TAP footswitch to set your Tap Tempo. This Tempo is saved per Preset.You’ll see the LED on the TAP switch blink to indicate your current Tap Tempo.FX2 and FX3 model sets each offer a global Tap Control setting which configures theseeffects’ modulation speed and delay time to sync to the Tap Tempo. See the “CommonParameters” descriptions for FX2 on page 6•11 and FX3 on page 6•14 for details.Pedal ControlThe on-board Expression Pedal (and an additional Pedal 2 for POD <strong>HD400</strong>devices) can be assigned to the Volume, Wah or FX1 Pitch Glide FX. Formost Presets, the pedal is pre-configured to control a Wah model for WAHmode and the Volume model for the VOL mode. Clicking the Pedal’s “toeswitch” toggles between these two functions, and the device’s WAH or VOLLED illuminates to indicate the current mode.Pitch GlideEither of these WAH or VOL modes can alternatively be assigned to control the PitchGlide model. This pedal assignment setting is found among the model’s Edit Mode settings- see “Pitch Glide” on page 6•6. Pedal assignment for any of these 3 FX is saved individuallywith each Preset. When controlling the Pitch Glide effect, you’ll see both the WAH andVOL LEDs illuminated.
Features & FunctionalityPedal 2 (POD <strong>HD400</strong> Only)Optionally, you can connect an additional Expression Pedal (such as the <strong>Line</strong>6 EX-1) to the PEDAL 2 jack on the back of POD <strong>HD400</strong>. Once connected,the WAH mode is automatically assigned to the on-board Pedal, and the VOLassigned to Pedal 2. You’ll see both the WAH and VOL LEDs lit to indicate thisstate. Note that you can still assign either the WAH or VOL mode to the PitchGlide effect, and it will be controlled by the individual, assigned pedal.2•5L6 LINKA revolutionary new feature included with all POD HD devices is L6 LINK, whichprovides the ability to send your tones to <strong>Line</strong> 6 DT50 tube amplifiers, as well as toremotely control DT50 amp functions. The L6 LINK connection on the back of PODHD utilizes a single, standard XLR cable to connect directly with a DT50 amplifier. Fordetails on L6 LINK, please see the additional documentation available at http://line6.com/software/manuals/.Output Mode OptionsThe L6 LINK jackThe OUTPUT MODE switch on the back panel of your device allows you to change thetype of audio signal that is fed to the analog BALANCED, UNBALANCED OUTPUT*and PHONES jacks, as well as to the USB Record Send and the L6 LINK output.The OUTPUT MODE switch
Features & FunctionalityThe MASTER VOLUME knob on the back of your device controls the overall level ofthese outputs. Here are some pointers for the use of the Output Mode options.2•6*Note: The hardware LINEAMP switch located between the UNBALANCEDOUTPUT jacks allows you to optimize the signal level sent from these sets of outputs.• LIVE Mode: In this mode, the analog outputs are fed a signal which includes yourselected Amp and specially voiced “Live” Cab version (without a Mic model), whichis well suited for direct input to an external guitar amp. When in LIVE Mode, thereare also additional options found in the SETUP menu to allow you to choose thetype of amp you are connecting to (see “Output Mode Options” on page 2•5).TIP: This LIVE Mode is the recommended setting to use when connecting your analogoutputs to an external tube amp, or if using L6 LINK to connect to a <strong>Line</strong> 6 DT50amp (also see “Amp Model Type” on page 5•3).• STUDIO Mode: In this mode, the outputs are fed the complete processed signal,which includes your selected Amp, Cab, Mic and FX models. This is the best choicewhen routing the analog outputs into recording or P.A. gear, or if using the USBconnection for recording into DAW software.• DUAL Mode (POD <strong>HD300</strong>): This option offers more performance flexibility,routing the LIVE Mode signal to the left BALANCED & UNBALANCED outputsand a great sounding mic’d amp tone to the right BALANCED & UNBALANCEDoutputs. This allows you to send a mono signal tailored for a guitar amp, whilesimultaneously routing a mono mic’d cab signal to a mixer or recorder!• DUAL Mode (POD <strong>HD400</strong>): This option offers more performance flexibility, routingthe LIVE Mode signal to the left & right UNBALANCED outputs, and routing agreat sounding mic’d amp tone to the left & right BALANCED outputs. This allowsyou to send the LIVE signal to a guitar amp, while simultaneously routing a mic’dcab signal to a mixer or recorder!
Features & FunctionalityPOD HD Edit SoftwareBe sure to visit line6.com/software to download <strong>Line</strong> 6 POD <strong>HD300</strong> Edit or POD <strong>HD400</strong>Edit - the free patch editor/librarian software for Mac® and Windows® computers. UsingPOD HD Edit you can easily create, audition, customize, backup/restore, and save anunlimited number of Tone Presets for your device!2•7The POD <strong>HD400</strong> Edit application
Working with PresetsWorking with Presets<strong>POD®</strong> <strong>HD300</strong> & <strong>POD®</strong> <strong>HD400</strong> include the ability to store up to 128 Presets withinthe device’s internal memory. These Presets are found within the 01A to 32D Bank andChannel locations. In this chapter we’ll cover accessing and saving Presets. For details onediting the many Tone parameters saved within Presets, please refer to “Edit Mode” onpage 4•1.Accessing PresetsPOD <strong>HD300</strong>/<strong>HD400</strong> includes 32 Preset Banks (1 through 32), each containing 4 Channellocations (A,B, C & D). Each location is capable of storing one Preset. There are two waysto access the Presets on the device: using the Preset Select controls or using the Bank &Channel footswitches.Preset Select ControlsUse the 4-way Nav. Disc button, and PRESETS knob to navigate and load Presets.3•1Currently loaded Presetindicator LEDUp/Down selects thenext/previous BankRotate knob to selectand load the next/previousPresetLeft/Right have nofunction for the PresetSelect screenThe amber LED indicator and the top row of the LCD screen shows the current Presetlocation Bank/Channel. Use the Nav. Disc functions to increment through Presets oneBank at a time.The lower row on the screen displays the name of the current Preset - use the Presets knobto scroll through Preset Channels incrementally.
Working with PresetsBank & Channel FootswitchesPlace the POD HD footswitches into Preset Mode for hands-free Preset selection bypressing the MODE switch until the lower (green) LED is lit (also see “Footswitch Mode”on page 1•3). This configures the 4 footswitches to the right to function as A, B, C & DChannel switches.3•2The green LEDs indicate Preset ModeThe lit A,B,C,D footswitch indicatesthe selected ChannelPress the A, B, C or D switch to instantly recall its Channel location within the currentlyselected Bank. For example, if the LED displays 12A, then Bank 12 is the current Bank,and switches A, B, C and D will load Presets 12A, 12B, 12C and 12D, respectively. Bankswitching differs for POD <strong>HD300</strong> and POD <strong>HD400</strong> devices:POD <strong>HD300</strong> Bank Select: Press the A and B switches simultaneously for Bank Up, orthe B and C switches for Bank Down.Press A+B for Bank UpPress B+C for Bank DownPOD <strong>HD400</strong> Bank Select: Press for Bank Up, or for Bank Down.Bank UpBank Down
Working with PresetsFor either POD <strong>HD300</strong> or <strong>HD400</strong>, using these Bank switches will “queue” the selectedBank - no new Preset is loaded until you press the desired A, B, C or D Channel switch.Saving PresetsTo save your current tone as a Preset, press the SAVE button and you’ll see it start flashingred, then use the following functions.Up/Down selects thenext/previous locationas the destinationLeft/Right selects one ofthe 14 text characters- the selected characterflashesRotate knob to editselected text character.Press to select nextcharacter groupPress SAVE button toinitiate and completePreset Save3•3• The top row of the LCD screen shows the Preset’s current location, followed by thedestination Channel location where the Preset will be saved. In the above example,our current 06A Preset is set to be saved in location 01B.• To save your Preset to a new location, use the Nav. Disc buttons to choose thenew Channel location. You’ll also see the amber LED display flashing, indicating thedestination Channel location.• If you want to overwrite the Preset within the current location, simply keep theChannel location the same.• Use the Nav. Disc buttons to select each character of the Preset name displayedin the lower row of the LCD screen. Turn the PRESETS knob to change the selectedcharacter to enter your own custom Preset name.• Press the flashing SAVE button once again to perform the save. Or, if you changeyour mind about saving, press the TAP switch instead of the SAVE button to abortthe process.Be sure to also check out the free <strong>Line</strong> 6 POD <strong>HD300</strong>/<strong>HD400</strong> Edit software. It can beused to create, customize & manage an unlimited library of Presets right on your Mac® orWindows® computer! See “POD HD Edit Software” on page 2•7.
Edit ModeEdit ModeWithin this chapter, we’ll cover the Edit Mode within <strong>POD®</strong> <strong>HD400</strong>, which providesaccess to all the editable Tone parameters that are saved within a Preset, as well as several“global” settings and system functions.Accessing Edit ModeTo enter Edit Mode, press the PRESETS knob, then use Nav. Disc and PRESETS knob tocall up and adjust the many parameters:Use Left/Right tonavigate the menus ofeditable parametersUse Up/Down toselect the next/previousparameter within thecurrent menuPush the PRESETSknob to enter or exitEdit ModeRotate the knob tochange the setting forthe selected parameter4•1TIP: You can also access Edit Mode directly for the last-accessed FX model type. Forexample, turn the REVERB knob to adjust it, then immediately push the PRESETS knobto call up the <strong>Rev</strong>erb Edit Mode menu.Fine/Coarse TuningWhen turning the PRESETS knob to adjust numerical parameter values (such as %, ms,dB type values), this typically adjusts the value incrementally by single integer amounts(1%, 2%, 3%, etc.) But if you push the PRESETS knob while turning, this provides a“coarse” adjustment, jumping in larger increments, for faster edits!To follow, we’ve listed information about each of the menus found within Edit Mode. Youwill also be directed to the other chapters of this document where additional details areprovided for individual parameters.
Edit ModeSETUP MenuThe parameters in this menu allow configuration of your POD HD hardware. Please alsosee “Setup Details” on page 1•1.The Edit Mode - SETUP menu4•2AMP MenuThe AMP menu offers several parameters that affect the Amp/Preamp models, as well asthe ability to select a different Speaker Cabinet or Mic Model for the current Amp. Pleasesee “AMP Edit Mode” on page 5•2.FX1, FX2 & FX3 MenusThe Edit Mode - AMP menuThese three FX menus offer access to all editable parameters for each model within the FXcategories. Use the Model - Select option to choose the desired model, and you’ll then beable to access its individual parameters. Please see “FX Models” on page 6•1 .The Edit Mode - FX1, FX2 & FX3 menus
Edit ModeREVERB MenuThe REVERB menu offers access to all editable parameters for each <strong>Rev</strong>erb model. Usethe Model - Select option to choose the desired model, and you’ll then be able to accessits individual parameters. Please see “<strong>Rev</strong>erb Models - Reference Table” on page 6•16.GATE MenuThe Edit Mode - <strong>Rev</strong>erb menuThe GATE menu offers access to all editable parameters for the Noise Reduction and NoiseGate. These tools can be used together or separately on any Preset to reduce unwantedbuzz & hum from your input signal. All settings made here are stored per Preset.4•3Mode• Off - Disables both the Noise Reduction and Noise Gate.• Gate - Enables only the Noise Gate.• NR - Enables only the Noise Reduction.• Gate+NR - Enables both the Noise Reduction and Noise Gate.ThresholdSets the Gate Threshold. Lower values make the Gate kick in at quieter levels, highervalues make it kick in at louder levels.
Edit ModeDecaySets the Gate Decay. Higher levels result in a longer transition from non-gated to gatedaudio.4•4WAH MenuThe WAH menu offers selection of any Wah model. This setting, as well as the Wahenabled/disabled state and pedal assignment, are stored individually for each Preset.*Please also see “Pedal Control” on page 2•4 and “Wah Models” on page 6•18.*Note: Either the WAH and VOL pedal functions of POD HD can be alternatively assignedto control the FX1 Pitch Glide effect per Preset for some wild pitch-bending antics. Pleasesee “Pitch Glide” on page 6•6.VOL MenuThe VOL menu offers several options for how the POD HD pedal functions when set tocontrol the Volume effect. These parameters, as well as the pedal assignment (see “PedalControl” on page 2•4), are all stored individually for each Preset. The Volume effect isenabled and disabled automatically via the status of your POD HD pedal (as indicated bythe WAH and VOL LEDs next to the pedal).RoutingYou’ll get slightly different sonic behaviors when positioning the Volume pedal before orafter the amp and some types of FX. Feel free to experiment here to get the desired resultsfor your Tone!
Edit Mode• Pre - Positions the Volume effect before the Amp model (and before all other “Pre”designated FX) within the signal flow.• Post - Positions the Volume effect after the Amp model (and before all other “Post”designated FX) within the signal flow.Minimum & MaximumThese two parameters allow you to configure the Volume level for the “heel” and “toe”positions of the Volume pedal, respectively. Adjust these as desired if you want somethingother than the normal behavior. For example, set Min to 100% and Max to 0% if you wantto “reverse” the Volume pedal action!4•5FX Loop Menu (POD <strong>HD400</strong> Only)The FX Loop SEND and RETURN jacks on the back of POD <strong>HD400</strong> allow you to patchin your favorite external pedals or rack FX.The FX Loop SEND & RETURN jacksUse the only L/MONO jacks if connecting your external FX in a mono connection, or usethe pairs of connections if your FX are in a stereo or mono-stereo configuration. The FXLOOP LEVEL switch should be used to optimize the level for your external FX; Use LINEfor rack FX or STOMP for pedals.Once you have FX connected to the FX Loop, you can utilize the Edit Mode - FX Loopoptions for specific behaviors with your current tone. These settings are saved per Preset.
Edit ModeRoutingConfigure the position of the FX Loop Send/Return.4•6• Pre - Positions the FX Loop before the Amp model (and between FX1 and FX2, ifthese FX are also set “Pre”).• Post - Positions the FX Loop after the Amp model (and between FX1 and FX2, ifthese FX are also set “Post”) within the signal flow.Send & Return LevelsUse these options to attenuate the Send level fed into your external FX and the Returnlevel fed from your external FX back into the POD <strong>HD400</strong> signal path. (Also use the FXLOOP LEVEL switch, as mentioned on the previous page.)MixAdjust the amount of the FX Loop signal that is fed to the Send, and thus blended withyour tone. At 100%, the full signal is fed to the FX Loop.Note: Factory Presets are typically created with the Mix set to 100%, therefore, if youengage the FX LOOP footswitch with no connections to the SEND and RETURN jacks,you will hear silence.
Edit ModeMIDI DUMPThis setting configures the specific MIDI SysEx data that is fed to the POD HD MIDI Outport when performing a MIDI Dump. When this MIDI menu is displayed in Edit Mode,the TAP button will initiate the MIDI Dump. Also see “Appendix B: MIDI” on page B•1.• Current - Sends only data for the currently loaded Preset.• All - Sends all data for all 128 Presets.4•7
Amp, Cab & Mic ModelsAmp, Cab & Mic ModelsThis chapter provides details on selecting & editing the exemplary HD Amp & PreampModels, all of which have been newly developed by our amazing team of sound engineersfor <strong>POD®</strong> HD devices! Also covered here are details on Speaker Cabs, Mic Models, andputting Amp Models to use.Parameter DetailsAs you’ve likely already figured out, the 2nd row of knobs on your hardware offers easyaccess to the Amp Model selection and Amp Tone parameters:5•1Amp Model Select knob and the 5 Amp Tone knobsEach category labeled on the Amp Model Select Knob (CLEAN, PAWNSHOP, BLUES,etc.) contains two Amp Models - each indicated by a red or green LED.* While adjustingthe Amp Select knob, you’ll see the LCD display the selected Amp Model for a fewseconds, followed by a momentary display of the settings of the Amp Tone knobs (as wellas for the <strong>Rev</strong>erb knob at the far right).* TIP: In addition to using the Amp Model Select knob, there are also several additionalAmp Models that are accessible from within the Amp Edit Mode! Please see page 5•2.The current Amp Model is displayed... and the Amp’s actual knob valuesThe Amp knob values screen is also displayed momentarily whenever adjusting any of the5 Amp tone knobs.
Amp, Cab & Mic ModelsNote that some of the classic amplifiers we modeled for POD HD family devices includeknobs other than the typical “Treble,” “Bass,” “Mid,” etc. In several cases, we’ve mappedthese types of controls to the POD HD Amp Tone knobs to retain the mojo of the originalamplifier. Please see “Amp Control Knobs” on page 5•10.About Default Amp SettingsWhenever you change to a different Amp or Preamp Model, predetermined Cab & Micmodels are automatically loaded, as well as Amp Tone Knob & Amp Edit Mode parametersettings designed to complement the Amp type. But you can alternatively select yourdesired settings for all these Amp options individually to customize and save your completeTone as a Preset (see the following sections)!5•2AMP Edit ModeThe AMP Edit Mode menu offers several options for customizing your Amp options. Pressthe PRESETS knob to enter Edit Mode:Use Left/Right to navigateto the AMP menuUse Up/Down to selectthe next/previous AMPparameterPress the PRESETSknob to enter or exitEdit ModeRotate the knob tochange the setting forthe selected parameterAmp Model SelectionIn addition to using the Amp Model Select knob, as covered on page 5•1, you canaccess all Amp Models from the Model menu here in the Amp Edit Mode screen. Notethat you’ll see several extra Amp Models available here are not found via the Amp ModelSelect knob! See the table on page 5•9 for a list of all Amp Models.
Amp, Cab & Mic ModelsAmp Model TypeAs the default setting for all Amp Models, this option is set to “Full” to provide thecomplete sonic characteristics of the classic amp’s preamp + power amp stages. However,you can alternatively select “Preamp” to obtain just the preamp stage of the amp.It is recommended to select the Preamp option when feeding your output to an externaltube amp, such as if connecting from the UNBALANCED OUTPUTS into a guitar amp,or when using the L6 LINK connection with a <strong>Line</strong> 6 DT50 amplifier. That said,there is no wrong choice. PODs have always been about flexibility... Check out all thepossibilities and decide which Models work best for your tone!Note that, when either the Full or Preamp option is selected, the additional application ofCab and Mic models is dependent upon the device’s OUTPUT MODE settings and theparticular output jacks you are using. Please see “Output Mode Options” on page 2•5.5•3Cab Model SelectionWhen selecting a new Amp Model, the Amp automatically loads a default, matchedspeaker cabinet model (see “Cab Models” on page 5•11). But you can use the CabMdl optionto choose any of the 16 available Cabs for any Amp Model. Your Cab Model selection isretained with each individual saved Preset.:Mic Model SelectionWhen selecting a new Amp model, a default Mic model is automatically loaded along withit (see table on page 5•2). But you can use the MicMdl option to choose a different Mic forany Amp Model. Your Mic Model selection is retained with each individual saved Preset.
Amp, Cab & Mic ModelsThe 8 Mic Model options for each Amp are as follows.5•4Mic ModelsMic Name Based On... *57 On Xs Shure® SM57 On Axis57 Off Xs Shure® SM57 Off Axis409 Dyn Sennheiser® MD 409 Dynamic421 Dyn Sennheiser® MD 421 Dynamic4038 Rbn Coles 4038 Ribbon121 Rbn Royer® 121 Ribbon67 Cond Neumann® U 67 Condenser87 Cond Neumann® U 87 CondenserE.R. (Early Reflections)This option adds the amount of reflective “room tone” that is mixed with your Amp tone.This value is saved per Preset.PresenceJust as with the Presence knob found on the front panel of most tube amplifiers, thisbrightens up your tone at higher settings.* All product names used in this manual are trademarks of their respective owners, which are in no way associated or affiliated with <strong>Line</strong> 6. These trademarks of other manufacturers are used solely to identify the products of those manufacturers whose tones and sounds werestudied during <strong>Line</strong> 6’s sound model development. Shure® is a registered trademark of Shure Incorporated, Sennheiser® is a registered trademark of Sennheiser Electronic Corporation, Neumann® is a registered trademark of Georg Neumann GMBH, Royer® is a registeredtrademark of Bulldog Audio, Inc. DBA Rover Labs
Amp, Cab & Mic ModelsMaster VolumeNOTE: This Master Volume parameter, as well as the following several parameters (Sag,Hum, Bias, and Bias Excursion) all modify strictly the “power amp” component of the“Full” type Amp Models. If you have the Amp Model Type set to “Preamp” (see page5•3), these parameters will have no effect on the sound.Use this Master Volume to adjust the amount of power amp distortion. This parameter ishighly interactive with all other power amp parameters - the lower the Master is set, theless effect the other controls will have.Sag5•5Setting the Sag to minimum offers a “tighter” responsiveness, and turning clockwiseprovides more “touch” dynamics & sustain.HumControls how much heater hum & AC ripple interacts with your tone. At the maximumsetting things get really freaky.
Amp, Cab & Mic ModelsBiasChanges the Bias of the power tubes. Set to minimum to achieve a very “cold” Class ABbiasing. At maximum the amp is operating in Class A.Bias Excursion5•6Knob 2: The Bias Excursion determines how the power amp tubes’ voicing reacts whenthey are pushed hard. Set low for a tighter feel. Set high for more tube compression. Thisparameter is highly reactive with the DRIVE & MASTER settings.Bypass VolumeThis is a volume control strictly for the level heard when the Amp Model has beendisabled (and when the FX ONLY feature is active - see page 5•8). This can be handy toadjust your device’s output level when using it just for the FX models. This value is savedper Preset.
Amp, Cab & Mic ModelsManual ModeAs described earlier, selecting a new Amp Model loads the new Amp, along with defaultsettings for each of the Amp Tone knob, <strong>Rev</strong>erb knob and Amp Edit Mode parameters. Ifyou prefer to NOT have these settings change when selecting a new Amp Model, use theManual Mode:Press and Hold the FX ONLYbutton to toggle in and out ofManual ModeWhen in Manual Mode, the following behaviors apply:5•7• The amber LED Bank/Patch display shows “- - -” to indicate you are in ManualMode.• The positions of the 5 physical Amp Tone knobs & <strong>Rev</strong>erb knob always reflect thevalues in use - what you see on the physical knobs is what you get.• Selecting a new Amp Model does NOT load the Amp’s “default” settings for these 6knobs. Instead, all 6 knobs’ settings remain as-is, unless you turn the knobs.• Likewise, all “power amp” parameter values within the Amp Edit Mode (see previoussection) remain at their current settings when changing Amp Models.• Selecting any Preset will automatically exit Manual Mode and load the new Preset,including its last-saved Amp Model and parameter settings.
Amp, Cab & Mic ModelsFX Only ModeUse the “FX Only” mode if you prefer to keep the Amp, Cab & Mic models’ processingbypassed, such as to use only the unit’s FX if running POD HD into a guitar amp. Thefollowing behaviors apply for the FX Only mode:5•8• To toggle FX Only mode on/off, simply toggle the FX ONLY button, which remainslit when this mode is active.• The FX Only mode is a persistent, “global” setting, therefore, the Amp, Cab & Micprocessing remains bypassed when the mode is active, regardless of the Amp Model’senabled/disabled state saved within any Preset.• Since the FX Only mode bypasses the Amp, this also means the Amp’s tone knobsand Amp Edit Mode parameters are disabled. Therefore, when the Amp is off, a“Bypass Volume” parameter is provided to allow signal level adjustment - see “BypassVolume” on page 5•6.*• The <strong>Rev</strong>erb effect is still available when in FX Only mode, and fully adjustable viathe REVERB knob, as well as via the Edit mode - <strong>Rev</strong>erb menu.* Note that the Amp & Cab processing can also be bypassed via the AMP footswitch,however, the footswitch only bypasses the Amp for the current Preset.AutoFX SETUP ParameterThis option is a global setting, offered in the SETUP menu. Please see “AutoFX” on page1•2. This setting will affect the FX behaviors when selecting a new Amp Model via the Ampselect knob.
Amp, Cab & Mic ModelsAmp/Preamp ModelsTo follow is a table showing the classic amplifiers upon which our HD Amp/PreampModels are based.* For more details, please also check out the POD HD Model Gallery,available from http://line6.com/support/manuals/.Amp/Preamp ModelBlackface Double NormalPOD HD Amp/Preamp ModelsHiway 100 Hiwatt® Custom 100Super OGibtone 185Tweed B-Man NormalBlackface ‘Lux NormalBased On...*‘65 “Blackface” Fender® Twin <strong>Rev</strong>erb®, Normal input channel‘60s Supro® S6616Gibson® EH-185Divide 9/15 Divided By 13 9/15PhD Motorway Dr. Z® Route 66Class A-15Class A-30 TBBrit J-45 BrightBrit P-75 BrightBrit J-800Bomber UberTreadplate‘59 Fender® Tweed Bassman®, Normal input channelFender® “Blackface” Deluxe <strong>Rev</strong>erb®, Normal input channel‘61 “Fawn” Vox® AC-15Vox® AC-30 “Top Boost”‘65 Marshall® JTM-45 MkII, Bright input channelPark 75, Bright input channelMarshall® JCM-8002002 Bogner UberschallMesa/Boogie® Dual Rectifier®Angel F-Ball Engl® Fireball 100Blackface Double VibratoTweed B-Man BrightBlackface ‘Lux VibratoBrit J-45 NormalBrit P-75 Normal<strong>Line</strong> 6 ElektrikNOTE: The following Amp Models are accessed withinthe Amp Edit Mode - Model menu only‘65 “Blackface” Fender® Twin <strong>Rev</strong>erb®,Vibrato input channel‘59 Fender® Tweed Bassman®, Bright input channelFender® “Blackface” Deluxe <strong>Rev</strong>erb®, Vibrato input channel‘65 Marshall® JTM-45 MkII, Normal input channelPark 75, Normal input channelA face-melting <strong>Line</strong> 6 original5•9* All product names are trademarks of their respective owners, which are in no way associated or affiliated with <strong>Line</strong> 6. These product names and descriptions are provided for the sole purpose of identifying the specific products that were studied during <strong>Line</strong> 6’s sound modeldevelopment. Fender®, Twin <strong>Rev</strong>erb®, Bassman® and Deluxe <strong>Rev</strong>erb® are registered trademarks of Fender Musical Instruments Corporation. Vox® is a registered trademark of Vox R&D Limited. Marshall® is a registered trademark of Marshall Amplification Plc. Dr. Z®is a registered trademark of Dr. Z Amps, Inc. Mesa/Boogie® and Dual Rectifier® are registered trademarks of Mesa/Boogie, Ltd. Engl® is a registered trademark of Beate Ausflug and Edmund Engl. Hiwatt® is a registered trademark of Fernandes Company, Ltd. Fane® is atrademark of Fane International. Gibson® is a registered trademark of Gibson Guitar Corp. Supro® is a registered trademark of Zinky Electronics. Celestion® is a registered trademark of Celestion International Ltd. Jensen® is a registered trademark of Jensen Loudspeakersand Audiovox Corporation.
Amp, Cab & Mic ModelsAmp Control KnobsSome of the classic amps we’ve modeled include special knob controls, therefore, we’veemulated their behaviors accordingly. These are listed as follows...5•10• Super O (PAWNSHOP Red) - The actual Supro® only has a Drive and a Toneknob, so we’ve fashioned our MID knob to behave as a “Tone,” and invented Bassand Treble controls.• Divide 9/15 (BOUTIQUE Red) - Our Model is based on the EL84 circuit of theDivided By 13 9/15. The DRIVE knob controls the “clean” channel, and the BASSknob is being used as the Drive for the “dirty” channel. Just think of the BASS knobas a “Drive 2” control.• Class A-15 & Class A-30TB (CLASS A Red & Green) - Following the Vox® traditionupon which these Models are based, we’ve mapped the MID knob as a “Cut” - turningthe knob counter-clockwise reduces the treble.
Amp, Cab & Mic ModelsCab ModelsTo follow is a table showing the classic speaker cabinets upon which our Cab Models arebased.*Cab ModelPOD HD Cab ModelsBased On...*212 Blackface Double Fender® “Blackface” Twin <strong>Rev</strong>erb® combo cabinet, 2x12 inchJensen® speakers412 Hiway Hiwatt® cabinet, 4x12 inch Fane® 12287 50 watt speakers6x9 Super OSupro® S6616 combo cabinet, one “6x9” size speaker112 Field Coil Gibson® EH-185 combo cabinet, 1x12 Field Coil Speaker410 Tweed 59 Fender® Tweed Bassman® combo cabinet, 4x10 inch Jensen®alnico speakers112 BF ‘Lux Fender® “Blackface” Deluxe <strong>Rev</strong>erb® combo cabinet , one 12 inchOxford 12K5-6 speaker112 Celest 12-H Divided By 13 9/15 combo cabinet, one 12 inch Celestion® G12HHeritage (70th anniversary) speaker212 PhD Ported Dr. Z®, Z Best cabinet, 2x12 inch Celestion® speakers (one G12HHeritage and one Vintage 30)112 Blue Bell ‘61 “Fawn” Vox® AC-15 combo cabinet, one 12 inch Celestion®Alnico Blue speaker212 Silver Bell Vox® AC-30 “Top Boost,” 2x12 inch Celestion® Alnico Silver Bellspeakers412 Greenback 25 Marshall® cabinet, 4x12 inch Celestion® G12M “Greenback”speakers412 Blackback 30 Marshall® cabinet, 4x12 inch Celestion® Rola G12H30W“Blackback” speakers412 Brit T-75 Marshall® cabinet, 4x12 inch Celestion® G12T75 speakers412 Uber Bogner Uberschall cabinet, 4x12 inch Celestion® speakers (2 xG12T75 and 2 x Vintage 30 speakers)412 Tread V-30 Mesa/Boogie® cabinet, 4x12 inch Celestion® Vintage 30 speakers412 XXL V-30 Engl® Pro cabinet, 4x12 inch Celestion® Vintage 30 speakers5•11* All product names are trademarks of their respective owners, which are in no way associated or affiliated with <strong>Line</strong> 6. These product names and descriptions are provided for the sole purpose of identifying the specific products that were studied during <strong>Line</strong> 6’s sound modeldevelopment. Fender®, Twin <strong>Rev</strong>erb®, Bassman® and Deluxe <strong>Rev</strong>erb® are registered trademarks of Fender Musical Instruments Corporation. Vox® is a registered trademark of Vox R&D Limited. Marshall® is a registered trademark of Marshall Amplification Plc. Dr. Z®is a registered trademark of Dr. Z Amps, Inc. Mesa/Boogie® and Dual Rectifier® are registered trademarks of Mesa/Boogie, Ltd. Engl® is a registered trademark of Beate Ausflug and Edmund Engl. Hiwatt® is a registered trademark of Fernandes Company, Ltd. Fane® is atrademark of Fane International. Gibson® is a registered trademark of Gibson Guitar Corp. Supro® is a registered trademark of Zinky Electronics. Celestion® is a registered trademark of Celestion International Ltd. Jensen® is a registered trademark of Jensen Loudspeakersand Audiovox Corporation.
FX ModelsFX ModelsThis chapter provides reference tables & parameter details on all <strong>POD®</strong> HD FX Models,most of which were derived from the exemplary <strong>Line</strong> 6 M13 Stompbox Modeler! All FXparameters are accessible within Edit Mode - Please see “Edit Mode” on page 4•1.TIP: For more details about the POD HD FX Models, please also check out the POD HDModel Gallery and M13 <strong>Advanced</strong> <strong>Guide</strong> documents, available from http://line6.com/support/manuals/.FX1 Models - Reference TableBelow is a Reference Table listing all parameters for the FX1 models, which includes aplethora of “Stomp” effects (Distortions, Fuzzes, Compressors, Pitch-Shifters and more).FX1 ModelParametersGAIN SwooshScreamer Drive Bass Tone Treble OutputTube Drive Drive Bass Mid Treble OutputClassic Distortion Drive Bass Filter Treble OutputHeavy Distortion Drive Bass Mid Treble OutputColor Drive Drive Bass Mid Treble OutputOverdrive Drive Bass Mid Treble Output<strong>Line</strong> 6 Drive Drive Bass Mid Treble Output<strong>Line</strong> 6 Distortion Drive Bass Mid Treble OutputBoost Comp Drive Bass Comp Treble OutputRed Comp - - - Sustain LevelBlue Comp - - - Sustain LevelBlue Comp Treb * - - - Sustain LevelVetta Comp - - - Sensitivity LevelVetta Juice - - - Amount LevelFuzz Pi Drive Bass Mid Treble OutputOctave Fuzz Drive Bass Mid Treble Output* Available in POD <strong>HD400</strong> only.6•1
FX Models6•2FX1 ModelParametersJet Fuzz Drive Fdbk Tone Speed OutputSub Octave Fuzz * Drive Bass Sub Treble OutputBuzz Saw * Drive Bass Mid Treble OutputFacial Fuzz Drive Bass Mid Treble OutputJumbo Fuzz Drive Bass Mid Treble OutputVARIOUS SwooshSpring - Decay Time Tone Mix‘63 Spring * - Decay Time Tone MixParticle Verb * - Dwell Gain Verb MixGraphic EQ * 80Hz 220Hz 440Hz 1.1kHz 2.2kHzStudio EQ * LowFreq LowAmt MidFreq MidAmt OutputParametric EQ Lows Highs Freq Q (Width) Gain4-Band Shift EQ Low Low Mid Hi Mid High ShiftMid Focus EQ * HPFreq HP Q LPFreq LP Q GainSlow Filter * Speed Freq Q Filter MixTron Down Freq Q (Width) Range Type MixTron Up Freq Q (Width) Range Type MixQ Filter Freq Q (Width) Gain Filter MixRing Modulator Speed Depth Shape AM FM MixDimension Switch 1 Switch 2 Switch 3 Switch 4 MixFrequency Shifter - - Freq Mode MixRotary Drum Speed Depth Tone Drive MixRtry Drm W/Hrn * Speed Depth HDepth Drive Mix* Available in POD <strong>HD400</strong> only.
FX ModelsFX1 ModelParametersPITCH SwooshSmart Harmony - Key Scale Shift MixPitch Glide Position Pedal Heel Toe MixAttack Synth * Speed Freq Wave Pitch MixSynth String Speed Freq Attack Pitch MixGrowler Speed Freq Q (Width) Pitch MixSynth-O-Matic Freq Q (Width) Wave Pitch MixBass Octaver - Tone Normal Octave -V Tron Start (Vowel) End (Vowel) Speed Mode Mix* Available in POD <strong>HD400</strong> only.Common FX1, FX2 & FX3 ParametersAll FX include the following “Model Select” and “Routing” parameters. You’ll see theseparameters, as well as several others for each FX model, when you enter Edit Mode:Model Select6•3Allows you to choose from among the lists of FX1, FX2 or FX3 models.RoutingSets the FX model’s position within the signal flow - Pre or Post.• Pre: Positions the effect before the amp.• Post: Positions the effect after the amp.
FX ModelsFX1 GAIN Swoosh Models - ParametersThe following parameters are common to most Compressor, Distortion & Fuzz models:• Drive: Adjusts the amount of overdrive/distortion/fuzz.• Bass: Adjusts Bass EQ level.• Mid: Adjusts the Midrange EQ level.• Treble: Adjusts Treble EQ level.• Output: Adjusts the overall volume level - higher settings typically offer an outputboost.FX1 VARIOUS Swoosh Models - ParametersThe following parameters are common to most <strong>Rev</strong>erb models:• Decay: Sets the length of time the reverb effect sustains.• Time: Configures the “pre-delay” time, before the wet reverb effect is heard.• Tone: Adjusts the tone of the “wet” reverb signal only.6•4Particle Verb (POD <strong>HD400</strong> Only)This is a truly unique <strong>Rev</strong>erb effect, so we’ve provided details on its parameters.Turns your chords into a lush modulated pad in STABLE mode. CRITICAL mode issimilar, but with a slight rise in pitch. In HAZARD mode, all stops are removed.• Dwell: Essentially a decay parameter, which adjusts the length of time the reverbtail lasts.• Condition: Choose between STABLE, CRITICAL and HAZARD here for somedifferent reverb experiences!• Gain: Sets overall output level of the effect.
FX ModelsThe following parameters are common to most EQ models:• Frequency (as well as Low, Mid, High): Selects the center frequency or range forthe particular EQ Band. (The Graphic EQ includes “fixed” Bands where the gain isadjustable for each.)• Q: Adjusts the frequency width or shape of the frequency band filter.• Gain: Adjust the output level of the particular Band. (The Gain parameters accessedby Multi-function Knob #4 adjust overall level.)The following parameters are common to most Filter models.• Frequency: Selects the center frequency used by the effect.• Q: Adjusts the frequency width of the filter in use.• Depth & Speed: Adjusts the modulation intensity & rate (for those Filter FX thatinclude modulation).• Mix: Sets the balance of the “Dry” and “Wet” signals. At 0% no effect is added toyour signal; at 100% you will hear the effected signal only. For most Filter FX, try the100% setting to achieve the full weirdness factor.FX1 PITCH Swoosh Models - ParametersSince the Pitch FX are a bit more complex, we’ve provided examples of each Pitch FXModel’s Edit Mode screen and parameter descriptions.6•5Smart HarmonyFinally, a <strong>Line</strong> 6 intelligent harmonizer effect! Select a Scale, Key and Shift value and ourDSP algorithms will do the rest, producing a perfect harmony note along with your guitarriffs. The available parameters are:• Key: Select the Key you’ll be playing in.
FX Models• Scale: Select the Scale you’d like to use (also see table below).• Shift: Determines the interval value for the desired harmony note.• Mix: Sets the balance or your dry + harmony notes.The Smart Harmony effect automatically detects your guitar’s single-note pitch and shiftsit to match a user-selected key and scale. A choice of keys is provided; consult the tablebelow to achieve other scalic modes.• Choose your Key on the left, then your Mode on the top.• The cell where the two connect tells you the scale. For example, for the Key of C -Lydian Mode, the scale you want is G Major.6•6ModeKey Ionian Dorian Phrygian Lydian Mixolydian Aeolian LocrianA A Maj G Maj F Maj E Maj D Maj C Maj Bb MajB B Maj A Maj G Maj Gb Maj E Maj D Maj C MajC C Maj Bb Maj Ab Maj G Maj F Maj Eb Maj Db MajD D Maj C Maj Bb Maj A Maj G Maj F Maj Eb MajE E Maj D Maj C Maj B Maj A Maj G Maj F MajF F Maj Eb Maj Db Maj C Maj Bb Maj Ab Maj Gb MajG G Maj F Maj Eb Maj D Maj C Maj Bb Maj Ab MajPitch GlideThis is the <strong>Line</strong> 6 Pitch Glide effect, designed to be used with the POD HD ExpressionPedal. Set your heel and toe values as desired, then glide between them.• Position: Manually adjusts the pedal position, allowing you to tweak the effectwithout actual pedal control.• Pedal:*• Choose Wah:Glide to have your pedal’s Wah mode control the Pitch Glide effect.
FX Models• Choose Vol:Glide to have your pedal’s Vol mode control the Pitch Glide effect.• Choose Don’tCtl to use the effect manually, without pedal control.• Heel: Sets the amount of pitch shift for the “heel” position of your pedal.• Toe: Sets the amount of pitch shift for the “toe” position of your pedal.• Mix: Adjusts the balance of “Dry” guitar signal and “Wet” (pitch-shifted) signal.*Note: This Pedal assignment is retained when saving your Preset. You’ll see that thePedal’s WAH and VOL LEDs both lit to indicate when the pedal is switched to controlPitch Glide - see “Pedal Control” on page 2•4.Attack Synth (POD <strong>HD400</strong> Only)• Speed: Controls the attack time.• Frequency: Controls the stop frequency of the VCF filter.• Wave: Selects Square, Pulse Width Modulation or Ramp for the waveform.• Pitch: Sets the Pitch of the effect over a two octave range.• Mix: Adjusts the balance of “Dry” guitar signal and “Wet” signal.6•7Synth String• Speed: Sets the speed of the vibrato-y pulse width modulation.• Frequency: Controls a low pass filter tone control.• Attack: Configures the attack time.• Pitch: Sets the Pitch of the effect over a two octave range.• Mix: Adjusts the balance of “Dry” guitar signal and “Wet” signal.
FX ModelsGrowler• Speed: Dials in the speed of the vibrato-y pulse width modulation.• Frequency: Controls the center frequency of the filter.• Q: Sets the width of the filter.• Pitch: Controls the Pitch of the synth over a two octave range.• Mix: Adjusts the balance of “Dry” guitar signal and “Wet” signal.Synth-O-Matic6•8• Frequency: Selects the frequency for which the filter will be centered.• Q: Sets filter width to add more or less emphasis on the selected frequency.• Wave: Selects one of the eight synth waveforms.• Pitch: Controls the Pitch of the synth sound.• Mix: Adjusts the balance of “Dry” guitar signal and “Wet” signal.Bass Octaver• Tone: Adjusts the overall tone of the effected signal.• Normal: Controls the level of your original signal (allowing you to balance it withthe octave signal).• Octave: Controls the level of the pitch-shifted, octave signal.
FX ModelsV-TronEach time you strike a new note or chord, the vowel sequence will be “spoken.” You canchoose whether to go from Start vowel to End vowel only (Up), or have it turn around andcome back again (Up/Down).• Start and End: Sets the starting vowel and ending vowel sounds (A, E, I, O or U).• Speed: Adjusts how long it takes to “speak” from the Start to the End vowel.• Mode: Selects either Up or Up/Down.• Mix: Adjusts the balance of “Dry” guitar signal and “Wet” signal.6•9
FX ModelsFX2 Models - Reference TableBelow is a Reference Table listing all parameters for the FX2 set of models, which includesa complete array of Modulation, Filter & Tremolo FX!6•10FX2 ModelParametersMOD SwooshAnalog Chorus Speed Depth Chrs/Vibrato Tone MixAnalog Flanger Speed Depth Feedback Manual MixU-Vibe Speed Depth Feedback Vol Sensing MixPhaser Speed Depth Feedback Stages MixDual Phaser Speed Depth Feedback LFO Shape MixBarberpole Phaser Speed - Feedback Mode MixPanned Phaser Speed Depth Output Pan Speed MixScript Phase Speed - - - -Pitch Vibrato Speed Depth Rise Time Vol Sensing MixFILTER SwooshSeeker Freq Q (Width) Speed/Tempo Steps MixThrobber Freq Q (Width) Speed/Tempo Wave MixSpin Cycle Freq Q (Width) Speed/Tempo Vol Sensing MixObi-Wah Freq Q (Width) Speed/Tempo Filter Type MixVoice Box Start Vowel End Vowel Speed/Tempo Auto MixTREMOLO SwooshOpto - Tremolo Speed Depth Shape Vol Sensing MixBias Tremolo Speed Depth Shape Vol Sensing MixPattern Tremolo Speed Pattern 1 Pattern 2 Pattern 3 Pattern 4Panner Speed Depth Shape Vol Sensing Mix
FX ModelsCommon FX2 ParametersWhen you enter Edit Mode for any FX2 model, you’ll see the following common parametersfor most (as well as “Model Select” and “Routing,” as described on page 6•3):Tap ControlSet this option to Control to have the Modulation speed of your FX2 models followwhatever tempo you “tap” into your POD HD, using the TAP button. Set this parameterto Don’t Ctl and the FX2 models’ Speed parameter can be adjusted to any speed you like,regardless of the current Tap Tempo. The TapCtl setting is a “global” parameter. Also see“Tap Tempo” on page 2•4.SpeedAdjusts the modulation/oscillation/tremolo speed for the FX2 models.* The followingbehaviors apply:• If the TapCtl parameter (see previous item) is set to Don’tCtl, you can adjusts theModulation Speed manually, independent of the current Tap Tempo. This Speedvalue is stored per Preset.• If the TapCtl parameter is set to Control, the Modulation Speed follows the currentTap Tempo. If you stomp out your desired 1/4 note rhythm on the TAP footswitch,this will set a new Tap Tempo, and FX2 models will then follow this new tempo.6•11* Note that the FX2 Filter swoosh models offer slightly different Speed parameter options,as detailed within the following model’s descriptions, as applicable.
FX ModelsDepthAdjusts the intensity of the pitch-modulation, wobble or throb, depending on the type ofeffect. Higher settings yield more dramatic results.FeedbackMany Mod & FX offer a Feedback option. This controls the amount of delayed signal thatis fed back into the effect. Higher settings can provide more dramatic textures.Mix6•12Sets the balance of the “Dry” and “Wet” signals. At 0% you will hear strictly dry guitar; at100% you will hear the effected signal only. For Chorus, Flanger & Phase FX, results aretypically best with the Mix set between 0 to 50%. For Vibrato, Tremolo, Pitch and FilterFX, try the Mix at 90 - 100%. No rules here though, so feel free to experiment!Note that the Script Phase and Pattern Tremolo FX2 models do not offer a Mix parameter.Their dry/wet balance is “fixed,” just like the classic pedals that inspired them!Common FILTER Swoosh ParametersIn addition to the above, following parameters are found in several of the FX2 FilterSwoosh models:• Frequency: Selects the center frequency for the filter(s) in use.• Q: Sets the frequency width of the filters.
FX ModelsFX3 Models - Reference TableBelow is a Reference Table listing all parameters for the FX3 set of models, which includesa includes a collection of our best Delay & Echo models.FX3 ModelParametersDELAY SwooshDigital Delay Time Fdbk Bass Treble MixDigital Delay w/ Mod Time Fdbk Mod Speed Mod Depth MixAnalog Echo Time Fdbk Bass Treble MixAnalog w/Mod Time Fdbk Mod Speed Mod Depth MixEcho Platter Time Fdbk Wow/Flutter Drive MixEcho Platter Studio Time Fdbk Wow/Flutter Drive MixLow Res Delay Time Fdbk Tone Resolution MixStereo Delay Left Time Left Fdbk Right Time Right Fdbk MixPing Pong Delay Time Fdbk Time Offset Stereo Spread MixDynamic Delay Time Fdbk Threshold Ducking MixTAPE ECHO SwooshTape Echo Time Fdbk Bass Treble MixTape Echo Studio Time Fdbk Bass Treble MixTube Echo Time Fdbk Wow/Flutter Drive MixTube Echo Studio Time Fdbk Wow/Flutter Drive MixMulti-Head Delay Time Fdbk Head 1 & 2 Head 3 & 4 MixSWEEP ECHO SwooshAuto Volume Echo Time Fdbk Mod Depth Swell Time MixSweep Echo Time Fdbk Sweep Speed Sweep Depth MixSweep Echo Studio Time Fdbk Sweep Speed Sweep Depth Mix<strong>Rev</strong>erse Delay Time Fdbk Mod Speed Mod Depth Mix6•13
FX ModelsCommon FX3 ParametersWhen you enter Edit Mode for any FX3 model, you’ll see the following common parametersfor most (as well as “Model Select” and “Routing,” as described on page 6•3):Tap ControlSet to Control to have all FX3 models’ Delay time follow the current Tap Tempo, whichyou can define by using the TAP button. Or, set to Don’t Ctrl to manually set a DelayTime - See the following section. The TapCtl setting is a “global” parameter and notstored with your Preset. Also see “Tap Tempo” on page 2•4.Time / TempoSets the Delay/Echo repeat time. The following behaviors apply:6•14• If the TapCtl parameter (see above) is set to Don’tCtl, this parameter appears asTime and the PRESETS knob adjusts it in millisecond (ms) increments. The FX3models will use this ms value for their Time and will ignore the current Tap Tempo.• Push and hold the PRESETS knob while turning to adjust the value by 20 msincrements.• This Time value is stored within a Preset.• If the TapCtl parameter is set to Control, this parameter appears as Tempo anddisplays and follows the current Tap Tempo BPM. Turning the PRESETS knobadjusts by .1 BPM increments to allow fine-tuning.• Or, push the PRESETS knob while turning to adjust by full BPM values.• If you stomp out your desired 1/4 note rhythm on the TAP footswitch, this will seta new Tap Tempo, and FX3 models will then follow this new BPM value.
FX ModelsFeedbackSets the number of repeats for the Delay/Echo. The higher the setting, the greater numberof repeats.MixSets the balance of the “Dry” and “Wet” signals. At 0% you will hear strictly dry guitar; at100% you will hear the delay/echo only.6•15
FX Models<strong>Rev</strong>erb Models - Reference TableBelow is a Reference Table listing all parameters for the spacious <strong>Rev</strong>erb set of models.<strong>Rev</strong>erb ModelParametersPlate Decay PreDelay Tone MixRoom Decay PreDelay Tone MixChamber Decay PreDelay Tone MixHall Decay PreDelay Tone MixEcho Decay PreDelay Tone MixTile Decay PreDelay Tone MixCave Decay PreDelay Tone MixDucking * Decay PreDelay Tone MixOcto Decay PreDelay Tone MixSpring Decay PreDelay Tone Mix‘63 Spring Decay PreDelay Tone MixParticle Verb Dwell Condition Gain Mix* Available in POD <strong>HD400</strong> only6•16Common <strong>Rev</strong>erb ParametersWhen you enter Edit Mode for any <strong>Rev</strong>erb model, you’ll see the following commonparameters for each (as well as “Model Select” and “Routing,” as described on page 6•3).Pre-DelayConfigures the time before the reverb effect is heard.
FX ModelsDecaySets the length of time the reverb effect sustains.ToneAdjusts the overall Tone of the wet reverb signal. Higher settings provide a brighter, morereflective reverb quality.MixSets the balance of the dry & wet signals, from 0% (dry signal only) to 100% (wet reverbsignal only). Mix is persistent for all <strong>Rev</strong>erbs (your Mix level will stay the same when youload a different <strong>Rev</strong>erb model).6•17
FX ModelsWah ModelsBelow is a list of all Wah models included in the Wah set. Choose the desired Wah modelfrom the Edit Mode - Wah:Model Select menu (see page 6•3). There are no additional EditMode parameters for the Wahs other than Model Select - Simply use your POD HD onboardpedal to put them to work just like a traditional Wah!Wah ModelsVettaFasselChromeWeeperConductorColorfulThroaty *Chrome Custom ** These Wah models are available in POD <strong>HD400</strong> only.Using the Pedal6•18To utilize your POD HD on-board pedal to control the Wah, press the pedal all the wayforward and toggle the “toe switch” so that the Wah LED indicator is lit - see “PedalControl” on page 2•4.Note that it also possible to assign the “Wah” pedal to alternatively control the FX1 PitchGlide model - please see “Pitch Glide” on page 6•6.
Using the LooperUsing the LooperThe Looper in <strong>POD®</strong> <strong>HD300</strong> & <strong>POD®</strong> <strong>HD400</strong> offers you up to 24 seconds of monorecording time, as well as the ability to record overdubs, play on-demand and more, all viaseveral handy footswitches.Looper ControlsWhen you engage the Looper mode, the four bottom row switches control the Looper,providing hands-free operation of the Looper functions. Here are the details:12 3 4 51 MODE - Toggle this footswitch so that the middle, red LED is lit to engage Loopermode. The gold-colored labels on the row of switches to the right describe the action foreach in Looper mode. (See “Footswitch Mode” on page 1•3 for MODE options.)2 PRE/POST - Toggling this switch determines whether Amp & FX processing is addedto your guitar signal during the recording of your loop, or only for the loop’s playback.• PRE (switch is unlit): Your guitar signal is recorded unprocessed (i.e. - the loop isrecorded “Pre” Amp & FX processing). When played back, the loop audio is mixedwith incoming guitar to feed the current Preset’s Amp & FX processing. If youchange Presets or tone settings while set to PRE, you’ll hear them applied to yourloop playback.• POST (switch is lit): Your guitar signal is recorded processed (i.e. - the loop isrecorded “Post” Amp & FX processing). When played back, the loop audio is mixedwith incoming guitar AFTER the guitar signal has been processed through the Ampand FX. This provides the ability select a new Preset which is applied only on yourguitar input, while the loop plays back with the original recorded Preset tone!7•1
Using the LooperNote: When recording in the “POST” mode, it is likely that the Amp & FX modelingwill add some substantial gain to your dry signal. If, while you are playing back a “POST”recorded loop, you change the setting to “PRE,” this results in ‘doubling up’ the gain byrunning the playback through Amp & FX processing again. This is likely to cause theoutput to become loud and to distort. Best to pick a mode while playback is stopped, beforestarting your new loop!3 REC/OVERDUB - To record a loop, step on this switch and the Looper will immediatelystart recording. Step on it a 2nd time and your recorded loop will begin to play back, withOverdub mode activated (the switch’s LED will flash to indicate Overdub mode).Once you have a loop recorded, you can layer an overdub on top of your current loop.Simply play back the loop and step on the flashing REC/OVERDUB switch. Your newlive guitar will be recorded on top of your previously recorded loop. Repeat these steps torecord as many additional overdubs as you like!4 PLAY/STOP - Press this switch to start and stop playback of your recorded loop. Ifyou are actively recording a loop, press this switch to set your loop “out” point; recordingis stopped and the newly recorded loop starts playing immediately.5 PLAY ONCE - Pressing this button plays your recorded loop for one cycle. Cool fortriggering a pre-recorded phrase on demand!7•2TAP (Clear Loop) - Holding the TAP button when in “Looper” Mode clears outany recorded Loop audio. This function will automatically stop the Looperplayback or Loop recording, if active.Note: When the MODE switch is set to Looper mode, holding the TAP button does notset POD HD to the Tuner mode. To access the Tuner, first set the MODE switch to Presetor Pedal On/Off mode, then press and hold the TAP button.
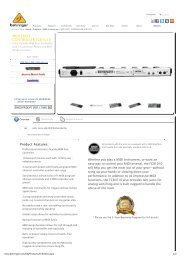
USB AudioUSB AudioIn this chapter, we’ll cover the USB audio capabilities of <strong>POD®</strong> <strong>HD300</strong> & <strong>POD®</strong> <strong>HD400</strong>.With the installation of the <strong>Line</strong> 6 USB audio driver, you can use POD HD as a highquality, 24-bit audio interface for your Mac® or Windows® computer!The <strong>Line</strong> 6 USB Audio DriverBefore connecting your POD HD device to your computer, it is recommended that youdownload and install the <strong>Line</strong> 6 POD <strong>HD300</strong> Edit or POD <strong>HD400</strong> Edit software. Thisinstalls the necessary <strong>Line</strong> 6 USB Audio Driver, as well as the <strong>Line</strong> 6 Monkey® updateutility (also see “Appendix A: <strong>Line</strong> 6 Monkey” on page A•1).*NOTE: As of the POD <strong>HD300</strong> & <strong>HD400</strong> USB Device Driver version 5.7.0, Mac OS®X 10.4 (Tiger®) is no longer supported. To use the POD HD device’s USB connection witha Mac® running OS® X 10.4, you’ll need to download and install the earlier POD <strong>HD300</strong>/<strong>HD400</strong> Driver version 5.1.2, available from http://line6.com/software/.The <strong>Line</strong> 6 Software Downloads site - selecting the POD <strong>HD400</strong> Edit softwareOnce the installation is complete, just connect your device directly to a USB port on yourcomputer (it is not recommended to connect to a USB hub) and power on your POD HD.8•1For more assistance, please see the POD HD Edit Installer <strong>Guide</strong>s and the POD HD EditPilot’s <strong>Guide</strong>s, available from http://line6.com/support/manuals.
USB AudioAudio RoutingWhen using the POD HD USB connection, the audio driver manages several tasks. Thedriver feeds the processed guitar signal out the USB Record Send to your computer andreceives playback audio from the computer. It also grabs the processed guitar signal beforerouting it to the Record Send, to provide a low latency monitor signal, and then mixes themonitor signal with the playback audio and feeds this combined signal to your POD HDanalog outputs.Note that all USB audio is muted whenever a L6 LINK connection is active betweenPOD HD and a DT50 amplifier. Please see the additional documentation found at http://line6.com/support/manuals/ for more about L6 LINK.Mix of monitor signal + playbackaudio fed to analog outputsPlayback audiofrom computerRecord Send audioto computerUSB audio routing provided by the <strong>Line</strong> 6 USB audio driver8•2The POD HD Record SendAs shown above, the Record Send is the virtual “pipeline” that carries your POD HDprocessed,digital signal across the USB connection, making it available to your audiosoftware as an input signal for recording. (Note that the signal fed to the USB RecordSend signal is also controlled by the Output options - see “Output Mode Options” on page2•5.)
USB AudioYou’ll see the POD HD device and Record Send appear within your audio software -Simply select this Send as the input for the track and you’ll be able to record your PODHD signal. The level of the signal fed to the Send (and thus the level received within yourrecording track) is affected by your POD HD output levels: Amp Model Drive & Volume,FX Model Gain controls, Volume Pedal, etc.USB Monitor LevelWhen recording with POD HD and your computer, it is often necessary to balance yourguitar’s monitor signal versus the playback audio. For just this reason we’ve provided aUSB Monitor level option within the SETUP menu to provide independent volumecontrol over your Monitor signal - please see “USB Monitor Level” on page 1•2.If you are using POD HD as your audio interface for recording, then your DAW softwaremay also offer its own “software monitoring” function. You may want to use the DAW’ssoftware monitoring in some scenarios, such as if you want to hear your guitar signalprocessed with plug-ins on the DAW track. When utilizing DAW software monitoring,turn this USB Monitor level to 0% to allow you to hear only the DAW software monitoringsignal.The <strong>Line</strong> 6 Audio-MIDI Devices PanelThe <strong>Line</strong> 6 Audio-MIDI Devices utility is the place to reference and configure variousaudio driver settings. The options in the <strong>Line</strong> 6 Audio-MIDI Devices dialog are slightlydifferent on a Mac® versus a Windows® system. See the following descriptions that matchyour setup.• For Mac®: See next section.• For Windows®: See “Windows® - <strong>Line</strong> 6 Audio-MIDI Devices” on page 8•8.8•3
USB AudioMac® - <strong>Line</strong> 6 Audio-MIDI DevicesLaunch the <strong>Line</strong> 6 Audio-MIDI Devices utility from within the Mac®System Preferences. This utility provides access to several driver options.<strong>Line</strong> 6 Audio-MIDI Settings - Driver Options (Mac®)1234568•41 Device Selector: Select your POD HD device here. If you have more than onesupported <strong>Line</strong> 6 audio device connected, each will be selectable in this list.2 Driver Version: Displays the current device’s installed driver version number.3 ESN: Displays the current device’s unique Electronic Serial Number.
USB Audio4 Run Audio-MIDI Setup: Mac ® Core Audio interface driver settings are configured inthe Mac OS ® X Audio-MIDI Setup utility. This button launches this dialog for you (see“Mac OS® X Audio-MIDI Setup Utility” on page 8•6).5 Sample Rate Converter Active: You’ll see this indicator light up whenever thedevice is operating at a sample rate other than its native 48kHz rate. In addition to 48kHz,POD HD supports 44.1kHz, 88.2kHz and 96kHz rates by utilizing an internal sample rateconverter. Please check your specific software’s documentation for details on configuringits audio sample rate.6 USB Audio Streaming Buffer: This slider adjusts the buffer size for the audioresponsiveness of the Input Monitoring signal. Basically, the default setting should befine for most systems, but if getting audio dropouts or working with large CPU demandson your system, raise the slider a notch or two to the right until it alleviates the problem.8•5
USB AudioMac OS® X Audio-MIDI Setup UtilityPOD HD utilizes the Mac® Core Audio driver type, making it a compatible audio interfacefor practically any Mac® audio/multimedia software. As with most Core Audio devices,some settings are found in the Audio Devices tab of the Mac® Audio-MIDI Setup dialog.ABCThe Audio MIDI Setup utility - Mac OS® X 10.5*8•6*Note: The Audio MIDI Setup utility window within Mac OS® X 10.6 has a slightlydifferent layout, but offers the same options and functionality as described here.A System Settings:• The Default Input and Default Output options allow you to choose the audiointerface you want your Mac® audio applications to use by default. If you want thisto be your <strong>Line</strong> 6 device, select it here.• The System Output option allows you to choose which audio interface the Mac ®System sounds are played through.
USB AudioB Device Properties: Choose your POD HD device here to allow the Audio Input andAudio Output options display its settings.C Audio Input & Output Options: If you’ve selected your POD HD in the DeviceProperties, these settings will all refer to your POD HD device:• You’ll see the Input and Output selectors both disabled, showing Master Stream foreach. POD HD includes one stereo “fixed” Input (Record Send 1-2) and one fixedstereo Output (Out 1-2).• The Source options are also disabled for POD HD.• The Format selectors show you the Sample Rate* and Bit Depth that POD HD isoperating at for recording. The Bit Depth for POD HD is fixed at 24 bit.*It is recommended that you do not use the Sample Rate selectors in this window to setyour sample rate when your audio software is running. Typically, your audio software willoffer a sample rate option within its own “Preferences” settings, which is where you shouldchange the rate.• The Input Volume Sliders offer level control for the Record Send signal fed to yourrecording software. These sliders can be used to fine tune your DAW’s recordinglevel.• The Output Volume Sliders offer stereo level control for your software’s audioplayback fed to POD HD. These sliders can be used to independently adjust theUSB playback audio versus your guitar input signal.8•7
USB AudioWindows® - <strong>Line</strong> 6 Audio-MIDI DevicesThe following settings are the same for Windows® XP, Windows Vista® or Windows® 7,except where noted.Launch the <strong>Line</strong> 6 Audio-MIDI Devices from within the Windows® Control Panel. OnWindows® systems, POD HD offers both a DirectSound® and ASIO® device driver formaximum compatibility with audio software applications. It is recommended that you usethe ASIO® audio driver if your software supports it, since this offers higher performance.When prompted for ASIO® driver settings, this dialog is where you will make them.<strong>Line</strong> 6 Audio-MIDI Settings1234 58•86The <strong>Line</strong> 6 Audio MIDI Devices panel - Windows® XP
USB Audio1 Device Selector - Select your POD HD device here. If you have more than onesupported <strong>Line</strong> 6 audio device connected, each will be selectable in this list.2 Driver Version - Displays the current device’s installed driver version number.3 ESN - Displays the current device’s unique Electronic Serial Number.4 Driver Operation (Windows® XP) - These options are only applicable for when anapplication utilizes the POD HD device via the Windows® DirectSound® driver. Theyare non-selectable when in use via the ASIO® driver.• Driver operating at: Displays the actual Sample Rate & Bit Depth the driver isoperating at when in use by an audio application.• Default Sample Rate & Bit Depth: Use this option to set the default sample rate& bit depth that (non-ASIO®) applications will use when using POD HD as theaudio interface.• Lock Driver Format: When checked, this forces the DirectSound® driver to alwaysoperate at the Sample Rate and Bit Depth settings entered in the two fields above (asopposed to following the sample rate requested by a Windows ® audio application).8•9
USB Audio4 Driver Operation (Windows Vista® & Windows® 7)On Windows® Vista & Windows® 7 you will see a Sound Control Panel button - clickthis to launch the Windows® Sound panel. Within the Sound panel’s Playback andRecording tabs you can designate POD HD as the “Default” audio device if you want allyour Windows® multimedia programs to utilize it as their sound card device.POD <strong>HD400</strong> selected as the Default Playback Device8•10
USB AudioYou can also click on the Properties button in the Sound dialog to access the defaultformat settings for the POD HD Sample Rate and Bit Depth when used with Windows®multimedia applications. (Note that if you are using an audio application that is set toutilize the ASIO® driver for your <strong>Line</strong> 6 device, then ASIO® communicates directly withthe device, and these “default format” settings do not apply.)The Window Vista/7 Control Panel>Sounds>Properties - <strong>Advanced</strong> tab5 ASIO® Driver Settings• ASIO® Client: If running audio software that is using POD HD as its ASIO® audiodevice, the name of the software will appear here.• Buffer Size: The ASIO® buffer size in use. The ASIO® Buffer Size will affect the“responsiveness” and “latency” of the DAW software. The lower the setting, thefaster the response, but with the trade-off of higher processor usage and the risk ofaudio dropouts. Raise the value if you are getting inconsistent playback or recordingin the audio software. Basically, 256 is generally a good average setting to start with.• Bit Depth: The ASIO® bit depth in use. It is recommended to use the 24-bit option.8•116 USB Audio Streaming Buffer - This slider adjusts the buffer size for the audioresponsiveness of the Input Monitoring signal. Basically, the default setting should be finefor most systems, but if getting audio dropouts or working with large CPU demands onyour system, raise the slider a notch or two to the right until it alleviates the problem.
Appendix A: <strong>Line</strong> 6 MonkeyAppendix A: <strong>Line</strong> 6 Monkey<strong>Line</strong> 6 Monkey is the free, intelligent updater software to keep all your <strong>Line</strong> 6products, up to date. <strong>Line</strong> 6 Monkey is installed automatically on your Mac®or Windows® computer along with the <strong>POD®</strong> <strong>HD300</strong>/<strong>HD400</strong> USB devicedrivers. If you have not yet installed the USB device drivers, you’ll need to doso now to utilize POD HD with your computer - please see “USB Audio” onpage 8•1. It is highly recommended that you run <strong>Line</strong> 6 Monkey periodicallyto check for and install the latest updates.A•1Launch <strong>Line</strong> 6 MonkeyConnect POD HD to your computer’s USB port, power on your on your device and thenlaunch <strong>Line</strong> 6 Monkey:• On Mac®, go to /Applications/<strong>Line</strong> 6/<strong>Line</strong> 6 Monkey.• On Windows®, go to Start menu\Programs\<strong>Line</strong> 6\Tools\<strong>Line</strong> 6 Monkey.The following instructions are the same on Mac® or Windows®, unless otherwise noted.Login AccountYou’ll need to Login so that <strong>Line</strong> 6 Monkey can communicate with <strong>Line</strong> 6 and provide youwith exactly what you need. It’s just a few clicks, and it’s free! If you have not yet createdan account, click the New User button and you’ll be walked right through the steps.
Appendix A : <strong>Line</strong> 6 MonkeyA•2Register Your HardwareIf you have not already done so, you’ll be prompted to Register your connected <strong>Line</strong> 6hardware. It’s a painless process really, so click that Register button now.Grab Those UpdatesIf you see any items where a newer, updated version is available, then you should click onthat item and let the little monkey fellow walk you through the installation steps. This isthe easiest way to stay current on the latest Driver, Firmware & Application updates.<strong>Line</strong> 6 Monkey - Update screen for POD <strong>HD400</strong>
Appendix A: <strong>Line</strong> 6 MonkeyAs an example, the above screenshot shows Monkey has detected that a newer Firmware -Flash Memory version is available for our connected POD <strong>HD400</strong>. In this scenario, selectthe Flash Memory item and click Update Selection. Be sure to read the prompts carefullyand Monkey will assist you in performing the update in minutes. It is especially importantnot to disturb the devices’ controls and cable connections until the update fully completes!A•3
Appendix B: MIDIAppendix B: MIDIIn this Appendix, we’ll cover the <strong>POD®</strong> <strong>HD300</strong> & <strong>POD®</strong> <strong>HD400</strong> MIDI functionality.Both these POD HD devices include the ability to send and receive MIDI System Exclusiveand MIDI Control data via the USB connection.MIDI SysEx FunctionalityPOD HD utilizes its USB connection to send or receive MIDI System Exclusive (SysEx)“dumps” of Preset data. This allows you to utilize any 3rd party SysEx application on yourMac® or Windows® computer to capture, backup and restore your device’s Presets.B•1Note: Alternatively, you can download and use the free <strong>Line</strong> 6 POD HD Edit patch editor/librarian software to backup and restore your Presets. Please see “POD HD Edit Software”on page 2•7 for details!Before you can utilize POD HD with your computer, you’ll need to download and installthe <strong>Line</strong> 6 USB device drivers - please see “USB Audio” on page 8•1.MIDI SysEx SoftwareYou’ll need to have a MIDI software utility installed on your computer that offers theability to receive and send MIDI SysEx data. There are many such applications available,but a few good (and free) ones are:• Snoize SysEx Librarian for Mac® - www.snoize.com/• MIDI-OX for Windows® - www.midiox.com/The use of these applications is very simple - Just choose to send & receive to/from theavailable POD HD MIDI Input and MIDI Output ports within the application.* Pleaseconsult the application’s Help documentation for more options.* Note: POD HD always sends and receives MIDI data strictly on MIDI Channel 1.Therefore, you’ll need to make sure your software is set to send and receive on this channel.
Appendix B: MIDIB•2MIDI Dump - Backing Up PresetsTo perform a MIDI Dump, connect POD HD to your computer’s USB port and prepareyour MIDI software to receive MIDI data from the device. Enter the Edit Mode on PODHD, and navigate to the MIDI menu. Here you’ll see the following options:• Current - Sends only data for the currently loaded Preset.• All - Sends all data for all 128 Presets.Select the preferred Dump option, press the TAP footswitch and the MIDI SysEx data willimmediately be fed to your computer. Once the dump has completed, name and save theSysEx file. The SysEx file can be selected again any time in the future and sent to POD HDto restore the Preset(s) on your device.Restoring PresetsOnce you have one or more POD HD SysEx dump files saved on your computer, open orselect the desired SysEx file and configure your MIDI software to send MIDI data to yourconnected POD HD.To restore a single PresetIf your selected SysEx file contains a single Preset (i.e. - you used the MIDI Dump “Current”setting above to create the file):• Call up the Preset location on your POD HD into which you want to import thePreset.• There is no special “receiving mode” setting on POD HD - it will always receiveMIDI.• Initiate the transfer of the selected SysEx file from within your MIDI software.• You should see and hear the new Preset loaded into the selected Preset location.• Save the Preset - Your new, restored settings will not be retained in the device’sPreset location unless you save the Preset.
Appendix B: MIDITo restore all PresetsIf your selected SysEx file contains all 128 Presets (i.e. - you used the MIDI Dump “All”setting above to create the file), you can send this data to POD HD to instantly replace allits existing Presets:Note: It would be a good idea to follow the MIDI Dump - Backing Up Presets settingsbefore proceeding if you want to backup your device’s existing Presets before permanentlyoverwriting them!B•3• There is no special “receiving mode” to select on POD HD - it will always receiveMIDI.• Initiate the transfer of the selected SysEx file from within your MIDI software.• Your software should indicate the progress of the transfer. It may take several secondsto complete.• Once complete, you should see and hear the new Presets loaded into all 128 Presetlocations of your device.• It is not necessary to save the restored Presets - they are now permanently stored onyour device.USB MIDI - MIDI Control MessagesWhen adjusting most POD HD controls, MIDI CC messages are sent to the POD HDUSB MIDI Out port, Channel 1. It is possible to utilize the USB MIDI port to route thisMIDI data to MIDI or DAW applications if desired. Further, many POD HD parameterscan also be controlled remotely by receiving MIDI control messages on its USB MIDI Inport, Channel 1. Details for all this MIDI functionality can be found in the additionaldocumentation at http://line6.com/support/manuals/.