Anti aliasing
Pixels are often square/rectangle and each one will cure a square area of resin. That means we don’t have native curves when using LCD mask technology, this is like build something out of square LEGO blocks or perhaps the Minecraft game.
Luckly due pixel size from 70μm to 35μm cure a curve shaped model will bring good visual results, and the smaller the pixel the less noticeable is the lack of native round shapes.
NOTE: Print quality comes from pixel size (display size / resolution). Resolution alone means nothing!
While pixel size become smaller and smaller these days, that don’t mean we can’t improve it to have a better visual surface with a technic called “Anti-aliasing”.
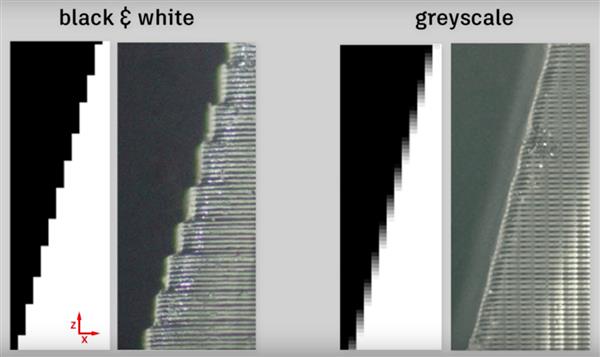
In the simplest terms, anti-aliasing is a software-based approach to reducing how blocky your model looks. Anti-aliasing smooths out jagged appearance by blending the edge of a pixel with the adjacent colors resulting in a far more realistic shape. While these blended pixels are still pixels (squares) the smoothing make our eyes to interpolate the model and give a depth perception that “fixes” the lack of curves.

Resin wise, the faded pixels will cure with less “time/strength” giving different properties and visuals, the less the brightness less time a pixel will cure up to a point. Adjacent faded pixels will attach to solid neighbors and detach/not-hold from the other adjacent point, this will create a “half pixel” and a way to have interpolated curves.
Different slicers may have different Anti-aliasing algorithms, but all share a common problem. They output fade pixels to a level that they serve no purpose but worse they introduce issue. Remember that a faded pixel will under-cure, if you keep fading adjacent pixels the darker they get, it become less probable for them to bound to each other – Creating floating partial cured bits and milky stuff in the resin. While is not that bad isn’t that good either and this can be avoided… Lets further inspect the problem:
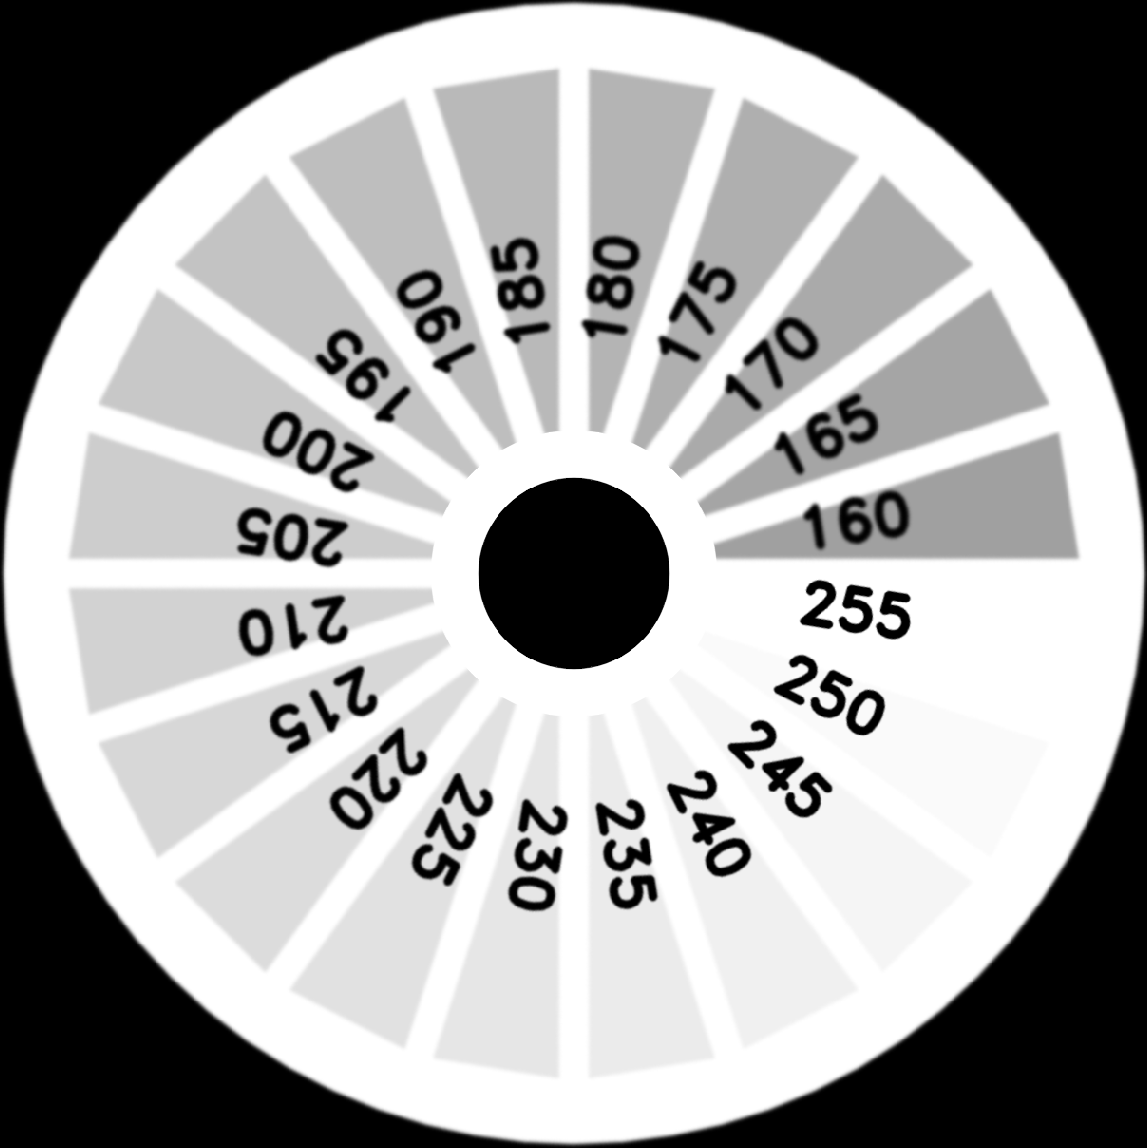
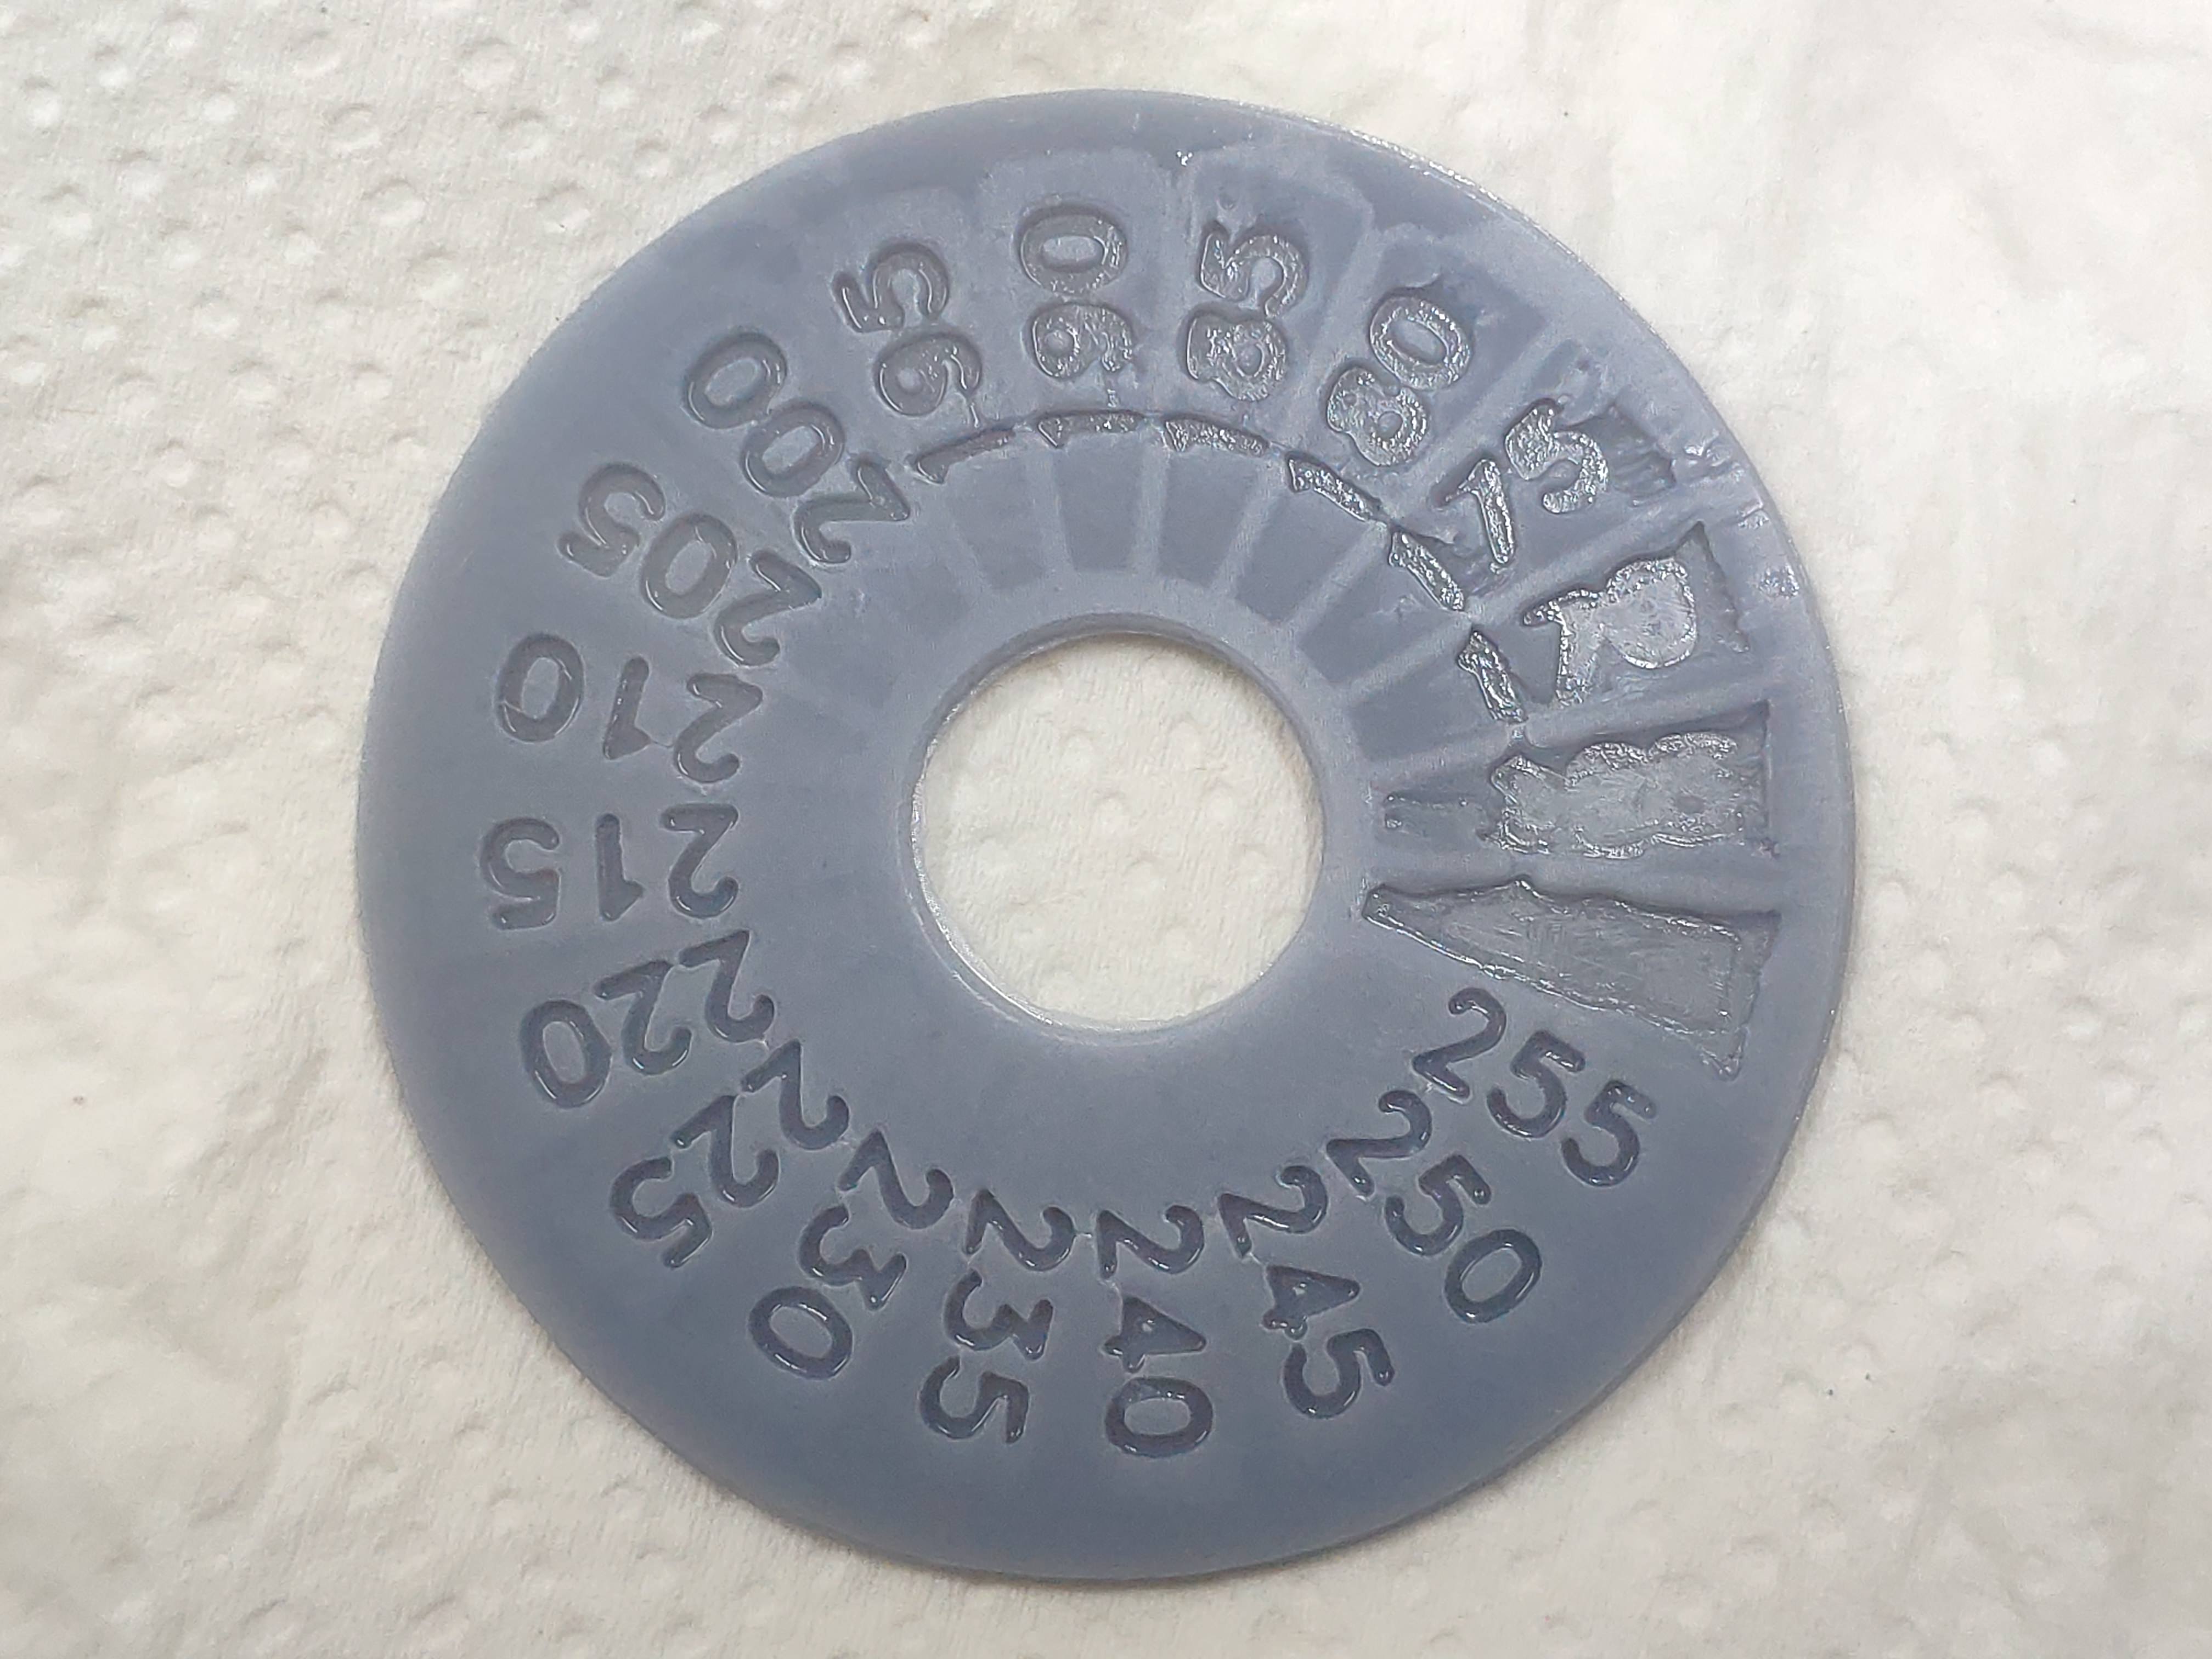
That test model was created with UVtools – Calibration – Grayscale. Results depend on resin, curing time, temperature, UV power, etc. The numbers represent the pixel brightness from “255” to “160” at 3s curing time, and as observed we see imperfections starting at “190”, which is not bad at this point, but see what start to happens at “175-170” pixels are starting to not bound to each other since they are too much faded and not cured enough to make the reaction to bound, at “170” isn’t very bad because it still to attach to solid white pixels, but when a big void comes or too many adjacent faded pixels groups it start to create holes. Problem just goes worse and worse as we dim the pixels, at “165” we barely can see the number, at “160” is a complete void and bellow that is just complete disaster. So, with this test we can conclude that pixels below certain brightness will serve no purpose other than create issues on the resin and leave uncured bits behind.
Slicer-wise they just blend pixels or use divisions, eg:
2x AA = (255 127)
4x AA = (255 191 127 63)
8x AA = (255 223 191 159 127 95 63 31)
16x AA = (255, 239, 223, 207, 191, 175, 159, 143, 127, 111, 95, 79, 63, 47, 31, 15)
If we correlate the used values with our sample, we can conclude that only about half of the brightness rage are actually usable, all others will not hold and act as black pixel, creating potential uncured resin behind.
Another downside is that on most of printers having a pixel with different brightness will require a new data on image structure, making file larger and heavier to process, without the need as they are useless. But let’s look at model output:
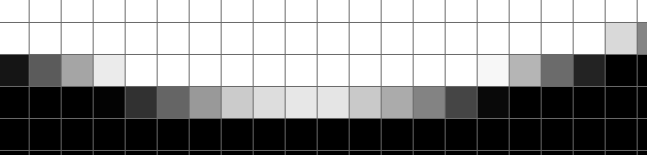
That model area is sampled with 9, 69, 131, 171, 201, 229, 231, 255 pixels (8x AA). With the brightness of 9, 69 and 131 not able to hold and then they can be discarded to clean your resin and file. The problem just go worse if you use aggressive blurs, eg:
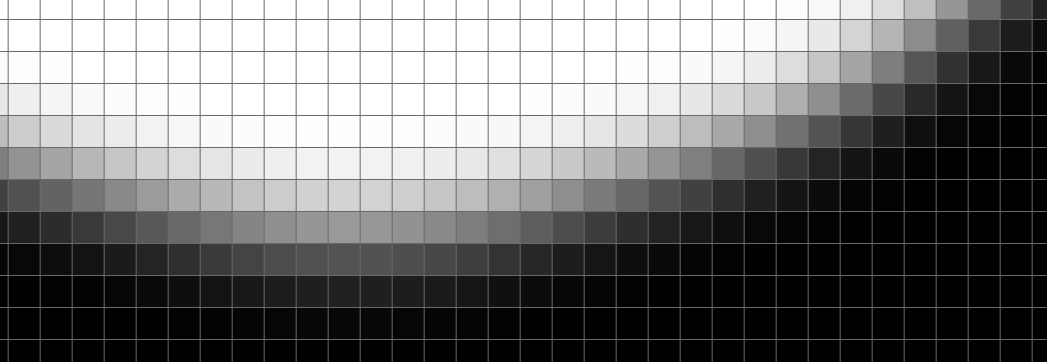
There are too many faded adjacent pixels with unusable brightness and then is not a very wise idea to use those smooth strategies.
The real solution would be in slicer, have a smart way to limit the usable brightness range and use only safe levels, but that also depends on many variables and not so easy to control and deliver the best option for each case. But generally, I still think that very low brightness should not be used.
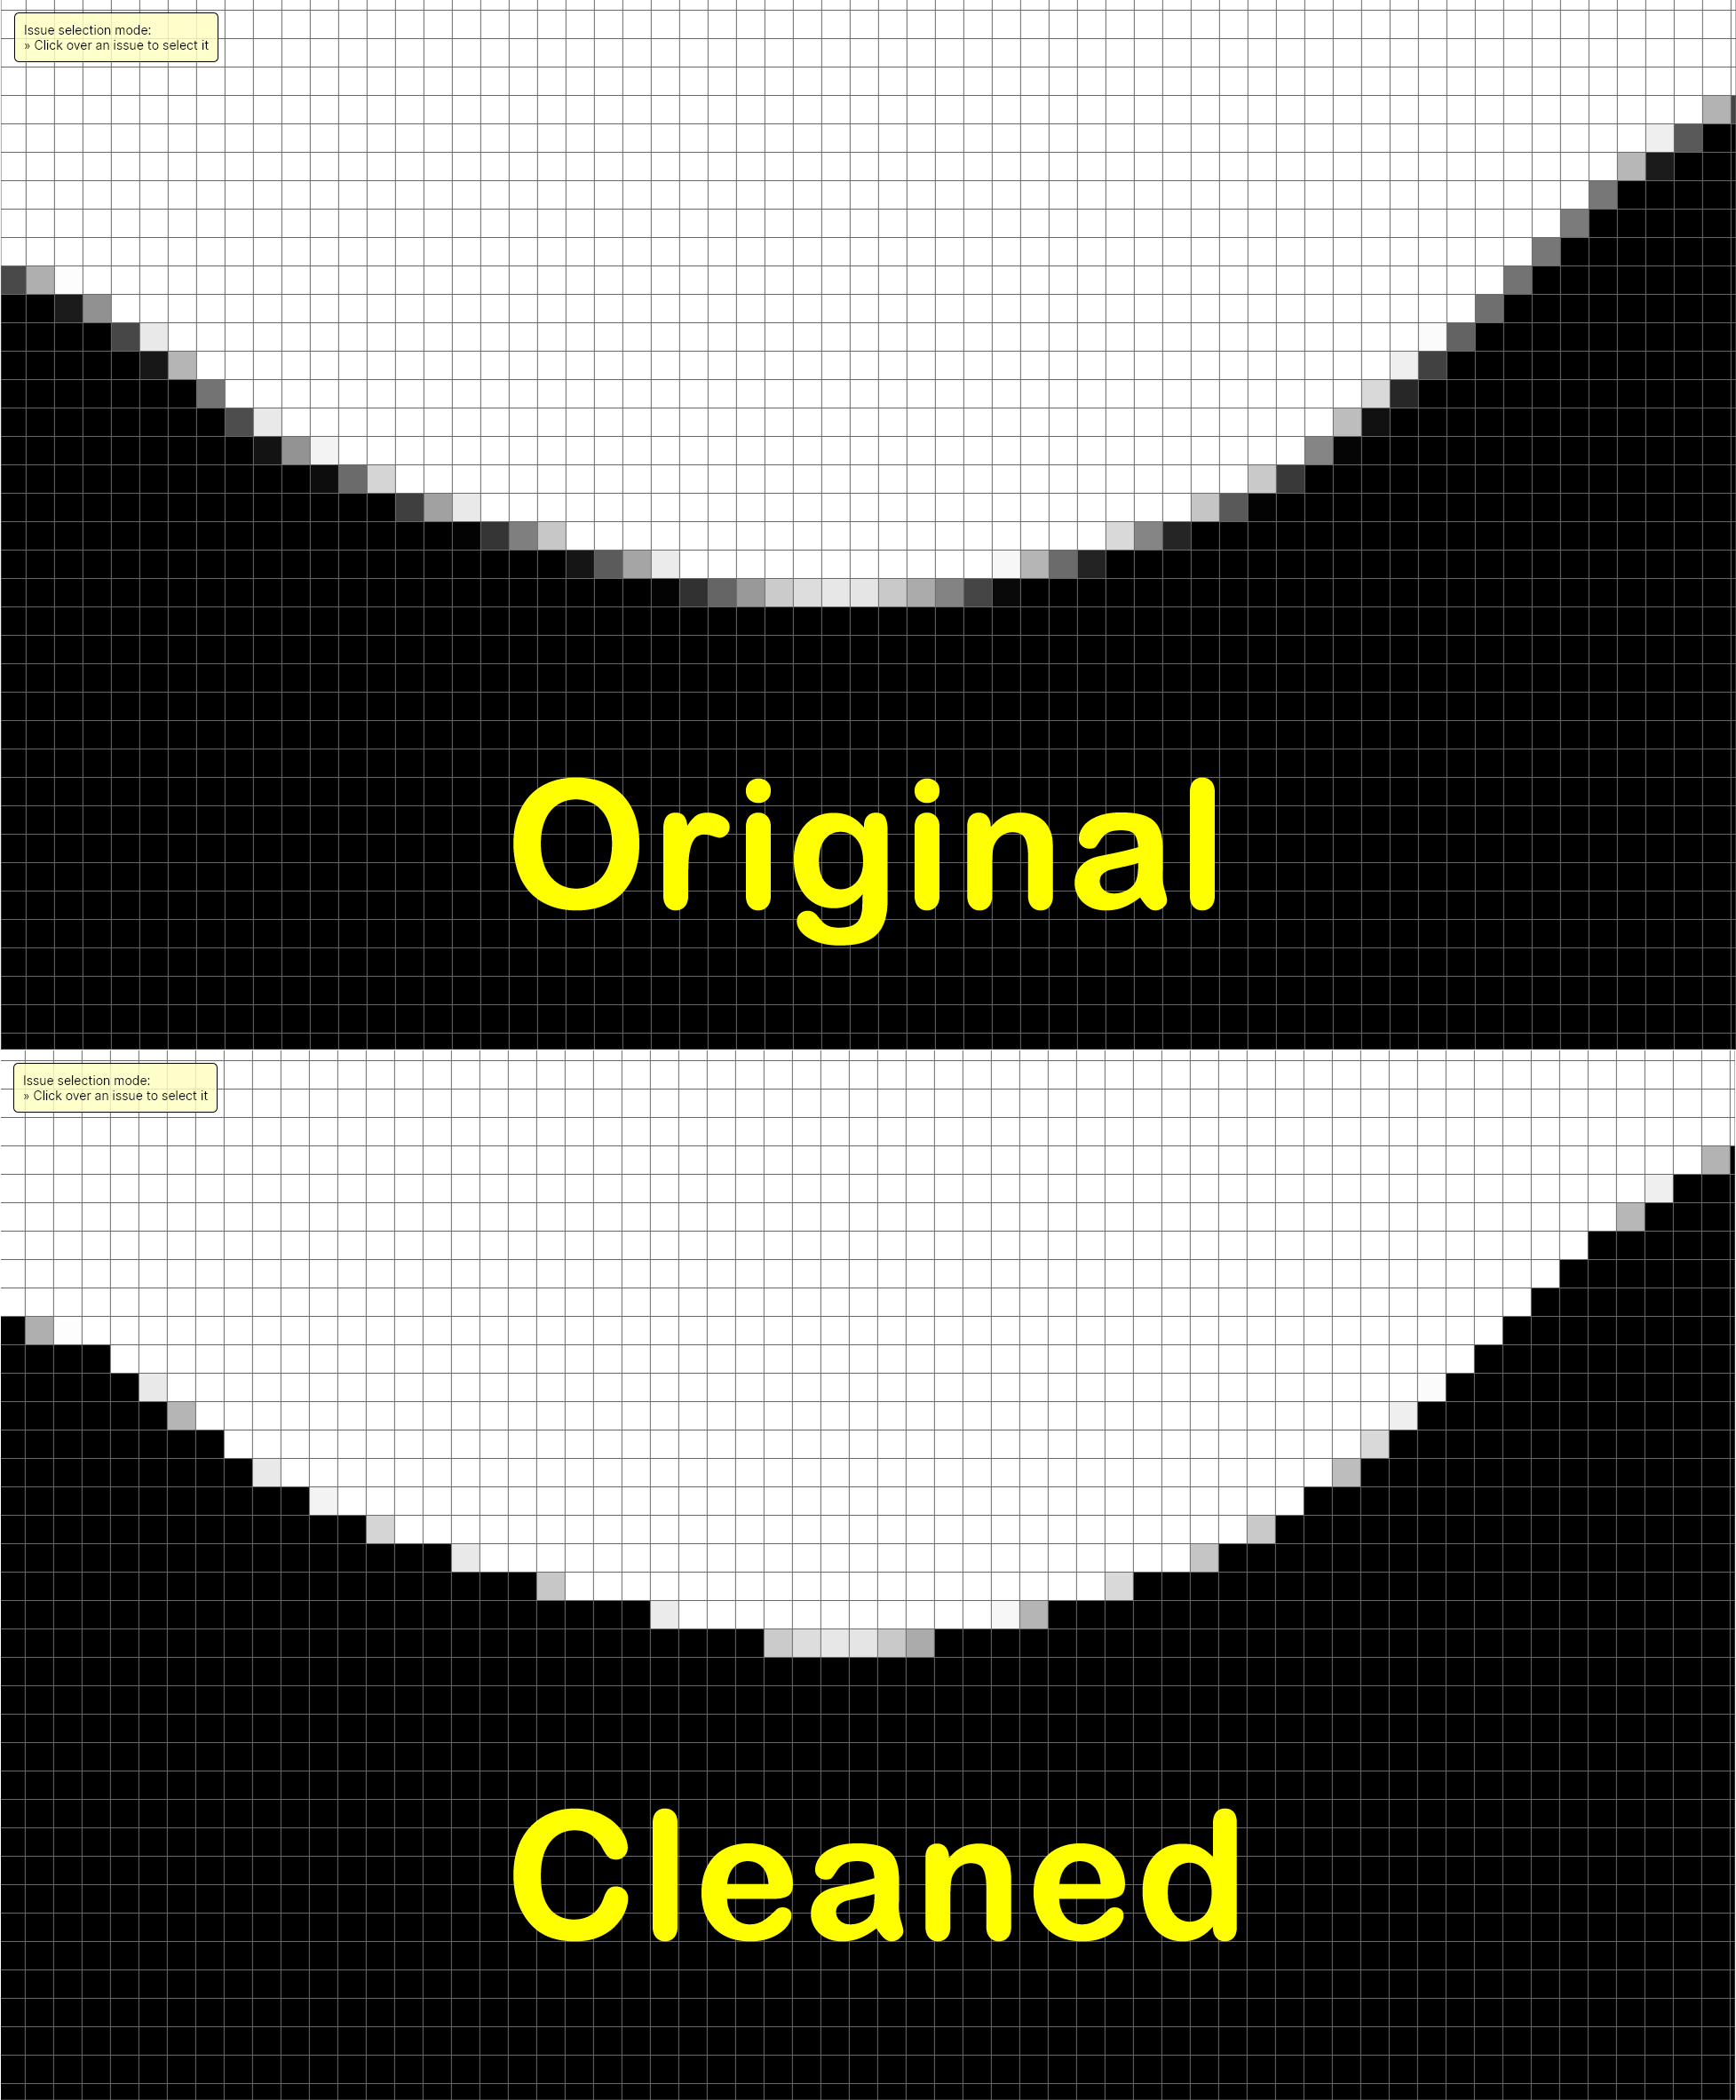
With UVtools you can clean those pixels and have a cleaner and safer file:
- Run the grayscale test with your conditions (Optional)
- Go to: Tools – Pixel arithmetic
- Click on “Heal anti-aliasing” preset
- Adjust the inclusive value from up to the brightness you want to discard the pixels and turn them into blacks. Result:
On blur:
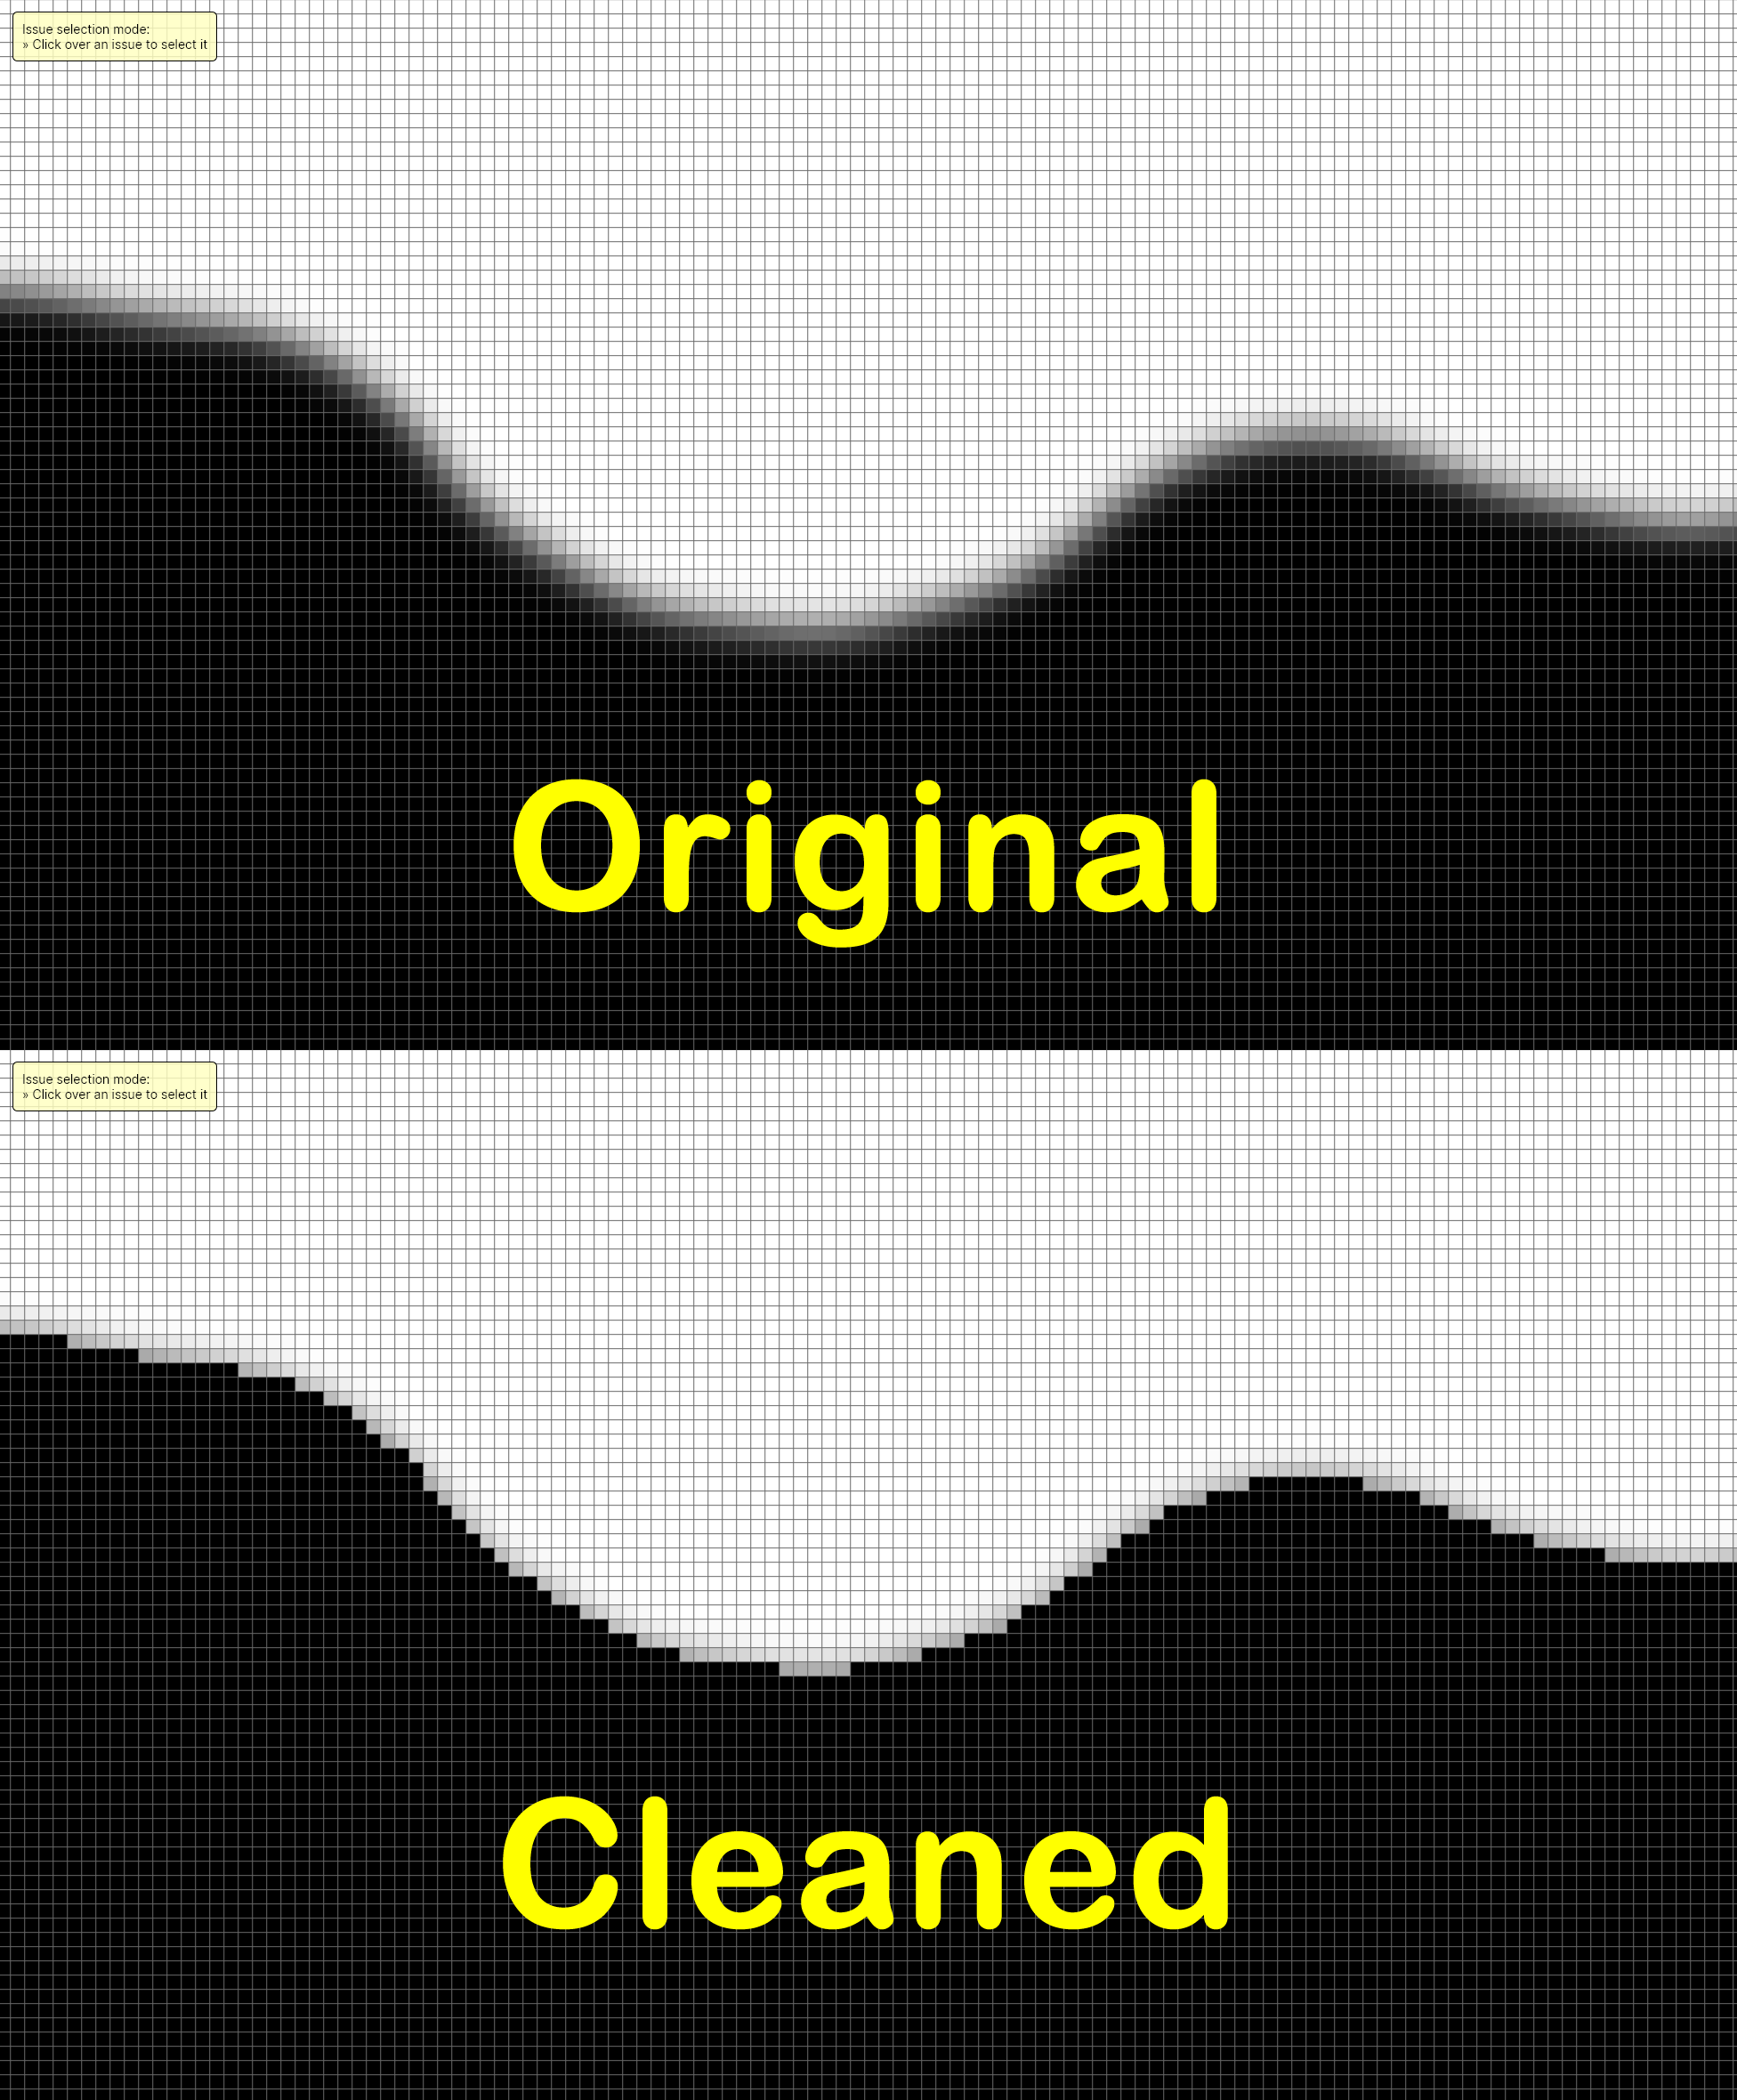
As noticed on comparison the most faded pixels are gone and are solid black now. On software and for our vision the original will always look better, but that doesn’t matter anyway if is not the real output on the printer. Give your printer less effort cleaner resin on the VAT!
Some people ask this (Which level? Blur?), the best way to pick the best method is to try each method on a real print with a curvy model, compare results and decide yourself. There are many variables and models, one can work for you while the same may not for others. But in general term use simpler methods that provide a good range and sanitize the pixels with UVtools. Don’t use aggressive/thick blurs.